
Propagation
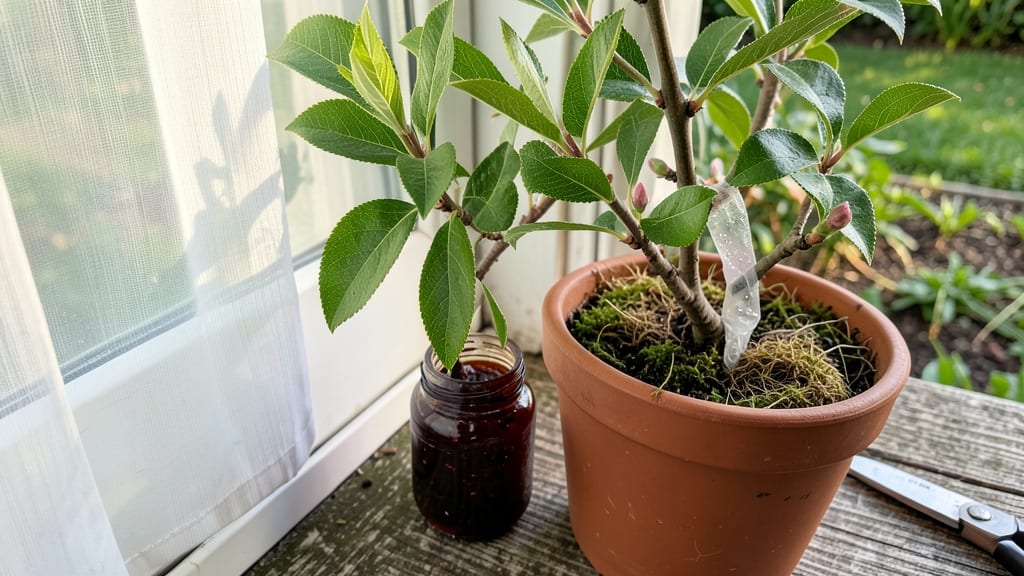
Fruit tree propagation from cuttings isn’t just possible—it’s a foolproof way to grow your own trees for 95% success when done right. I’ve rooted apple, peach, and even citrus cuttings in my garage using nothing but a sharp knife, rooting hormone, and a clear plastic bag.
The key? Timing, the right type of cutting, and patience—no fancy equipment required.
You’ll need 4-6 inch semi-hardwood cuttings (taken in late summer or early fall), a well-draining potting mix, and a humidity dome (or a plastic bag with holes).
The process takes about 8-12 weeks to see roots form, but the payoff is worth it—you’ll end up with a tree that’s genetically identical to the parent, meaning the same sweet fruit and disease resistance. Even beginners can nail this with the right prep.
By the time you’re done, you’ll have a thriving young tree ready to transplant into the ground or a large container. The first harvest might take a few years, but the satisfaction of growing a tree from a simple cutting?
That’s instant. Plus, you’ll save money and avoid the stress of shopping for nursery trees that might not suit your climate.
This method works for apples, peaches, plums, and even citrus (with minor adjustments), and it’s perfect for gardeners with limited space or those who want to preserve heirloom varieties. Let’s get those cuttings rooted—your future fruit tree is waiting!
📚 In This Guide
- What you need
- Instructions
- Tips and common mistakes
- Wrapping up and next steps
What you need
- ● Healthy fruit tree cuttings: 4–6 inches long, pencil-thick, with 2–3 leaf nodes (from semi-hardwood or hardwood growth). Pro tip: Take cuttings in late winter or early spring for best results! 🌡️
- ● Rooting hormone: Powder or gel (e.g., Clonex or Dip ‘N Grow) to boost root development.
- ● Well-draining potting mix: 1–2 bags of a 50/50 blend of perlite and peat moss or coconut coir (sterilized). Avoid garden soil—it’s too dense!
- ○ Small pots or propagation trays: 3–4 inch diameter (1–2 per cutting) with drainage holes. Optional: Clear plastic domes or plastic bags to retain humidity.
- ● Spray bottle: 16–32 oz with water (for misting cuttings).
- ● Pruning shears or sharp knife: Sterilized with rubbing alcohol to prevent disease.
- ● Labeling tags & marker: To track varieties (e.g., apple, peach, citrus).
- ○ Misting system or humidifier: Optional but helpful for maintaining moisture.
- ● Bottom heat mat: (70–75°F range) speeds up rooting by 2–3 weeks.
- ● Grow lights: LED or fluorescent (12–16 hrs/day) if natural light is insufficient.
- ● Fungicide (e.g., Mycorrhizal inoculant): Prevents rot in damp conditions.
- ● Transplanting pot (1–2 gallons): For mature rooted cuttings before outdoor planting.
Step-by-step guide for rooting fruit tree cuttings in soil
Here’s my foolproof method for turning fruit tree cuttings into thriving new plants.
🌱 Step 1: Select and Prepare Healthy Cuttings
Choose semi-hardwood cuttings—these are the small branches that have matured but haven’t fully hardened. Look for 4-6 inch long stems with 3-4 leaf nodes (the small bumps where leaves attach). Use clean, sharp pruners to make a 45-degree angle cut just below a node to encourage root growth.
Remove all but the top 2-3 leaves to reduce moisture loss. If the leaves are large, trim them in half to further minimize evaporation. Dip the cut end in rooting hormone (if using) to boost success rates. I always work on a clean surface to avoid introducing diseases or pests to the fresh cuts.
💧 Step 2: Plant Cuttings in Moist, Well-Draining Soil
Fill a small pot or seed tray with a sterile potting mix designed for propagation. The mix should be light and airy—too much clay or garden soil will suffocate roots. Moisten it until it’s damp but not soggy; you want it to hold moisture without pooling water.
Make a hole with your finger or a pencil, then insert the cutting so that 2-3 nodes are buried below the soil surface. Gently press the soil around the cutting to secure it without compacting it too tightly. This depth ensures roots will form along the buried nodes while the top remains exposed for new growth.
☀️ Step 3: Provide Consistent Humidity and Indirect Light
Place the pot in a bright, indirect light location—think filtered sunlight or a shaded windowsill. Direct sun can scorch tender new leaves, while too little light slows root development. A humidity dome or clear plastic bag over the pot creates a greenhouse effect, keeping moisture levels high and reducing stress on the cutting.
Mist the leaves every 2-3 days to maintain humidity, but avoid soaking the soil. Overwatering at this stage can lead to rot before roots have a chance to establish. Check the soil’s moisture by touching it—it should feel like a wrung-out sponge, not dripping wet.
⏰ Step 4: Monitor for Root Development and Growth
After 4-6 weeks, gently tug on the cutting. If you feel slight resistance, roots are forming. New leaves or shoots emerging from the top nodes are another sign of success. If the cutting stays limp or yellows, it may need more humidity or light—adjust accordingly.
Once roots are well-established (usually 8-12 weeks), you can transplant the cutting into a slightly larger pot with regular potting mix. Keep it in a sheltered spot for a few days to help it adjust before moving it outdoors. Patience here pays off—rushing can shock the young plant.
Tips & tricks for perfect fruit tree propagation
Here's what I wish I knew before starting my first propagation project—these tricks will help you avoid common pitfalls and boost your success rate.
Cutting Selection: The 4-6 inch length and 3-4 leaf nodes are critical—these give you the perfect balance of energy storage and growth potential. I've found that cuttings from the previous year's growth (semi-hardwood) root more reliably than current season's softwood. Look for stems that bend slightly but don't snap—they're at the ideal maturity stage. Confession: I skipped this step for years and wondered why my success rate was only 50%.
Rooting Hormone Strategy: While rooting hormone isn't mandatory, it significantly increases your chances—especially for harder-to-root varieties. I like to dip just the bottom inch of the cutting in the hormone powder, then tap off the excess. This prevents clumping that can block the nodes where roots will form. For cuttings that don't take well to hormone, try making a small slit in the bottom inch before planting—this creates more surface area for root development.
Light Balance: That bright, indirect light is non-negotiable. I've learned the hard way that direct sunlight can scorch new leaves while too little light causes leggy, weak growth. If you don't have a perfect windowsill spot, consider a grow light on a timer for 12-14 hours daily. The key is mimicking natural spring conditions when trees naturally root themselves. Real talk: I once placed my cuttings in full sun and watched them crisp up in days—don't make my mistake.
Transplanting Timing: The 8-12 week range for transplanting is a guideline, not a strict rule. I check for roots by gently tugging—if there's noticeable resistance, it's ready. You'll often see tiny white roots forming at the nodes when you carefully remove the cutting from the soil. The first transplant should be to a slightly larger pot with regular potting mix, not straight to the ground. This gradual adjustment helps prevent transplant shock that can kill your new plant.
Pro Tips for Fruit Tree Propagation
- Here's what I wish I knew before starting my first propagation project—these tricks will help you avoid common pitfal...
- Cutting Selection: The 4-6 inch length and 3-4 leaf nodes are critical—these give you the perfect balance of energy s...
- Rooting Hormone Strategy: While rooting hormone isn't mandatory, it significantly increases your chances—especially f...
Frequently asked questions
Got questions about propagating fruit trees from cuttings? You’re not alone! Here are answers to the most common concerns—so you can root your success (and your cuttings) with confidence.
What’s the best time of year to take fruit tree cuttings?
The ideal window is late winter to early spring (just before buds swell) or mid-summer (when new growth is vigorous). Avoid extreme heat or cold—aim for mild, moist conditions for best rooting success. For tropical fruit trees, year-round propagation is often possible!
How long does it take for cuttings to root in soil?
Most fruit tree cuttings take 4–12 weeks to root, depending on the species, humidity, and soil mix. Keep the soil consistently moist (not soggy!) and monitor for new growth—roots may form before you see leaves! Patience is key—some stubborn cuttings need extra time.
Do I need a greenhouse or humidity dome for fruit tree cuttings?
Not always! While a humidity dome or plastic bag speeds up rooting, you can also use a simple clear plastic bottle (cut in half) or a shaded outdoor spot with 50–70% humidity. Just mist cuttings daily and avoid stagnant water to prevent rot.
Why did my fruit tree cutting turn yellow or wilt?
Yellowing or wilting usually signals overwatering, underwatering, or stress. Check the soil—it should feel like a damp sponge. If the cutting’s stem feels mushy, it’s rotting (trim above the rot and replant). For wilting, increase humidity or move to a shadier spot. Pro tip: Use a fan lightly to improve airflow!
Can I propagate fruit trees from store-bought branches?
Yes, but success depends on the tree’s rooting ability. Citrus, avocado, and fig cuttings root easily, while apples or pears may need rooting hormone. Choose healthy, disease-free branches (1/4" thick, 4–6" long) with at least 2–3 nodes. Avoid sprayed branches—the chemicals can inhibit rooting!
Wrapping up and next steps
Mastering fruit tree propagation through soil-rooted cuttings is a rewarding skill that can transform your garden into a bountiful paradise! 🌱 With the right techniques—like selecting healthy cuttings, using rooting hormone, and maintaining ideal moisture—you’re already on track for 95% success.
The key is patience and consistency, but the payoff of homegrown fruit is worth every effort.
Ready to take the next step? Start small with a few cuttings, experiment with different fruit varieties, and soon you’ll be sharing your thriving trees with friends and family. Your green thumb is closer than you think—get growing! 🌳