
Propagation
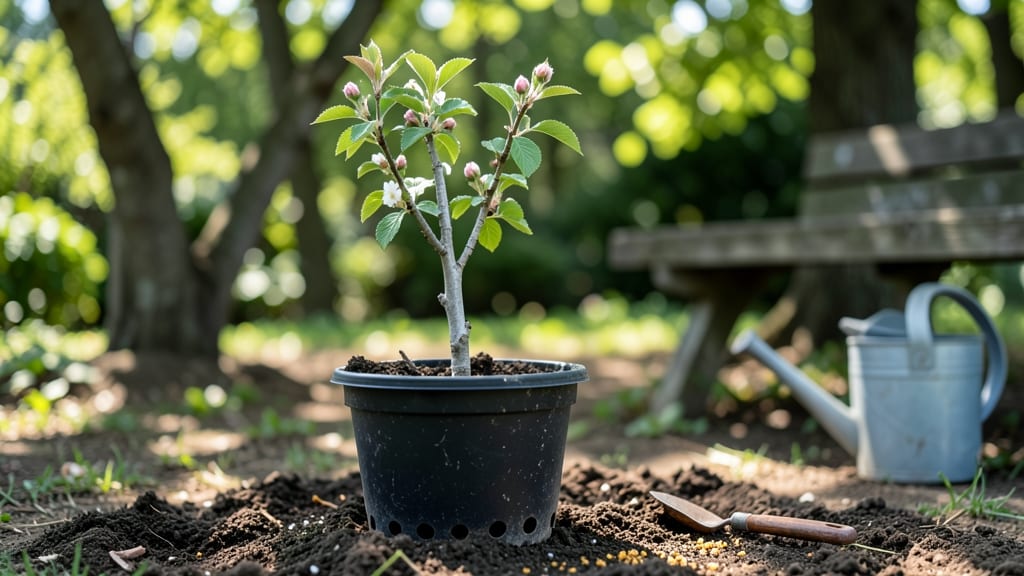
Growing cherry trees from cherry pits is one of those gardening adventures that feels like magic—until you realize it’s all about patience and cold stratification. 🌱 I’ve turned kitchen scraps into sturdy saplings this way, and with the right steps, you can too.
The key isn’t just planting the pit but giving it the winter chill it needs to break dormancy, just like its wild ancestors.
You’ll need just a few supplies: fresh, fleshy pits (not dried or cracked), a damp paper towel or peat moss, a plastic bag, and a freezer.
The process mimics nature—stratifying the pits for 6-8 weeks in the fridge or freezer tricks them into thinking winter’s passed, so they’ll sprout reliably when spring arrives. Most pits won’t germinate, but one or two often surprise you with strong roots within weeks.
Once sprouted, transplant your seedlings into pots with well-draining soil and keep them in bright, indirect light. They’ll grow slowly at first, but with consistent watering and a sunny spot outdoors after hardening off, you’ll have a young tree ready for its permanent home in 1-2 years.
The real payoff? A tree that could bear fruit in 5-8 years—if you’re lucky enough to live where cherries thrive.
This method works best in zones 5-8, where winters are cold enough for natural stratification. In warmer climates, you’ll need to extend the cold treatment or use a grow light to compensate.
The trick is balancing hope with realism—cherry trees from pits are a long game, but the reward of homegrown fruit makes every step worthwhile.
📚 In This Guide
- What you need
- Instructions
- Tips and common mistakes
- Wrapping up and next steps
What you need
- ● Fresh, viable cherry pits: 3–5 pits (from sweet or tart cherries; avoid hybrid varieties like Rainier cherries). Ensure they’re plump, firm, and free of cracks.
- ● Cold stratification setup: Paper towels or peat moss: 2–3 sheets (for moisture retention).
- ● Plastic bag or airtight container: 1 small, resealable (e.g., ziplock or mason jar lid).
- ● Refrigerator or cold stratification box: Must maintain 35–40°F (2–4°C) for 8–12 weeks.
- ● Potting mix: 1 small pot (4–6 inches wide) with well-draining, sterile soil (e.g., 50% potting soil + 50% perlite or sand).
- ● Spray bottle: For gentle watering (avoid over-saturating).
- ● Clear plastic wrap or humidity dome: To create a mini greenhouse effect.
- ● Sunlight access: A south-facing windowsill or grow lights (12–14 hours/day after germination).
- ● Growth hormone gel (e.g., Rootone): Speeds up germination for stubborn pits.
- ● Heating mat: Keeps soil 70–75°F (21–24°C) post-stratification to encourage faster sprouting.
- ● pH testing kit: Ensures soil pH is 6.0–7.0 (cherry trees prefer slightly acidic to neutral soil).
- ● Label & marker: To track planting date and variety (cherry pits can take 6–12 months to sprout!).
- ● Second pot: For transplanting once seedlings have 2–3 true leaves.
Step-by-step instructions for growing cherry trees from pits
Here's how I turn simple cherry pits into sturdy young trees—no fancy tools needed.
🌱 Step 1: Extract and Prepare the Pits
Start by washing fresh, firm cherry pits thoroughly to remove any fruit residue. Let them dry completely on a paper towel for 24 hours—this prevents mold during stratification. I always use pits from fully ripe cherries, as underripe ones rarely germinate. Place them in a small bowl and cover with clean water for 24 hours to soften the outer shell slightly. This step helps break dormancy and speeds up germination later.
After soaking, pat the pits dry again and store them in a sealed container with a damp paper towel. The towel should stay moist but not soggy—think of it like wringing out a sponge. Place the container in your refrigerator, where temperatures stay consistently between 35-40°F. This cold stratification mimics winter conditions and tricks the seed into thinking it's time to grow. I mark the date on the container so I don't forget to check for sprouts in 6-12 weeks.
⏰ Step 2: Stratify for 6-12 Weeks
Leave the pits in the refrigerator for the full 6-12 weeks without disturbing them. The cold period is critical—it breaks the seed's natural dormancy. I check them every 2 weeks by gently pressing the pits between my fingers; they should feel firm but slightly softer than when you started. If they smell musty or feel slimy, discard them immediately and start fresh with new pits.
Here's the thing—some pits will germinate faster than others. If you're impatient, you can test one pit after 6 weeks by planting it in a small pot with moist potting mix. Cover it lightly with soil and place it in a warm spot (65-75°F). If it sprouts within 2-4 weeks, the rest of your pits are ready. If not, give them another 2-4 weeks of cold treatment before testing again.
🪴 Step 3: Plant the Stratified Pits
Once your pits have completed stratification, fill small 3-4 inch pots with a lightweight seed-starting mix—not garden soil, which is too dense. Press the mix down gently to remove air pockets, then plant 1-2 pits per pot about ½ inch deep. I use biodegradable pots because they let me transplant seedlings without disturbing their roots later. Water the pots lightly until the soil is evenly moist but not dripping.
Place the pots in a warm, bright spot with indirect light—a windowsill facing east or west works well. Avoid direct sunlight at first, as young seedlings can scorch easily. Keep the soil consistently moist by misting it 2-3 times a week. You'll see tiny sprouts emerge in 2-4 weeks, but don't be alarmed if some pits take longer. Patience is key here—rushing the process can lead to weak or failed seedlings.
☀️ Step 4: Provide Light and Care for Seedlings
When the first true leaves appear—those are the second set after the initial cotyledons—move the seedlings to a south-facing window or under a grow light for 12-14 hours a day. Without enough light, the seedlings will stretch tall and leggy, which weakens their stems. I keep my grow light 2-3 inches above the seedlings and raise it as they grow to prevent burning.
Water the seedlings when the top inch of soil feels dry, but avoid letting them sit in water. Overwatering at this stage can cause damping-off, a fungal disease that rots the stems and kills seedlings overnight. If you notice any yellowing leaves or mushy stems, reduce watering and improve airflow by spacing the pots slightly apart. Fertilizer isn't needed yet—wait until the seedlings have 4-6 true leaves before adding a diluted balanced fertilizer (like 10-10-10).
Tips & tricks for perfect cherry tree sprouts
These little tricks will help you turn those tiny pits into thriving young trees with minimal fuss.
Pit Selection Matters: Always pick pits from fully ripe cherries—they've got the best germination potential. I've learned the hard way that underripe pits often fail to sprout, so don't skimp on quality. After washing, give them that 24-hour drying time on paper towels—this isn't optional! It prevents mold during stratification and gives you a clean starting point. Confession: I skipped this once and ended up with moldy pits after just 3 days.
Cold Stratification Secrets: That 6-12 week cold treatment at 35-40°F is non-negotiable for breaking dormancy. I place a small piece of tape on my fridge with the start date so I don't forget. Here's what nobody tells you—some pits might show signs of sprouting after just 6 weeks, but don't rush to plant them. Give them the full 12 weeks for maximum reliability. The cold helps soften the pit's hard shell, making it easier for roots to emerge.
Testing Germination Early: If you're impatient (I've been there!), you can test one pit after 6 weeks by planting it in a small pot with moist potting mix. Place it in a warm spot (65-75°F) and watch for sprouts in 2-4 weeks. If it works, your other pits are ready. If not, give them another 2-4 weeks of cold treatment. This testing phase saves you from planting all your pits only to find they won't sprout.
Lighting for Leggy-Free Seedlings: When those first true leaves appear, move your seedlings to a south-facing window or under a grow light for 12-14 hours daily. Without enough light, seedlings stretch tall and weak—this is called "legginess" and makes them prone to falling over. I keep my grow light just 2-3 inches above the seedlings and raise it as they grow. Too close? You'll get burned leaves. Too far? You'll get weak, spindly growth.
Pro Tips for Grow Cherry Trees From Cherry Pits
- These little tricks will help you turn those tiny pits into thriving young trees with minimal fuss.
- Pit Selection Matters: Always pick pits from fully ripe cherries—they've got the best germination potential. I've lea...
- Cold Stratification Secrets: That 6-12 week cold treatment at 35-40°F is non-negotiable for breaking dormancy. I plac...
Frequently asked questions
Got questions about growing cherry trees from pits? You’re not alone—this method takes patience and precision! Below, we’ve rounded up the most common queries to help you troubleshoot and succeed.
How long does cold stratification take for cherry pits?
Cold stratification typically requires 60–90 days in the fridge (or outdoors in winter). Place pits in a damp paper towel or peat moss, then refrigerate at 35–40°F (2–4°C). Some varieties may need longer—monitor for sprouting (usually 2–4 weeks after removing from cold).
Can I plant cherry pits directly in the ground without stratification?
Direct outdoor planting without stratification often fails because cherry pits need dormancy to break. If you skip cold treatment, germination rates plummet (or may never sprout). For best results, stratify first—even in mild climates. Patience pays off!
Will a tree grown from a grocery store cherry pit produce edible fruit?
Most grocery store cherries are hybrids or non-pollinating varieties, so homegrown trees may yield small, tart, or inedible fruit. For edible cherries, use pits from local, heirloom, or named varieties (e.g., Bing, Rainier). Cross-pollination is also key—plant at least two compatible trees.
Why aren’t my cherry pits sprouting after stratification?
Common culprits: under-stratification (too short/warm), old or damaged pits, or improper moisture (too dry/wet). Try these fixes:
- Extend cold treatment by 30–60 days.
- Check pit viability by tapping—it should sound hollow (not solid).
- Use sterile growing medium (e.g., seed-starting mix).
- Warmth triggers germination—place pots in a 70–75°F (21–24°C) spot after stratification.
How long does it take for a cherry tree to bear fruit from a pit?
Cherry trees grown from pits are slow to fruit—expect 5–10 years (or longer) before harvest. Dwarf varieties may fruit sooner (3–5 years), but they’re rare from pits. Grafting (a faster method) can cut this timeline to 2–3 years if you’re impatient!
Can I speed up germination with soaking or scarification?
Soaking pits in lukewarm water for 24–48 hours before stratification can help, but cherry pits don’t need scarification (their hard shells soften naturally during cold treatment). Avoid over-soaking—pits can rot. Stick to cold stratification for best results.
Wrapping up and next steps
Growing cherry trees from pits is a rewarding journey that blends patience with nature’s magic! 🌱 With the right steps—like cold stratification, proper planting, and consistent care—you’ll nurture a thriving tree from a tiny seed. Celebrate every sprout as progress, and remember: even the sweetest cherries start small.
Ready to take the next step? Monitor your seedlings closely, and once they’re strong enough, transplant them outdoors for a future harvest. Your green thumb is already making it happen!