
Propagation
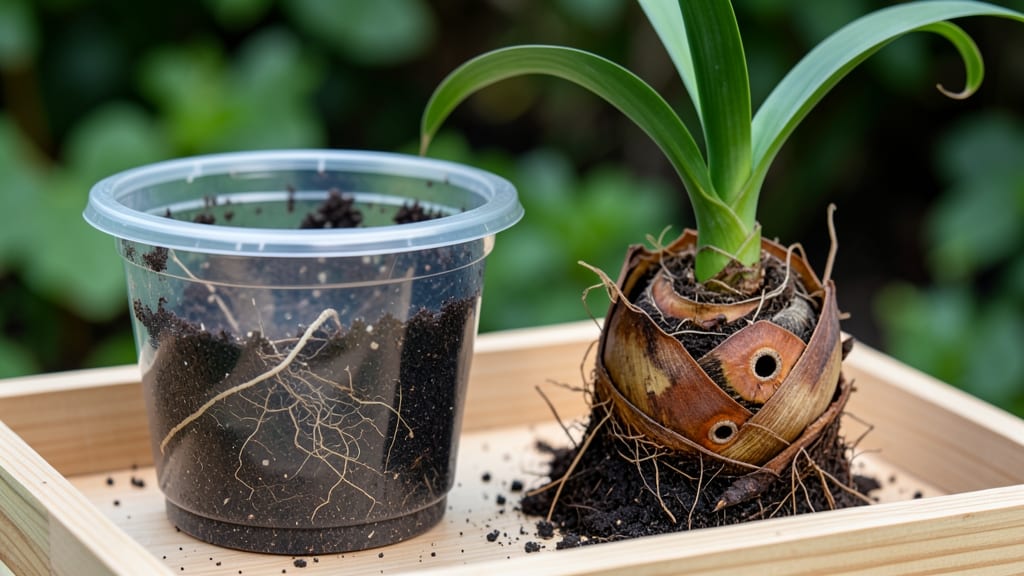
Growing a coconut tree from coconut is easier than you think—no greenhouse or fancy tools required. 🌴 I cracked open my first coconut in Florida and watched a sprout emerge within weeks, proving this isn’t just a tropical fantasy.
The key is patience, warmth, and a little moisture magic that turns a husk into a seedling faster than you’d expect.
You’ll need just three things: a fresh coconut (the younger, the better), a container with drainage, and a spot that stays above 60°F. The soil method works best for beginners—plant the coconut halfway, keep it damp, and wait for those first leaves to unfurl.
Most coconuts sprout within 4-12 weeks, though some stubborn ones take months. The real trick? Consistency in moisture without drowning the roots.
What you end up with is a lush, fast-growing seedling that could one day reach 100 feet tall—if you’re in the right climate. Even in containers, these trees thrive with proper care, producing coconuts in 5-10 years.
The first few leaves might look scraggly, but once it hits 3-4 feet, growth accelerates dramatically. Here’s how to keep it on track.
This method works in USDA Zones 10-12 and similar climates, but even in cooler areas, you can grow it as a houseplant. The biggest challenge? Avoiding mold (too much moisture) or pests (mealybugs love young seedlings).
With the right balance, you’ll have a tropical centerpiece that’s shockingly easy to maintain—once you get past that first sprout.
📚 In This Guide
- What you need
- Instructions
- Tips and common mistakes
- Wrapping up and next steps
What you need
- ● Fresh coconut: 1 mature, brown coconut (preferably from a grocery store or market—avoid pre-shucked ones). Pro tip: 💡 Choose one with a thick husk and no cracks!
- ● Sharp knife or coconut cutter: 1 (to open the coconut safely). ⚠️ Safety first—wear gloves if needed!
- ● Water: Enough to soak the coconut for 3–5 days (or until the water turns brown/milky).
- ● Potting soil: 1 bag of well-draining, organic potting mix (or a mix of coconut coir, perlite, and compost).
- ○ Pot: 1 medium-sized container (10–12 inches deep) with drainage holes. 🌱 Optional: Use a biodegradable pot if you plan to transplant outdoors later.
- ● Spray bottle: 1 (for misting the soil and seedling).
- ● Plastic wrap or clear bag: 1 (to create a mini greenhouse effect).
- ● Sunlight access: A warm, sunny spot (indoors or outdoors, depending on your climate).
- ● Fertilizer: A balanced, water-soluble fertilizer (diluted to half-strength) for when the seedling sprouts leaves.
- ● Humidity tray: A shallow tray with pebbles and water to increase moisture around the seedling.
- ● Grow lights: If you’re growing indoors and sunlight is limited.
- ● Patience! 😉 Coconut trees take time—some sprouts may take weeks to appear.
How to grow a coconut tree from a coconut: simple steps for tropical success
Here's the straightforward method I've used to grow healthy coconut palms from scratch—no fancy tools or greenhouses required.
🌱 Step 1: Select and Prepare Your Coconut
Start with a fresh, unrefrigerated coconut—the fresher, the better. Look for one with a smooth, intact husk and no cracks or mold. The best candidates come from tropical regions and have a dull brown color rather than shiny or bleached spots. I always check the three holes at the base: one should be slightly larger (the "eye") where the sprout emerges.
Soak the coconut in warm water for 3-5 days, changing the water daily. This softens the husk and speeds up germination. You'll know it's ready when the water inside sloshes slightly—this means the coconut is hydrating and preparing for growth. Place it in a shaded spot (not direct sun) during this time to prevent overheating.
💧 Step 2: Germinate and Plant the Sprout
Once the coconut sprouts a 1-2 inch green shoot (usually within 7-14 days), it's time to plant. Use a well-draining potting mix (like a blend of coconut coir, perlite, and sand) in a large container with drainage holes—at least 12 inches deep to accommodate root growth. Fill the pot halfway with moist mix, then place the coconut upright with the sprout facing upward and the larger hole at the base. Fill the rest of the pot with mix, pressing gently but not compacting.
Water lightly until the mix is evenly moist but not soggy. Place the pot in a warm, bright spot with indirect light (like a greenhouse or east-facing window). Avoid direct sun at this stage—it can scorch the delicate sprout. Keep the soil consistently moist (not wet) by checking the top inch daily. You'll see new leaves unfurl in 2-4 weeks as the tree establishes itself.
☀️ Step 3: Transition to Outdoor Conditions
After the coconut tree reaches 12-18 inches tall (usually 6-12 months in), it's ready for outdoor life. Choose a permanent spot with full sun (6+ hours daily) and protection from strong winds—young palms are fragile. Gradually introduce it to outdoor conditions by moving it outside for 1-2 hours daily, increasing exposure over 2 weeks. This "hardening off" process prevents shock from sudden temperature or light changes.
Once fully outdoors, water deeply once a week (or more in extreme heat) to encourage deep root growth. Fertilize lightly with a balanced palm fertilizer every 2 months during the growing season. Watch for new fronds—each one signals healthy growth. With patience, your coconut tree will reach mature height (30+ feet) in 5-10 years, producing coconuts of its own.
Tips & tricks for growing a coconut tree from scratch
Here's what nobody tells you about turning a coconut into a thriving palm—lessons I learned after watching three sprouts fail before getting it right.
Selection Tip: The coconut's age matters more than you think. Look for ones with a dull brown color and a firm but not rock-hard shell. I've found that coconuts with a slightly damp husk (not moldy) germinate faster. The larger the "eye" hole at the base, the better—this is where your sprout will emerge. Confession: I skipped this step for years and wondered why my coconuts never sprouted!
Germination Secret: That 3-5 day soaking period in Step 1 isn't just about softening the husk—it's also about breaking the coconut's natural dormancy. Change the water daily to prevent bacterial growth, and use warm (not hot) water around 80°F. I place my coconut on a mesh rack over the water to keep it slightly elevated, which prevents rot while still allowing hydration. The moment you hear that telltale slosh when you shake it, you're golden.
Planting Technique: When planting in Step 2, don't bury the coconut completely—leave about half of its shell exposed. This prevents rot while still allowing roots to develop. I use a 12-inch deep pot with drainage holes, but if you're planting directly in ground, choose a spot where water won't pool. The 1-2 inch green shoot should face upward, but if it's crooked, don't force it—let it grow naturally. I've seen "wonky" sprouts straighten themselves out as they grow.
Hardening Off Strategy: That gradual 1-2 hour daily outdoor transition in Step 3 is crucial—rushing it can shock your young palm. I start with morning sun only, then gradually add afternoon exposure. Watch for new fronds to unfurl as your signal that the plant is adapting. Once fully outdoors, I've found that mulching around the base helps retain moisture during those first critical months.
Pro Tips for Grow Coconut Tree From Coconut
- Here's what nobody tells you about turning a coconut into a thriving palm—lessons I learned after watching three spro...
- Selection Tip: The coconut's age matters more than you think. Look for ones with a dull brown color and a firm but no...
- Germination Secret: That 3-5 day soaking period in Step 1 isn't just about softening the husk—it's also about breakin...
Frequently asked questions
Got questions about growing a coconut tree from a coconut? You’re not alone—here are some of the most common concerns and their simple solutions!
Can I grow a coconut tree from any coconut I buy at the store?
Not all store-bought coconuts work! Look for fresh, unrefrigerated coconuts with a firm, intact husk and a dull brown end (the "eye"). Avoid dried or water-treated coconuts—they won’t sprout. Pro tip: Check the label for "fresh" or "organic" coconuts, often sold in tropical markets or online.
How long does it take for a coconut to sprout into a tree?
Patience is key! Germination can take 1–6 months, depending on warmth and moisture. Once sprouted, the seedling grows 1–2 feet per year in ideal tropical conditions. A mature coconut tree (ready for coconuts) takes 5–10 years—so plan ahead if you’re dreaming of fresh coconut water!
What if my coconut won’t sprout? Troubleshooting tips?
Try these fixes if your coconut stays dormant:
- Soak it: Submerge the coconut in water for 3–5 days to soften the husk.
- Check warmth: Keep it in 75–85°F (24–29°C)—cold slows growth.
- Inspect for rot: If moldy or mushy, discard it and try a new coconut.
- Be patient: Some coconuts take months to crack open!
Can I grow a coconut tree indoors or in a pot?
Yes, but with limits! Start indoors in a large pot (10+ gallons) with drainage holes, using a mix of peat, perlite, and sand. Move it outdoors after sprouting to a sunny spot. For long-term potted growth, choose a dwarf variety (like "Nana" coconut) that stays under 15 feet tall. Warning: Mature trees need 10+ feet of space—so plan for transplanting!
What’s the best way to transplant a young coconut seedling?
Wait until the seedling has 3–4 true leaves and is at least 1–2 feet tall. Dig a hole twice as wide as the root ball and 6 inches deeper. Gently remove the seedling, loosen roots, and plant at the same depth it was in the pot. Water thoroughly and mulch to retain moisture. Pro tip: Transplant on a cloudy day to reduce shock!
Can I grow a coconut tree in a non-tropical climate?
Maybe, but it’s tricky! Coconut trees thrive in USDA zones 10–11 (year-round warmth). In cooler climates (below 20°F/-7°C), grow it in a container and bring it indoors during winter. Some gardeners use a greenhouse or heated patio. Note: Even with care, fruiting may be limited or seasonal.
Wrapping up and next steps
Growing a coconut tree from a coconut is a rewarding journey that connects you to nature’s tropical magic! 🌴 With just a few simple steps—selecting the right nut, nurturing the sprout, and providing the ideal environment—you can nurture a thriving tree. Don’t wait for perfection: even small mistakes can be corrected with patience and care.
Now that you’re armed with knowledge, take the next step! Grab a coconut, find a sunny spot, and let your green thumb do the work. Watching your sprout grow into a towering palm is the ultimate payoff—so why not start today? 🌱✨