
Pruning
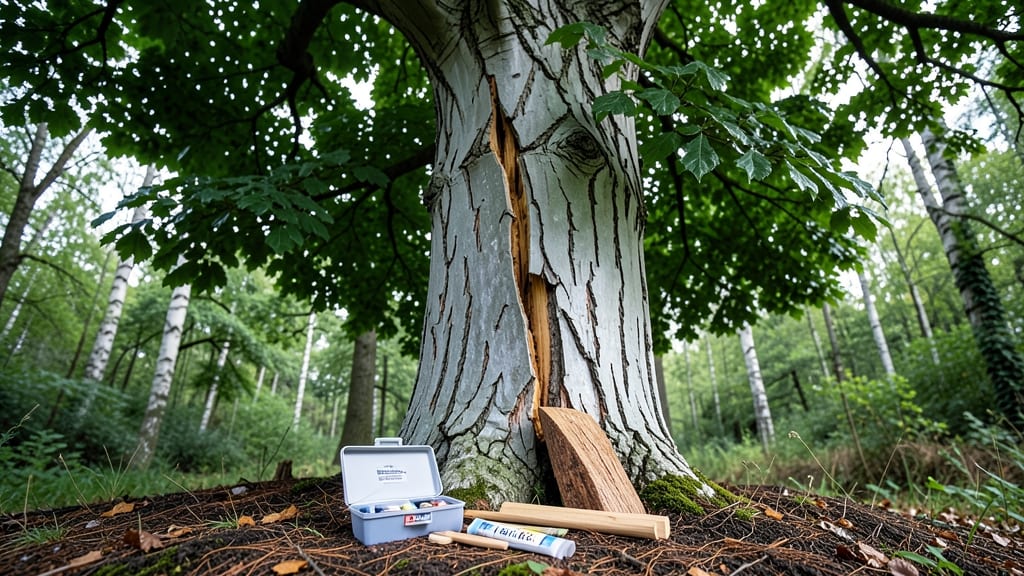
A split tree trunk isn’t just an eyesore—it’s a structural emergency, but with the right tree trunk splitting repair, you can save your shade tree from becoming a dangerous liability.
I’ve seen splits go from a thin crack to a full-blown split in just one storm season, and the key to saving your tree lies in acting fast with the right repair method. The good news?
Many splits can be fixed with basic tools and a little know-how, but timing matters—wait too long, and you might be looking at a professional bill or worse.
Your first move is assessing the split: if it’s less than 3 inches wide and the tree isn’t leaning dangerously, you can often repair it yourself using epoxy or grafting tape—both designed to bridge cracks and prevent further splitting.
For deeper splits or trees under heavy stress, tree repair cloth wrapped around the wound can add extra support. The tools you’ll need are simple: a pruning saw for cleanup, a wire brush to rough up the wood, and either epoxy or tape rated for outdoor use.
What you’ll end up with is a stabilized trunk that can heal over time, especially if you water deeply during dry spells and avoid heavy pruning near the split. The repair itself takes about 30-60 minutes, but the long-term payoff is keeping your tree standing for years.
Just remember: if the split is wider than your forearm or the tree is already leaning, call an arborist—some damage is beyond DIY fixes.
This method works for most common landscape trees—oaks, maples, and fruit trees—but always check for signs of decay first. A rotten trunk won’t hold any repair, so tap the wood around the split: a hollow sound means it’s time to consult a pro.
Safety first: wear gloves and goggles, and never work near power lines or in stormy weather.
📚 In This Guide
- What you need
- Instructions
- Tips and common mistakes
- Wrapping up and next steps
What you need
- ● Wood glue (epoxy or polyurethane-based): 1–2 tubes (look for waterproof, outdoor-rated options like Titebond III or PL Premium).
- ● Wood splints or dowels: 2–4 pieces (match the tree’s diameter; oak, hickory, or hardwood works best).
- ● Hose or water source: For cleaning debris and wetting the wood (improves glue adhesion).
- ● Clamps or zip ties: 4–6 heavy-duty clamps or 10+ zip ties (to hold splints in place).
- ● Saw (hand saw or reciprocating saw): For trimming splints to size (if needed).
- ○ Drill & bits (optional but helpful): To pre-drill holes for splints (1/4"–3/8" diameter).
- ● Sandpaper (80–120 grit): To rough up surfaces for better glue grip.
- ○ Paint or sealant (optional): Outdoor wood stain or latex paint (for aesthetics and protection).
- ● ✅ Safety gear: Gloves, safety glasses, and a dust mask (especially when sanding/drilling).
- ● ✅ Dry weather: Avoid repairing in rain or high humidity (glue won’t bond well).
- ● ✅ Stability check: Ensure the tree is structurally safe to work on (no loose branches or rot).
- ● ✅ Clean workspace: Remove leaves, sap, or debris from the repair area.
Step-by-Step guide for fixing a split tree trunk
Here's how to stabilize a cracked trunk and give your tree a fighting chance.
Assess the Damage and Prepare the Split
First, examine the split carefully. Look for clean breaks or jagged edges—this tells you how fresh the crack is. A recent split will have sharp edges, while older cracks will have rough, weathered surfaces. Use a tape measure to note the width and depth of the split at its widest point. This helps you determine how much material you'll need to fill it later.
Next, clean the crack thoroughly. Remove any loose bark or debris with a putty knife or stiff brush. This step is critical because dirt or old bark can prevent the repair material from bonding properly. If the split is deep, you might see layers of wood—this is normal, but it means you'll need to pack the repair material firmly to fill all the gaps.
Choose and Apply the Right Repair Material
For small cracks (under ½ inch wide), tree repair epoxy or a specialized bark sealant works best. For larger splits (over ½ inch), use a flexible tree mender or a high-quality wood filler designed for outdoor use. Avoid regular wood glue—it won’t hold up to weather or movement in the trunk.
Apply the material in thin layers, starting at the bottom of the crack and working your way up. Use a putty knife or a small trowel to press it firmly into the split. Smooth the surface so it blends with the tree’s natural contours. If the split is wide, you might need to insert a flexible strip (like a piece of burlap or tree mender fabric) into the crack first to help hold the filler in place.
Seal and Protect the Repair
Once the filler is dry (check the product instructions for curing time, usually 24 hours), apply a layer of tree sealant or paint designed for trunks. This protects the repair from moisture, pests, and UV damage. Use a brush to apply an even coat, feathering the edges slightly to match the tree’s bark. Avoid thick layers—they can trap moisture and cause rot.
For extra protection, wrap the repaired area with tree wrap or a flexible rubber guard. This adds a physical barrier against weather and animals. Secure it loosely with zip ties or tape, leaving room for the tree to expand and contract with seasonal changes. Check the wrap every few months to ensure it hasn’t become too tight.
Monitor and Maintain the Repair
Watch the repaired area closely for the first few months. Look for signs of new cracks, swelling, or oozing sap—these can indicate stress or failure in the repair. If the split widens or the material pulls away, you’ll need to reapply the filler and sealant immediately. Keep the base of the tree well-watered but not soggy, as consistent moisture helps the tree heal.
In the long term, avoid pruning or damaging the area around the repair. If the tree is large or valuable, consider consulting an arborist for additional support, like cabling or bracing, to reduce stress on the trunk. With proper care, many repaired trees continue to thrive for years.
Tips & tricks for perfect tree trunk splitting repair
Real talk: The details in Step 1 make all the difference between a repair that lasts and one that fails within months.
Damage Assessment: Pay extra attention to how deep the split goes—if it penetrates more than halfway through the trunk, you'll need to reinforce with a flexible strip before applying filler. I learned this the hard way after seeing a repair fail because the filler couldn't bridge such a deep gap. Use a flashlight to check depth if the crack isn't obvious from the outside.
Material Selection: For cracks wider than ½ inch, I recommend using a tree mender fabric strip first—it acts like a scaffold for the filler. Without this, the repair material can sag or pull away as the tree moves with wind or seasonal changes. Think of it like adding rebar to concrete for extra strength.
Application Strategy: When applying the filler in Step 2, work in thin layers—about ⅛ inch thick at a time. Thick layers take longer to cure and are more likely to crack. Let each layer dry completely before adding the next, especially if you're working in humid conditions. This patience prevents the repair from shrinking or pulling away later.
Sealing Wisdom: The 24-hour curing time mentioned in Step 3 is non-negotiable for outdoor conditions. If you're working in rainy weather, extend this to 48 hours—moisture can weaken the bond between the filler and wood. A quick test: Gently press your fingernail against the dried filler; if it leaves a mark, it's not fully cured yet.
Pro Tips for Tree Trunk Splitting Repair
- Real talk: The details in Step 1 make all the difference between a repair that lasts and one that fails within months.
- Damage Assessment: Pay extra attention to how deep the split goes—if it penetrates more than halfway through the trun...
- Material Selection: For cracks wider than ½ inch, I recommend using a tree mender fabric strip first—it acts like a s...
Frequently asked questions
Got questions about fixing a split tree trunk? You’re not alone! Here are some of the most common concerns—plus straightforward answers to help you tackle the repair with confidence.
How do I know if my tree trunk split needs repair?
A split trunk needs repair if the crack is wider than ¼ inch, deep into the wood, or oozing sap. Look for signs like leaning, dead branches, or mushrooms—these signal structural weakness. If the tree is young or in a high-risk area (like a driveway), act fast to prevent collapse.
Can I repair a split tree trunk in winter?
Winter is technically possible, but spring or early fall is ideal. Cold temps make wood brittle, and frozen ground can complicate digging. If you must repair in winter, work on dry, above-freezing days and use flexible epoxy that cures in cold weather. Avoid heavy pruning until spring, though!
Is it cheaper to repair or replace a split tree?
Repairing a split trunk is almost always cheaper—typically costing $50–$300 for materials and labor, while removal/replacement can run $500–$2,000+. Plus, many trees are irreplaceable for shade, wildlife, or property value. Pro tip: A certified arborist can assess if the tree is salvageable before you commit.
What’s the best material to fill a tree trunk split?
The top choices are:
- Epoxy or resin: Best for deep cracks (bonds like glue, waterproof).
- Tree mender paste: Flexible, breathable option for smaller splits.
- Cable-and-bolt systems: For large, unstable splits (think “tree braces”).
Avoid concrete or rigid fillers—they trap moisture and rot the wood! Always clean the crack first with a wire brush.
My tree split after I pruned—did I cause it?
Maybe! Pruning too much (over 25% of foliage) or making improper cuts can stress the tree, leading to splits. If the crack appeared weeks after pruning, you likely didn’t cause it—but future cuts should follow proper pruning rules (cut at the branch collar, avoid flush cuts). When in doubt, hire a pro!
How long until the tree is safe after repair?
Most repaired trees are safe within 24–48 hours if the crack was properly filled and stabilized. However:
- Wait 1–2 weeks before heavy pruning or storm exposure.
- Monitor for new cracks or sap leaks—these could mean the repair failed.
- If the tree is near power lines or a house, keep it avoided until fully healed (6+ months).
Pro tip: Add a tree support cable for extra stability if the trunk is still weak.
Wrapping up and next steps
A cracked or split tree trunk doesn’t have to mean the end of your beloved tree’s life—with the right tools, techniques, and a bit of patience, you can restore its strength and beauty.
Whether you’re addressing vertical splits, radial cracks, or deep fissures, the key is acting early, using durable materials like epoxy or flexible sealants, and ensuring proper support. Your efforts will not only preserve the tree’s structural integrity but also protect your property and the ecosystem it supports.
Ready to take action? Start by assessing the damage—if the split is severe, consult an arborist for professional guidance. For smaller repairs, gather your supplies and follow the steps above. Every tree deserves a second chance, and you’ve got the power to give it one! 🌳✨