
Propagation
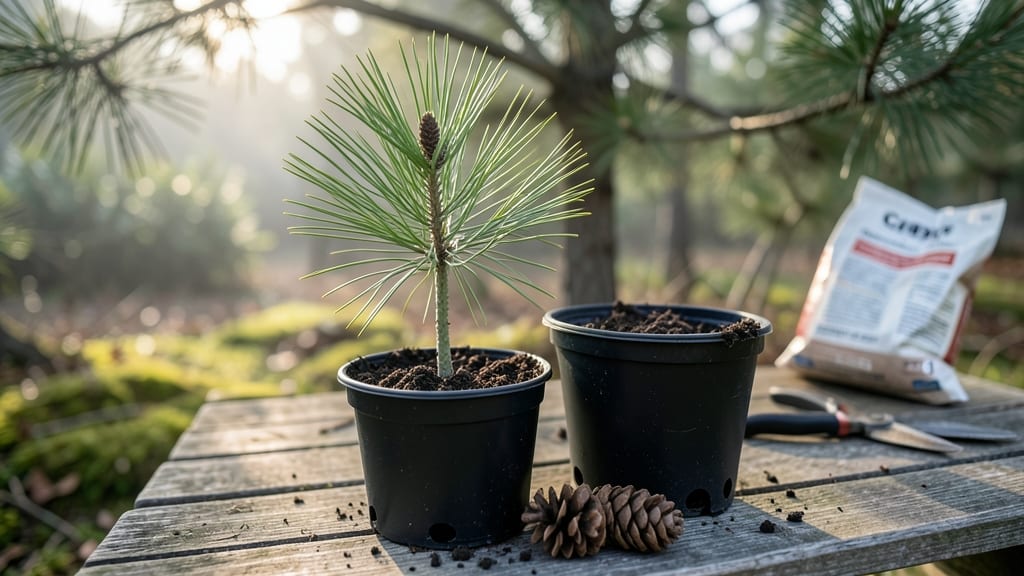
Growing a pine tree from a pine cone feels like unlocking a secret of the forest floor—it’s slower than most seeds, but the payoff is watching a towering evergreen grow from something you found in your yard. 🌲 The key isn’t just planting the cone; it’s tricking the seed inside into thinking winter has passed so it’ll finally sprout.
I’ve tried this with white pines, ponderosa, and even lodgepole, and the same cold stratification method works every time.
You’ll need just three things: fresh pine cones (green, not brown), a plastic bag with a damp paper towel, and patience—this isn’t a quick project. The cones must stay moist and chilled for 90 days before planting, mimicking nature’s way of breaking dormancy.
Most people skip this step and wonder why nothing happens; that’s the game-changer right there. Once you’ve got the cones prepped, outdoor planting in well-draining soil sets the stage for roots to take hold.
What you’ll end up with is a slow but steady sapling that’ll outlast annuals by decades. The first year might look like a stubborn twig, but by year three, you’ll have a 3-foot-tall pine that smells like Christmas all year.
The real magic? These trees thrive with almost no care once established—no fussing over water, no fighting pests like with fruit trees. Just sun, soil, and time.
This works best in USDA Zones 3-8, but even in warmer climates, the cold stratification trick forces germination. The biggest mistake? Using old, dried-out cones—always pick fresh ones in late summer or early fall. Ready to start? Let’s break it down step by step.
📚 In This Guide
- What you need
- Instructions
- Tips and common mistakes
- Wrapping up and next steps
What you need
- ● Fresh pine cones: Collect 5–10 healthy, mature pine cones from native pine species (e.g., Pinus sylvestris or Pinus strobus). Avoid cones with visible damage, pests, or mold.
- ● Cold stratification setup: 1–2 paper towels or coir mats (moistened, not soggy)
- ● 1 ziplock bag (quart-sized, reusable) or airtight container
- ● 1 refrigerator (set to 34–40°F (1–4°C))
- ● Planting medium: 1 seedling tray (with drainage holes) or small pots (3–4 inches wide)
- ● Well-draining soil mix: 50% peat moss, 30% perlite, 20% coarse sand (or a commercial pine seedling mix)
- ● Watering tools: 1 spray bottle (for gentle moisture)
- ○ 1 fine-mist sprayer (optional, for humidity control)
- ● Growth environment: 1 humidity dome or plastic wrap (to retain moisture)
- ● 1 grow light (LED or fluorescent, 12–16 hours/day) or a sunny windowsill (south-facing)
- ● Fungicide: Neem oil or hydrogen peroxide (3%) to prevent mold on seeds/cones.
- ● pH test kit: Ensure soil pH is 4.5–6.0 (pine trees prefer acidic soil).
- ● Heating mat: For faster germination (70–75°F (21–24°C) during warm stratification, if applicable).
- ● Label markers: To track cone species and planting dates.
- ● Outdoor nursery space: A shaded, windbreak area for transplanting seedlings after 6–12 months.
Step-by-step instructions for growing a pine tree from a pine cone
Cold stratification is the secret weapon for breaking pine seed dormancy.
🌱 Step 1: Collect and Prepare Fresh Pine Cones
Gather mature pine cones from the ground in late fall or winter—never rip them from trees. Look for cones that are fully open, as these contain the most viable seeds. Place them in a paper bag and store in your refrigerator's crisper drawer for 3-4 months. This mimics winter's natural cold period that softens the seed coat.
Check cones monthly. If they begin to open further, that's a good sign—the seeds inside are waking up. Once you see green buds forming inside the cone scales, they're ready for the next step. Real talk: if your kitchen feels too warm, move them to a cooler basement spot where temps stay between 35-45°F.
💧 Step 2: Extract and Stratify the Seeds
Carefully pry open the cold-treated cones and remove the seeds. You'll find them nestled between the scales—each seed is tiny, about the size of a sesame seed. Fill a small container with moistened peat moss (not garden soil) and bury the seeds ¼ inch deep. Cover the container with plastic wrap and poke a few tiny holes for airflow.
Place the container in a cool, dark spot (like the refrigerator's vegetable drawer) for another 2-3 months. This second stratification period ensures maximum germination rates. Here's the thing—pine seeds need this extended cold treatment to break their tough outer shells. Don't rush this step, even if you're eager to see sprouts.
☀️ Step 3: Sow in Germination Medium and Wait
After the second stratification period, transfer the container to a warm, bright location (around 70-75°F). Keep the peat moss consistently moist but never soggy—water when the top feels dry to the touch. Germination can take 3-6 months, so patience is key. You'll know it's working when you see tiny green needles pushing through the soil.
Once seedlings appear, move them to individual 2-inch pots filled with a mix of peat moss and perlite (50/50 ratio). Place the pots under grow lights for 14-16 hours daily—natural sunlight alone won't provide enough intensity. Watch for first true needles (not the initial cotyledons) as your signal to increase light exposure gradually.
🌿 Step 4: Transplant and Nurture Young Seedlings
When seedlings reach 3-4 inches tall (usually after 1-2 years), transplant them to 5-gallon containers with well-draining potting mix. Pine trees hate wet feet, so ensure each pot has drainage holes. Place them outdoors in partial shade for their first summer, gradually introducing more sun over time.
Water deeply but infrequently—pine trees in containers dry out faster than you'd expect. Let the top 2 inches of soil dry completely between waterings. You'll see healthy growth when new needles emerge bright green and firm. Here's where it gets fun—watch the seedling develop its characteristic pine needle clusters as it matures.
Tips & tricks for growing pine trees from pine cones
Patience and precision are everything when growing pine trees from seeds—here's how to maximize your success without common pitfalls.
Temperature Matters: The 35-45°F range during the initial 3-4 month cold stratification is non-negotiable. I learned this the hard way after trying to use a warmer garage—my cones never developed those crucial green buds. If your kitchen exceeds 50°F, move the paper bag to a basement or unheated garage. A simple thermometer check every few weeks ensures you're staying in the optimal zone.
Seed Extraction Technique: When prying open those cold-treated cones in Step 2, work gently but firmly. The seeds are delicate—think sesame seed size! I use a butter knife heated briefly over a flame to soften the resin slightly, making the scales easier to separate. Never force it; you'll crush seeds if you're impatient. The goal is to expose them without damaging their protective coating.
Moisture Management: After sowing seeds in peat moss, the key is consistent moisture—not soggy conditions. I use a spray bottle to mist the surface daily rather than pouring water, which prevents displacing seeds. The plastic wrap creates humidity, but those tiny air holes are critical for preventing mold. If condensation forms on the plastic, it's time to remove it briefly to air out the container.
Light Exposure Strategy: Those 14-16 hours of grow light daily in Step 3 are about intensity, not just duration. I position my lights just 6 inches above the seedlings and use full-spectrum bulbs rated for 10,000+ lumens. Regular fluorescent bulbs won't cut it—they're too weak for young pine seedlings. Watch for seedlings leaning toward the light; if they do, rotate the container daily for even growth.
Pro Tips for Grow A Pine Tree From A Pine Cone
- Patience and precision are everything when growing pine trees from seeds—here's how to maximize your success without ...
- Temperature Matters: The 35-45°F range during the initial 3-4 month cold stratification is non-negotiable. I learned ...
- Seed Extraction Technique: When prying open those cold-treated cones in Step 2, work gently but firmly. The seeds are...
Frequently asked questions
Got questions about growing a pine tree from a pine cone?
You’re not alone! Here are answers to the most common queries—from timing to troubleshooting—to help you succeed with your cold stratification project.
How long does it take for a pine cone to sprout after cold stratification?
Patience is key! After stratification (typically 6–12 weeks), germination can take anywhere from 2 weeks to several months. Some cones sprout quickly, while others need extra time—especially if they’re from slower-growing species like Pinus sylvestris. Keep the soil consistently moist and warm (around 70°F) to encourage growth.
Can I skip cold stratification and just plant the pine cone directly?
Not recommended! Pine cones require cold stratification to break dormancy. Without it, germination rates plummet (often to 0%). If you’re in a warm climate, mimic winter by refrigerating the cone for 6–8 weeks before planting. Think of it as tricking nature into thinking it’s time to grow!
What if my pine cone doesn’t open or release seeds?
Some cones are stubborn—especially if they’re too fresh or from a species like Pinus strobus (white pine), which may need a second year to mature. Try these fixes:
- Soak the cone in warm water for 24 hours to soften scales.
- Gently pry open stubborn scales with a butter knife (sterilized!).
- Check for pests like beetles—discard if infested.
How do I know if my pine seedling is healthy?
A thriving pine seedling has:
- Bright green needles (no browning or yellowing).
- Slow, steady growth (1–3 inches per year is normal).
- No wilting or soft stems (a sign of rot or overwatering).
Can I grow a pine tree indoors from a pine cone?
Indoor growth is possible but challenging. Pines need bright light (6+ hours of sun daily) and humidity to thrive. Use a south-facing window or grow lights, and mist seedlings often. For best results, start outdoors in a protected spot (like a greenhouse) once sprouted, then transplant later. Dwarf varieties (like Pinus mugo) adapt better indoors.
What’s the best time of year to plant pine seeds?
Timing matters! Plant stratified seeds in early spring (March–April) for the best success. This gives seedlings 6–8 months of growing season before winter. If you’re in a warm climate, you can plant in fall, but protect young seedlings from frost. Avoid planting in summer heat—seeds dry out quickly!
Wrapping up and next steps
Growing a pine tree from a pine cone is a rewarding journey that blends patience with nature’s magic! 🌱 By mastering cold stratification and providing the right conditions, you’ve unlocked the secret to nurturing a future forest giant.
Whether you’re a gardening newbie or a green-thumb pro, every small step—from soaking to planting—brings you closer to success.
Now that you’re armed with the know-how, take the next step: gather your supplies, pick a healthy pine cone, and start your stratification process. Watch as your tiny seedling sprouts into a towering tree—proof that great things grow from persistence! 🌲✨