
Propagation
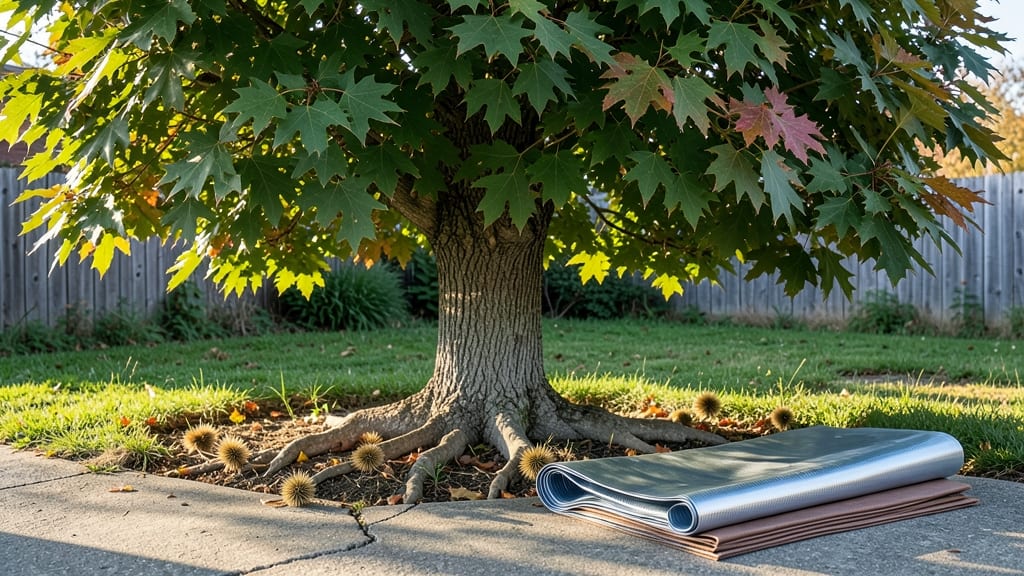
Learn how to stop tree roots from growing back—because after my oak’s aggressive roots cracked my sidewalk for the third time, I finally found barrier methods that work. sheets to natural deterrents, and these are the ones that held.
The key isn’t just blocking roots once; it’s creating a system that outsmarts their growth pattern.
Most solutions fail because they’re either too flimsy or too aggressive. You’ll need heavy-duty root barriers (like 20-mil plastic or galvanized steel) for stubborn invaders, paired with organic mulch to discourage lateral spread naturally.
For pipes, a sand-and-gravel trench creates a root-free zone while letting water drain properly. The upfront effort saves you from costly repairs down the road.
What you’ll end up with is a clear boundary that roots respect—no more buckling driveways or clogged drains. The best setups combine physical barriers with regular monitoring: check for new sprouts every spring and reinforce weak spots.
It’s not a permanent fix, but with the right materials and placement, these methods last 5-10 years before needing updates.
Whether you’re dealing with a young sapling or a mature oak, the approach scales. Urban gardens need narrower barriers, while rural properties can use wider trenches. The goal is always the same: redirect, not destroy. Let’s get those roots under control without harming the tree—or your wallet.
📚 In This Guide
- What you need
- Instructions
- Tips and common mistakes
- Wrapping up and next steps
What you need
- ● Root barrier material: HDPE (High-Density Polyethylene) plastic sheets – 20–30 mil thickness, enough to cover the target area (e.g., 4’ x 8’ sheets for most projects).
- ● OR galvanized steel or aluminum barriers – 16–20 gauge thickness, ideal for aggressive root systems.
- ● Digging tools: Shovel (flat and pointed) – for trenching.
- ● Matlock or digging bar – for stubborn soil/clay.
- ● Wheelbarrow – to haul dirt and debris.
- ● Measuring & marking: Tape measure (25+ ft).
- ● Stakes and string – to outline the barrier zone.
- ○ Spray paint (optional, for marking guidelines).
- ● Fasteners: Galvanized or stainless steel screws (1.5"–2") + drill/driver.
- ● Heavy-duty staples or landscape staples (for plastic barriers).
- ● Safety gear: Work gloves (heavy-duty).
- ● Knee pads.
- ● Safety goggles.
- ● Soil amendments: Landscape fabric – to line trenches and reduce root intrusion.
- ● Compost or mulch – to stabilize soil after installation.
- ● Tools for tricky spots: Post-hole digger – for deep or rocky soil.
- ● Vibratory plate compactor – to firm up soil around barriers.
- ● Long-term maintenance: Root-killing herbicide (glyphosate-based) – for pre-treatment if needed.
- ● Monitoring stakes – to check for root breakthrough over time.
Step-by-Step guide to installing physical root barriers for tree roots
Here’s how to create a lasting barrier that actually stops aggressive roots from spreading where you don’t want them.
Assess the Root Zone and Determine Barrier Depth
First, map the tree’s root spread by gently probing the soil with a shovel around the trunk. Look for lateral roots—thick, horizontal roots that spread outward. These are your primary targets. Most root barriers need to extend 12-24 inches deep, depending on soil type and tree species. Sandy soil requires deeper barriers because roots grow faster and deeper.
Mark the barrier line with stakes and string, extending at least 2-3 feet beyond the current root spread. For large trees, consider a 36-inch deep barrier to prevent deeper roots from bypassing it. The deeper the barrier, the more effective it will be against persistent root growth.
Excavate a Trench Along the Marked Line
Dig a trench along your marked line using a shovel or trenching tool. Keep the trench width consistent—12-18 inches wide is ideal for most barrier materials. Remove all roots, rocks, and debris from the trench to ensure a clean installation. If you encounter large roots, trim them back 6-12 inches from the trench edge to prevent regrowth into the barrier zone.
Check the trench depth frequently with a level to maintain consistency. Uneven trenches weaken the barrier’s effectiveness. If the soil is loose or sandy, consider adding a 1-inch layer of compacted gravel at the bottom to stabilize the barrier material.
Install the Root Barrier Material
For most applications, HDPE (high-density polyethylene) root barriers are the best choice because they’re durable and resistant to rotting. Cut the barrier material to fit the trench, overlapping sections by 6-12 inches and securing them with heavy-duty staples or screws designed for plastic. Ensure the barrier stands vertically—tilted barriers create gaps that roots exploit.
For trenches deeper than 24 inches, use interlocking barrier sections or reinforce seams with additional staples. If using metal barriers, coat them with a rust inhibitor to prevent corrosion, which can compromise the barrier over time. Backfill the trench with the removed soil, tamping it down firmly to eliminate air pockets.
Monitor and Maintain the Barrier Long-Term
After installation, inspect the barrier annually for signs of root penetration or material degradation. Look for small cracks or gaps where roots might squeeze through. If you notice roots growing over or around the barrier, trim them back immediately and seal any gaps with additional barrier material or a root-resistant membrane.
Water the soil near the barrier regularly to encourage upward root growth rather than lateral spread. Mulch the area around the tree with 2-4 inches of organic mulch to stabilize soil moisture and reduce stress on the tree, which can lead to aggressive root searching. Over time, the barrier will redirect root growth downward and away from protected areas.
Tips & tricks for effective root barrier installation
Stopping aggressive roots requires precision—here’s how to avoid common pitfalls and ensure your barrier lasts.
Depth Precision: When determining the 12-24 inch barrier depth in Step 1, use a measuring tape to verify depth at multiple points. Sandy soil demands the deeper 24-inch barrier—roots in these conditions grow aggressively downward. For clay soil, 18-20 inches often suffices. I’ve seen barriers fail when homeowners eyeballed depth instead of measuring.
Trench Preparation: In Step 2, don’t rush the trench excavation. The 12-18 inch width is critical—narrower trenches create pinch points where roots can squeeze through. For stubborn roots you encounter, trim them back the full 6-12 inches as specified. I once had to redo a barrier after missing this step, and the roots simply grew around the edges.
Material Selection: For Step 3, HDPE barriers are my top recommendation, but if you’re working with a budget, consider corrugated metal barriers treated with rust inhibitors. The key is ensuring the material extends the full trench depth without gaps. Overlapping sections by 6-12 inches creates a seamless barrier—this is where most installations fail when corners are cut.
Long-Term Maintenance: The annual inspection in Step 4 is non-negotiable. I’ve seen barriers compromised by small cracks that went unnoticed for months. Use a flashlight to inspect seams during your annual check—roots exploit even tiny gaps. The 2-4 inches of organic mulch around the tree isn’t just decorative; it stabilizes moisture and reduces root stress that could lead to aggressive growth patterns.
Pro Tips for Stop Tree Roots From Growing Back
- Stopping aggressive roots requires precision—here’s how to avoid common pitfalls and ensure your barrier lasts.
- Depth Precision: When determining the 12-24 inch barrier depth in Step 1, use a measuring tape to verify depth at multiple points.
- Trench Preparation: In Step 2, don’t rush the trench excavation.
Frequently asked questions
Got questions about keeping those pesky tree roots in check? You’re not alone—here are some of the most common concerns and straightforward answers to help you tackle the problem like a pro.
What’s the best time of year to install root barriers?
The ideal window is late fall or early spring when trees are dormant but the ground is workable. Avoid extreme heat or freezing temps—this makes installation easier and gives roots less time to bypass the barrier before it’s fully set. Pro tip: Water the area 24 hours before digging to soften the soil!
Will a root barrier damage my tree’s health?
Not if installed correctly! A properly sized and buried barrier (at least 2–3 feet deep) won’t strangle roots—it just redirects them. Just avoid cutting into the root flare (the bulge at the tree’s base) or encasing the trunk. Think of it like a gentle detour sign, not a cage.
Can I use concrete or metal for a DIY root barrier?
Concrete is too rigid and can crack or damage roots over time. Metal (like galvanized steel) works but may corrode. The best DIY options are plastic (HDPE) or flexible corrugated barriers—they’re lightweight, durable, and won’t harm the tree. For heavy-duty needs, consider professional-grade plastic sheets with a smooth finish.
How do I know if my barrier is working?
Success isn’t instant! Monitor for 3–6 months for signs like reduced cracking in nearby structures or pavement. Dig a small test hole near the barrier—if roots are growing alongside (not through) it, you’re on the right track. If roots breach the barrier, it might need reinforcement or deeper burial.
What if roots keep growing back after I’ve installed a barrier?
This usually means the barrier is too shallow or has gaps. Double-check depth (buried below the root zone) and seal seams with landscape fabric or root-repellent gel. For stubborn cases, consider chemical root inhibitors (like copper sulfate) as a temporary fix—just follow label instructions carefully.
Are there natural alternatives to physical barriers?
Yes! Try these low-tech fixes:
- Mulch rings: Spread 3–4 inches of mulch around the tree (keep it 6 inches from the trunk) to discourage lateral growth.
- Saltwater or vinegar: Mix 1 gallon water + 1 cup salt or vinegar and apply to problem roots (use sparingly—it’s not a long-term solution).
- Root-pruning: Hire a pro to trim aggressive roots outside the barrier zone to redirect growth.
Wrapping up and next steps
Stopping tree roots from encroaching on your property is totally doable with the right barrier methods and a little persistence! Whether you’ve installed root barriers, used chemical treatments, or adjusted your landscaping, consistency is key. Remember, roots are resilient—but so are you! 🌱
The next logical step? Monitor and maintain your barriers regularly. Check for gaps, reinforce weak spots, and keep an eye on nearby trees. If you notice new growth, act fast—small fixes now save bigger headaches later. You’ve got this!