
Tools
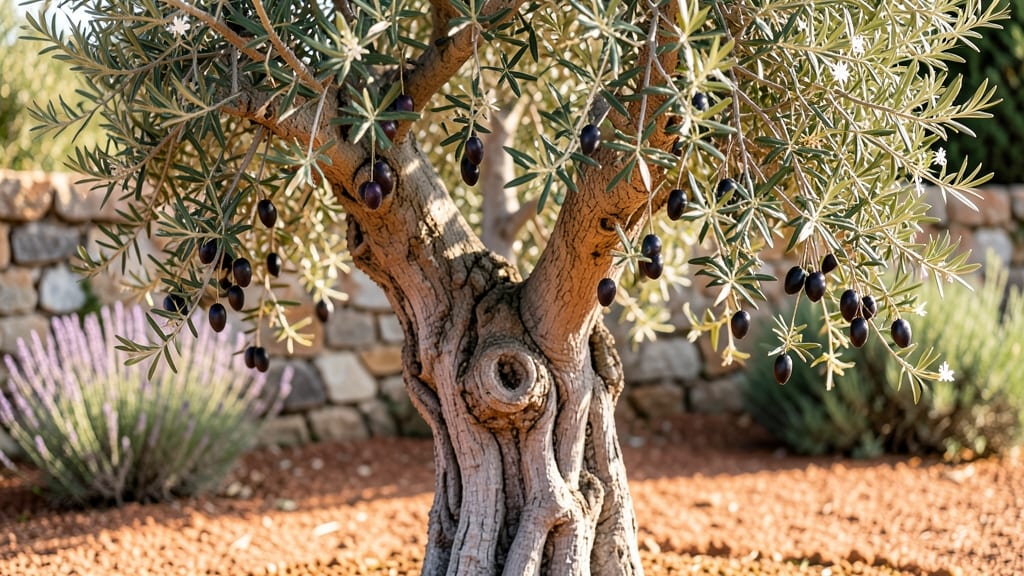
An olive tree garden isn’t just about the trees—it’s about crafting a living, fragrant privacy screen that transforms your backyard into a Mediterranean escape. 🌿 I’ve designed my own with a mix of standard and dwarf varieties, creating layers of green that shift with the seasons while keeping neighbors’ views (and nosy cats) at bay.
The key is spacing: mature olive trees need 15–20 feet between them for full canopy, but dwarf varieties can fit into 8–10 feet spaces. Pair them with lavender, rosemary, or low-growing thyme for a sensory-rich understory that thrives in the same dry conditions.
This isn’t just a hedge—it’s a fragrant, ever-evolving garden feature.
By year three, you’ll have a lush, textured wall that stays green year-round, blocks wind, and even produces olives (if you’re patient). The best part? It ages beautifully, developing a gnarled, rustic charm that makes your yard feel like a Tuscan villa. Ready to sketch your own olive oasis?
Works in zones 8–10 (and with winter protection in cooler climates), so whether you’re in California or the South, this design adapts. Start small—even a single specimen tree makes a statement—and let it grow into something extraordinary.
📚 In This Guide
- What you need
- Instructions
- Tips and common mistakes
- Wrapping up and next steps
What you need
- ● Olive tree saplings: 5–10 healthy, disease-free Olea europaea plants (choose dwarf varieties like 'Arbequina' or 'Frantoio' for smaller spaces).
- ● High-quality potting soil: 5–10 bags (sterile, well-draining mix with perlite or sand).
- ● Containers or planting holes: For containers: 5-gallon pots or larger (1 per tree).
- ● For in-ground: Dig holes 2–3x wider than the root ball, 12–18" deep.
- ● Mulch: 2–3 cubic feet of organic mulch (wood chips or straw) to retain moisture.
- ● Fertilizer: Slow-release granular fertilizer (10-10-10 or citrus-specific blend).
- ○ Drip irrigation system or hose: For consistent watering (optional but recommended).
- ● Garden gloves (to protect your hands from thorns and soil).
- ● Trowel or shovel (for planting and soil prep).
- ● Pruning shears (sterilized, for shaping and maintenance).
- ● Measuring tape (to space trees 8–15 feet apart for optimal growth).
- ● Wheelbarrow (for hauling soil, mulch, or tools).
- ● Sunlight: Full sun (6+ hours daily). Olive trees thrive in USDA Zones 8–11 (check local climate!).
- ● Drainage: Avoid waterlogged areas—olives hate soggy roots! Amend clay soil with sand if needed.
- ○ Windbreak: Optional but helpful for young trees (burlap screens or temporary fencing).
- ● Patience: Olive trees grow slowly but reward you with decades of lush, fragrant privacy!
Step-by-step guide to designing a thriving olive tree privacy screen
Here's how to create a dense, evergreen olive hedge that delivers year-round privacy and Mediterranean charm.
🌱 Step 1: Select and Prepare Planting Sites
Olives thrive in well-drained soil with 6-8 hours of direct sun daily. Choose a location where the final canopy will cast shade on your patio or windows—most mature olive trees reach 15-25 feet tall and 10-15 feet wide. Mark planting spots 10-12 feet apart for four trees to create a solid privacy barrier.
Dig holes twice as wide as the root ball and 6 inches deeper to accommodate amended soil. I always loosen the sides of the hole with a shovel to prevent root circling. Mix the excavated soil with 20% compost and 10% coarse sand to improve drainage—olives hate soggy roots.
🪴 Step 2: Plant Trees with Proper Spacing and Support
Remove each tree from its container and gently tease the roots outward if they're circling. Place the root ball 1-2 inches higher than the surrounding soil level—this prevents waterlogging during heavy rains. Backfill with your amended soil mix, tamping lightly every 6 inches to eliminate air pockets.
Create a 2-foot wide by 3-inch deep trench around each planting hole to direct irrigation water directly to the roots. Install 3-foot wooden stakes at a 45-degree angle on opposite sides of each tree and secure with soft ties. This gives young trees stability while they establish their root systems.
☀️ Step 3: Establish Irrigation and Mulching Routine
Water deeply immediately after planting to settle the soil, then maintain 1-2 inches of water per week during the first growing season. I use a soaker hose placed in the trench to deliver water slowly at the root zone—never water overhead, as olive leaves are prone to fungal diseases in damp conditions.
Apply 3 inches of wood chips as mulch, keeping it 6 inches away from the trunk to prevent rot. Refresh the mulch annually in late winter. During the first two years, fertilize lightly with ½ cup of 6-6-6 fertilizer in early spring and again in mid-summer. Over-fertilizing causes excessive leaf growth at the expense of root development.
✂️ Step 4: Prune for Structure and Density
Wait until spring of the second year before pruning to allow roots to establish. Remove any crossing branches or inward-growing shoots to create an open center that encourages air circulation. Cut back 1/3 of the new growth each year to maintain shape and density—olives respond well to pruning but don't overdo it in the first few years.
Shape the trees into a rounded canopy by making cuts just above outward-facing buds. I always prune after the last frost when new growth is about to begin. Avoid heavy pruning in fall, as this stimulates tender growth that won't survive winter in colder climates. Your goal is a uniform, lush canopy that provides privacy while allowing light to filter through.
Tips & tricks for perfect olive tree privacy screen
Creating a lush olive hedge takes patience, but these key insights will help you avoid common pitfalls and accelerate your trees' growth.
Soil Preparation Strategy: When amending your soil with 20% compost and 10% coarse sand, don't skimp on the sand—olives absolutely despise soggy roots. I've seen trees struggle when planted in amended garden soil without proper drainage. Test your amended mix by squeezing a handful: it should hold shape but crumble when tapped. For heavy clay soils, increase the sand to 15% if needed.
Staking Technique: Those 3-foot wooden stakes at a 45-degree angle are crucial for stability, but the real secret lies in the ties. Use soft fabric strips instead of wire—they won't cut into the bark as the tree grows. I also recommend installing a third stake on the windward side if you're in a particularly breezy location. The goal is to mimic natural wind resistance while the roots establish.
Watering Wisdom: The 1-2 inches of water per week guideline assumes average conditions—adjust based on your climate. In summer heat, you might need daily watering for the first month until roots establish. Check moisture by sticking your finger 2 inches into the soil: if it's dry, water again. The trench irrigation system you create will make this much easier once established.
Pruning Timeline: Waiting until spring of the second year to prune is critical, but don't be afraid to do light maintenance pruning after the first growing season if you spot dead or crossing branches. Just limit yourself to removing only what's absolutely necessary. The key is to shape the tree gradually—never remove more than 25% of the foliage in any single year, or you'll shock the tree.
Pro Tips for Olive Tree Garden
- Creating a lush olive hedge takes patience, but these key insights will help you avoid common pitfalls and accelerate your trees' growth.
- Soil Preparation Strategy: When amending your soil with 20% compost and 10% coarse sand, don't skimp on the sand—olives absolutely despise soggy roots.
- Staking Technique: Those 3-foot wooden stakes at a 45-degree angle are crucial for stability, but the real secret lies in the ties.
Frequently asked questions
Got questions about creating your own olive tree garden?
You’re not alone! Here are some of the most common queries—plus straightforward answers to help you plan with confidence.
How long does it take for an olive tree to grow tall enough for privacy?
Olive trees grow at a moderate pace—expect Prunus oleae varieties to reach 15–25 feet in 5–10 years with proper care. Dwarf cultivars (like ‘Little Ollie’) mature faster (3–5 years) but stay shorter (8–10 feet). For quick privacy, plant multiple trees in a staggered row to fill gaps sooner.
When is the best time to plant olive trees for a garden?
Plant olive trees in early spring or late fall when soil is workable but not frozen. Avoid summer heatwaves, which stress young roots. If planting in containers, anytime works—just keep them watered! Cooler temps help roots establish before summer’s intensity.
How much water do olive trees need in a privacy garden?
Olive trees are drought-tolerant once established (2+ years old), but young trees need 1–2 inches of water weekly (deep watering, not frequent shallow soaks). Mulch heavily (3–4 inches) to retain moisture. Overwatering causes root rot—let soil dry slightly between waterings.
Can I use other trees or plants for privacy instead of olives?
For fast privacy, try leylandii cypress (grows 3–4 feet/year) or bamboo (dense but invasive—contain with root barriers). For low-maintenance, consider arbutus (evergreen, drought-resistant) or cherry laurel. Olives excel for year-round greenery + edible benefits—but mix with flowering plants (like bougainvillea) for color!
What pests should I watch for in an olive tree privacy screen?
Olive trees are generally pest-resistant, but keep an eye out for:
- Scale insects (sticky residue on leaves)—treat with horticultural oil.
- Olive fruit fly (in warm climates)—use traps or neem oil.
- Spider mites (dry conditions)—spray with water or insecticidal soap.
Wrapping up and next steps
Creating your own olive tree garden is a rewarding journey that blends beauty, functionality, and sustainability. With the right materials, a little patience, and a touch of creativity, you’ll soon enjoy a lush, year-round privacy screen that thrives on minimal effort.
Whether you’re a seasoned gardener or a beginner, this project is well within reach—and the results? Pure serenity.
Ready to take the next step? Start by sketching your garden layout, gathering your supplies, and planting those first saplings. Watch your vision grow—literally—and soon, you’ll be basking in the shade of your very own olive tree oasis. 🌿✨