
Propagation
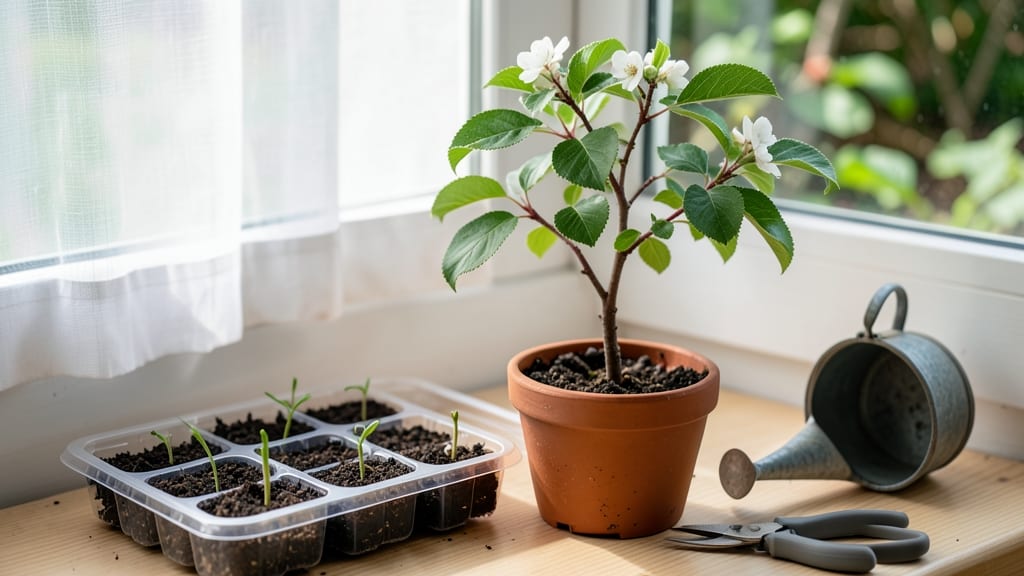
Propagating fruit trees from seed turns a simple kitchen experiment into the kind of project that rewards patience with a future orchard. 🌱 I’ve nursed avocado seedlings into towering houseplants and watched apple seeds sprout stubborn little shoots, and the patience required makes every harvest feel like a triumph.
The best varieties for beginners—apples, citrus, and avocados—start with seeds that need just the right conditions to break their dormancy and grow into strong, fruit-bearing trees.
The secret lies in understanding each seed’s quirks: some need scarification (a gentle nick to break their tough coat), others require cold stratification (mimicking winter’s chill), and a few—like avocados—thrive in water until roots appear.
My first batch of apple seeds took three months to germinate, but that wait taught me more about soil, light, and timing than any book ever could. You’ll learn to read the signs: when to transplant, how to harden off seedlings, and which varieties hold their promise across seasons.
What starts as a tiny sprout becomes a tree that could feed your family for decades. You’ll harvest your first fruit years down the line, but the joy comes from watching each stage—from the first true leaves to the day you taste something you grew from a seed you saved.
The challenges? Sure, germination rates can be low, and genetic variability means your tree might not match the grocery store version. But that’s part of the magic: you’re growing something uniquely yours.
This method works for any climate, though timing and variety matter—citrus thrives in warm zones, apples in cooler ones, and avocados need heat.
Whether you’re starting with a seed from a store-bought fruit or saving one from your neighbor’s tree, the process is the same: patience, curiosity, and a little scientific know-how. Let’s get those seeds sprouting!
📚 In This Guide
- What you need
- Instructions
- Tips and common mistakes
- Wrapping up and next steps
What you need
- ● Fresh, viable seeds: Harvest from ripe, healthy fruit (avoid hybrid varieties—they may not produce true-to-type fruit). Aim for 5–10 seeds per tree (some may not germinate).
- ● Potting mix: A well-draining blend like 50% peat moss or coconut coir + 50% perlite or vermiculite (sterilized to prevent mold). Use a 10-inch pot or seed tray for initial planting.
- ● Small pots or seedling trays: 2–3 inch diameter (one per seedling) with drainage holes.
- ● Grow lights or a sunny windowsill: A full-spectrum LED grow light (12–16 hours/day) or a south-facing window (6+ hours of sunlight).
- ● Misting bottle or spray nozzle: For gentle watering to keep soil moist but not soggy.
- ● Plastic wrap or humidity dome: To create a mini greenhouse effect during germination.
- ○ Fertilizer (optional but helpful): A balanced, water-soluble fertilizer (5-5-5 or 10-10-10) diluted to half-strength for young seedlings.
- ● Seed scarification tools: Sandpaper (medium-grit, 100–150 grit) or a knife to nick hard seed coats.
- ● Heat mat: A 70–80°F heat mat to speed up germination (especially for tropical seeds).
- ● pH test kit: To ensure soil pH is 6.0–7.0 (ideal for most fruit tree seeds).
- ● Grafting tools (future-proofing): If you plan to graft later, a sharp grafting knife and grafting tape.
- ● Labeling tags: To track seed types and planting dates (trust us, you’ll forget!).
Step-by-Step instructions for propagating fruit trees from seed
Here's the method I've used to grow strong, healthy saplings from fruit pits.
🌱 Step 1: Collect and Prepare the Seeds
Start with fresh, plump fruit pits—avoid dried or shriveled ones. I like to rinse them under cool water to remove any remaining fruit residue, then let them dry completely on a paper towel for 24 hours. This prevents mold from forming when we store them.
Here's the thing—fruit tree seeds often need a stratification period to break dormancy. For most temperate climate seeds (like apple, pear, or cherry), place them in a sealed plastic bag with a damp paper towel and refrigerate for 8-12 weeks. Tropical seeds (mango, citrus) don't need this step, but they do need a warm start.
Check the seeds weekly—if they feel dry, add a few drops of water to the towel and reseal the bag. You'll know stratification worked when the seed coat softens slightly and you see a tiny white root emerging.
💧 Step 2: Start the Seeds in a Controlled Environment
Fill small pots (2-3 inches deep) with sterile seed-starting mix—not garden soil, which can introduce pathogens. I use a mix of 50% peat moss and 50% perlite for perfect drainage. Moisten the mix until it's damp but not soggy, then press it down lightly to remove air pockets.
Plant each seed ½ inch deep—deeper planting delays germination because the seedling must push through more soil. Place one seed per pot to avoid crowding. Gently water the surface until moisture reaches the bottom, then cover the pots with clear plastic wrap to retain humidity. This creates a mini greenhouse effect that speeds up germination.
Keep the pots in a warm location (70-75°F)—a seedling heat mat works wonders. Most fruit tree seeds germinate in 4-12 weeks, depending on the variety. Patience is key here—don't disturb the pots until you see green sprouts breaking through the soil.
☀️ Step 3: Provide Light and Care for Young Seedlings
The instant you see cotyledons (the first true leaves), remove the plastic wrap immediately. Seedlings need bright, indirect light for the first week to prevent shock. After that, move them to a south-facing window or under a grow light for 14-16 hours daily. Without enough light, seedlings stretch leggily and weaken.
Water gently from the bottom—place the pots in a tray of ½ inch of water for 10-15 minutes, then drain excess. This prevents damping-off disease, which turns stems to mush overnight. You'll know moisture is right when the soil surface looks slightly damp but not glistening.
Once seedlings have 3-4 true leaves (not just the initial cotyledons), it's time to transplant them into 4-inch pots with fresh potting mix. Handle them carefully—they're delicate! I like to firm the soil around the base to support the stem.
🪴 Step 4: Transition to Outdoor Conditions
After 4-6 weeks of indoor growth, start hardening off your seedlings. Place them outside in a shaded, sheltered spot for 1-2 hours the first day, gradually increasing time over 10-14 days. This acclimates them to wind, sun, and temperature fluctuations.
Watch for wilting or yellowing leaves—these are signs they're not ready. Strong seedlings will bounce back quickly after short outdoor sessions. Once they tolerate a full day outside without stress, they're ready for the garden.
Plant them in a sunny, well-drained spot with 6 feet of space between each sapling. Mulch around the base with 2-3 inches of organic mulch to retain moisture and suppress weeds. Water deeply at planting to settle the soil.
Tips & tricks for perfect fruit tree propagation
These little details make all the difference between thriving saplings and disappointing failures.
Stratification Secret: Don't skip checking your seeds weekly during the 8-12 week cold treatment. The damp paper towel should feel like a wrung-out sponge—not dripping, but not bone-dry either. If you forget to monitor, seeds can dry out completely and die. I mark my calendar with reminders to avoid this common mistake.
Pot Selection Tip: For Step 2, choose pots that are just 2-3 inches deep—any deeper and you'll waste space while waiting for germination. I use biodegradable peat pots that can go straight into the garden later, eliminating transplant shock. Just make sure they have drainage holes to prevent soggy soil.
Light Transition Strategy: When moving seedlings to 14-16 hours of light in Step 3, start with gradual exposure. Place them near a west-facing window first—the intense afternoon sun is gentler than harsh midday rays. If you notice leaves turning yellow or stretching excessively, they're getting too much direct light too soon.
Hardening Off Hack: During the 10-14 day hardening process in Step 4, I place a small fan on low setting near the seedlings for the last 3 days. This mimics wind conditions they'll face outdoors and strengthens their stems. Just avoid direct airflow on the leaves to prevent damage.
Pro Tips for Propagating Fruit Trees From Seed
- These little details make all the difference between thriving saplings and disappointing failures.
- Stratification Secret: Don't skip checking your seeds weekly during the 8-12 week cold treatment.
- Pot Selection Tip: For Step 2, choose pots that are just 2-3 inches deep—any deeper and you'll waste space while waiting for germination.
Frequently asked questions
Got questions about growing fruit trees from seed?
You’re not alone! Here are answers to the most common concerns—from timing to troubleshooting—so you can confidently start your fruit tree journey.
How long does it take for a fruit tree seedling to bear fruit?
Patience is key! Most fruit trees grown from seed take 5–10 years to bear fruit, if they ever do. While some may produce earlier, the fruit may not match the parent tree’s quality. For faster, more reliable results, consider grafting or buying a young tree.
When is the best time to plant fruit tree seeds?
The ideal time depends on your climate. In warm regions, spring or early summer works best. In cooler areas, late winter or early spring (just before the last frost) is ideal. If sowing indoors, start seeds 6–8 weeks before the last frost for a head start.
Can I grow any fruit tree from seed, or are some better than others?
Some trees, like apples, peaches, and citrus, are notoriously difficult to grow true from seed due to genetic variability. Easier options include avocados, mangoes, and figs, which often produce viable seedlings. For reliable fruit, research varieties known for seed propagation success or opt for grafting.
Why did my fruit tree seedling die? Common issues and fixes.
Seedlings often fail due to overwatering, poor drainage, or pests. Check for:
- Mushy stems = Overwatering or fungal disease (reduce water, improve airflow).
- Yellow leaves = Underwatering or nutrient deficiency (adjust watering, add compost).
- Holes or wilting = Pests like aphids or cutworms (use neem oil or insecticidal soap).
Is it better to propagate fruit trees from seed or cuttings?
It depends on your goals:
- Seed propagation: Cheaper, fun, and great for experimentation—but slow and unpredictable for fruit quality.
- Cuttings/grafting: Faster, produces genetically identical trees, and ensures fruit quality. Best for serious growers.
Wrapping up and next steps
Growing fruit trees from seed is a rewarding journey that connects you to nature while expanding your gardening skills. 🌱 With patience, the right techniques, and a little care, you can nurture a thriving tree that yields delicious fruit for years to come. Ready to take the next step? Start by planting your first seed today—or share your newfound knowledge with fellow gardeners to inspire even more green thumbs!
💡 Pro tip: Keep a journal of your progress to track growth milestones and refine your approach over time!