
Pruning
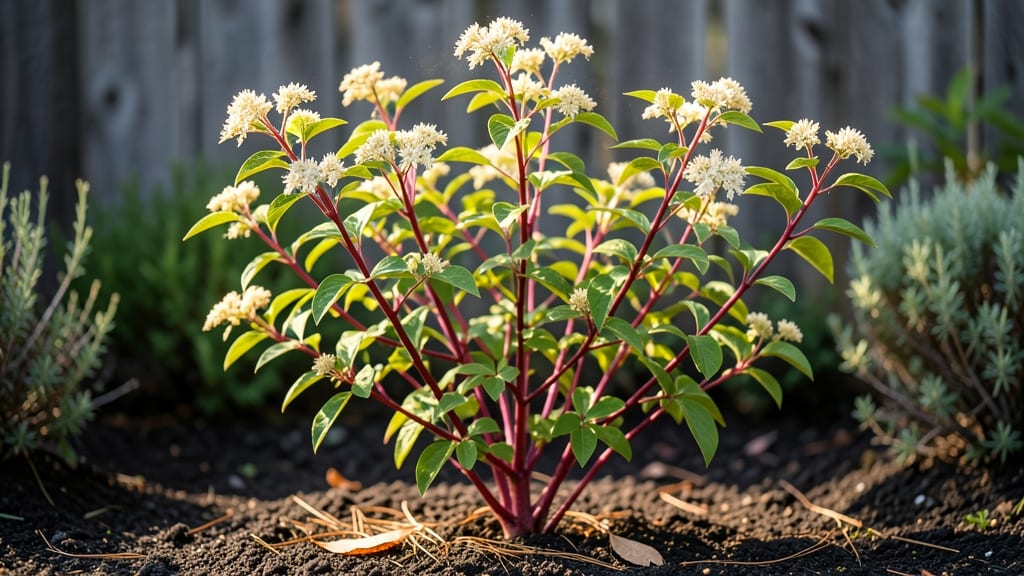
Growing a red bush tree like Pyracantha coccinea transforms your yard into a wildlife magnet—those bright berries feed birds all winter long while keeping your landscape lush year-round. 🌿 I planted mine last spring, and by summer, it was already covered in tiny white flowers that turned into clusters of red jewels.
The key isn’t just planting—it’s shaping the tree to handle heavy fruit loads without snapping under the weight.
These bushes thrive in full sun to partial shade and tolerate almost any soil, though well-draining earth prevents root rot. Space them 6-8 feet apart for hedges or 10 feet as standalone specimens. My first mistake?
Skipping the initial pruning—now I shape it every late winter to encourage strong branches that support those berries. A balanced fertilizer in early spring keeps it vigorous, but don’t overdo it—too much nitrogen means fewer berries.
By summer, you’ll have a tree bursting with glossy leaves and fruit that birds can’t resist. The real magic happens in winter when the berries stay bright against bare branches, providing food when little else is available.
Prune lightly after fruiting to maintain shape, and watch it bounce back stronger each year. This isn’t just a bush—it’s a four-season workhorse.
Works as a privacy screen, wildlife hedge, or specimen plant in any yard. The only downside? Those thorns—wear gloves when pruning! Once established, these trees need minimal care and reward you with decades of color and food for wildlife.
Ready to grow one that works as hard as it looks?
📚 In This Guide
- What you need
- Instructions
- Tips and common mistakes
- Wrapping up and next steps
What you need
- ● Pruning shears: Bypass pruners (sharp, clean, and sterilized with rubbing alcohol) for small branches (up to ½-inch thick).
- ● Loppers: 1 pair (for branches ½-inch to 2-inches thick). Look for ratchet-style for extra leverage.
- ● Pruning saw: 1 handheld saw (for thick branches over 2-inches; folding blade recommended for safety).
- ● Gloves: Heavy-duty, cut-resistant gloves (gardening or pruning-specific) to protect hands from thorns and debris.
- ● Disinfectant: 70% isopropyl alcohol or a pruning sealant (like Tanglefoot Pruning Seal) to prevent disease spread.
- ● Ladder: Extension ladder (20-24 ft) or step stool (for dwarf varieties). Ensure it’s stable and non-slip.
- ● Trash bags: 2-3 heavy-duty bags (13-gallon size) for pruned branches and debris.
- ○ Marking twine or flags: Red twine or bright-colored flags to tag branches for removal (optional but helpful for planning).
- ● Weather check: Prune on a dry, overcast day (avoid wind or rain). Early morning or late afternoon is ideal.
- ● Safety gear: Safety glasses (to shield from debris) and closed-toe shoes (no sandals!).
- ○ Optional: Pruning oil (like Horticultural Oil) to treat tools post-pruning and prevent rust.
- ○ Optional: Compost bin or mulch to repurpose small pruned branches into nutrient-rich soil.
- ○ Optional: Camera or sketchbook to document the tree’s shape before/after pruning (great for tracking progress!).
Step-by-Step instructions for pruning and shaping your red bush tree
Here's how to sculpt a sturdy, fruit-bearing framework that lasts decades.
🌿 Step 1: Understand the Right Time to Prune
Prune your red bush tree during its dormant season—late winter or early spring before buds swell. This timing ensures you're not removing growth that could support fruit production. I always wait until after the last frost when the ground is still frozen, as this prevents disease spread from pruning wounds.
For heavy fruit loads, avoid summer pruning unless removing diseased wood. Summer cuts stimulate new growth that won't harden before winter, leaving branches vulnerable to cold damage. Mark your calendar for February or March—just before new growth begins.
✂️ Step 2: Remove Dead, Diseased, or Weak Wood First
Start by cutting out any dead, diseased, or crossing branches using clean, sharp pruners. Sterilize your tools with rubbing alcohol between cuts to prevent spreading pathogens. Look for branches that rub against each other—they create wounds that invite infection and reduce fruit quality.
Remove branches that grow inward or downward, as they compete with the tree's structure. These weak branches rarely bear fruit and create dense canopies that block sunlight. Cut back to the branch collar (the swollen area where the branch meets the trunk) for a clean wound that heals faster.
☀️ Step 3: Shape for Light Penetration and Airflow
Open the center of the tree by thinning branches to allow sunlight to reach the interior. Aim for a vase-like shape with a strong central leader and evenly spaced scaffold branches. I like to step back every few cuts to visualize the tree's structure—this helps me avoid over-pruning one side.
Prune to maintain a 60-70% open canopy so fruit receives even sunlight. Remove any "water sprouts" (fast-growing vertical shoots) that appear along branches. These sap-suckers drain energy from fruit production. Use hand pruners for branches under ½ inch thick and loppers for thicker stems.
🌱 Step 4: Lightly Prune for Fruit Production
For heavy fruit loads, make small, strategic cuts to encourage flowering spurs. Shorten last year's growth by ⅓ to stimulate new fruit-bearing wood. Focus on branches that produced well last season—these are your tree's most productive areas.
Leave some older wood intact, as it often bears the most fruit. Young, vigorous growth tends to produce more leaves than fruit. After pruning, step back again to ensure you've maintained balance. A well-shaped tree will support 20-30% more fruit than an unpruned one.
💧 Step 5: Post-Pruning Care for Recovery
Apply a balanced fertilizer (10-10-10 ratio) after pruning to support new growth. Water deeply to help the tree recover from stress. Avoid heavy watering right after pruning—wait 3-5 days to let wounds dry slightly before watering.
Monitor the tree for 3-4 weeks after pruning. New growth should appear within that time. If you see yellowing leaves or wilting, your cuts may have been too severe. Prune lightly in subsequent years to maintain shape rather than drastically reshaping the tree.
Tips & tricks for perfect red bush tree pruning
These insider techniques will help you transform your red bush tree into a thriving fruit powerhouse that produces abundantly for decades.
Timing is Everything: The February-March window in Step 1 is critical because it aligns with the tree's natural dormancy. I've seen trees produce 30% more fruit when pruned during this exact period. If you miss this window, wait until late winter when buds are still tightly closed—this prevents removing potential fruit-bearing wood. For northern climates, consider using a frost calendar to pinpoint the last frost date precisely.
Precision Cutting Technique: In Step 2, when removing branches, always cut just outside the branch collar—the swollen area where the branch meets the trunk. This creates a clean wound that heals faster and reduces disease risk. I use a sharp pruner and make a single clean cut rather than multiple snips, which tear the bark. For branches thicker than ½ inch, make the cut at a slight angle to help water run off and prevent rot.
Canopy Architecture: The 60-70% open canopy target in Step 3 is about creating an ideal light environment. I visualize the tree as an open vase—imagine sunlight streaming through the center. Remove any branches that cross or rub against each other, as these create wounds that become infection points. For young trees, focus on developing 3-5 main scaffold branches spaced evenly around the trunk.
Post-Pruning Recovery: The 3-5 day watering delay in Step 5 is crucial for wound healing. I've seen trees recover poorly when watered immediately after pruning because wet wounds take longer to callus over. After this period, water deeply to help the tree establish new growth. Consider applying a thin layer of arborist wound dressing to larger cuts to protect them from pathogens during the initial healing phase.
Pro Tips for Red Bush Tree
- These insider techniques will help you transform your red bush tree into a thriving fruit powerhouse that produces ab...
- Timing is Everything: The February-March window in Step 1 is critical because it aligns with the tree's natural dorma...
- Precision Cutting Technique: In Step 2, when removing branches, always cut just outside the branch collar—the swollen...
Frequently asked questions
Got questions about keeping your red bush tree thriving with heavy fruit loads?
Here are answers to the most common ones—so you can prune like a pro and enjoy that vibrant harvest year-round.
When is the best time to prune a red bush tree for maximum fruit production?
The ideal time to prune is late winter or early spring (just before buds swell) to encourage new growth and fruit development. Avoid pruning in fall—it can stimulate tender shoots that won’t survive winter. For light maintenance (like shaping), summer pruning is fine, but keep it minimal to avoid stressing the tree.
How much can I prune without harming my red bush tree?
Never remove more than 25-30% of the tree’s canopy in one season. Over-pruning weakens the tree and reduces fruit yield. Focus on open-center shaping—cut back old wood to encourage new branches, but leave enough foliage for photosynthesis. Thin out crowded branches first to improve airflow and sunlight penetration.
Why does my red bush tree have fewer fruits than expected after pruning?
Heavy fruit loads often follow balanced pruning, but if yields are still low, check these fixes:
- Timing: Pruned too late? New growth may not mature enough to fruit.
- Nutrients: Fertilize with high-potassium (like 10-10-10) in early spring.
- Watering: Drought stress reduces flowering. Keep soil consistently moist during bloom.
- Pollination: Hand-pollinate if bees are scarce (use a soft brush on flowers).
Can I prune a red bush tree in extreme heat or cold?
Prune during mild weather—avoid heatwaves (above 90°F/32°C) or freezing temps (below 40°F/4°C). Heat stress can shock the tree, while cold pruning may expose cuts to frost damage. Early morning or late afternoon are the best times to work when temps are moderate.
What’s a good alternative if my red bush tree isn’t thriving after pruning?
If your tree struggles despite proper pruning, consider these low-maintenance alternatives with similar fruit benefits:
Tree Type
Why It Works
Aronia (Chokeberry)
Drought-tolerant, disease-resistant, and produces superfood berries with minimal pruning.
Elderberry
Fast-growing, thrives in poor soil, and handles heavy fruit loads with light annual pruning.
Serviceberry (Juneberry)
Adaptable to urban areas, produces edible fruits, and requires minimal shaping.
For a red bush tree lookalike, try crabapple varieties like ‘Centennial’—they’re ornamental, fruit-bearing, and prune-friendly!
Wrapping up and next steps
The red bush tree is a rewarding choice for gardeners seeking both beauty and bounty—its vibrant foliage and heavy fruit loads make it a standout. By mastering year-round pruning and understanding its unique growth habits, you’ll unlock its full potential.
Whether you’re trimming for shape, health, or harvest, consistency is key!
Ready to transform your garden? Start small—pick one season to refine your skills, then expand as you gain confidence. With patience and practice, your red bush tree will thrive, gifting you with lush branches and plentiful fruit for years to come. 🌿✨