
Pruning
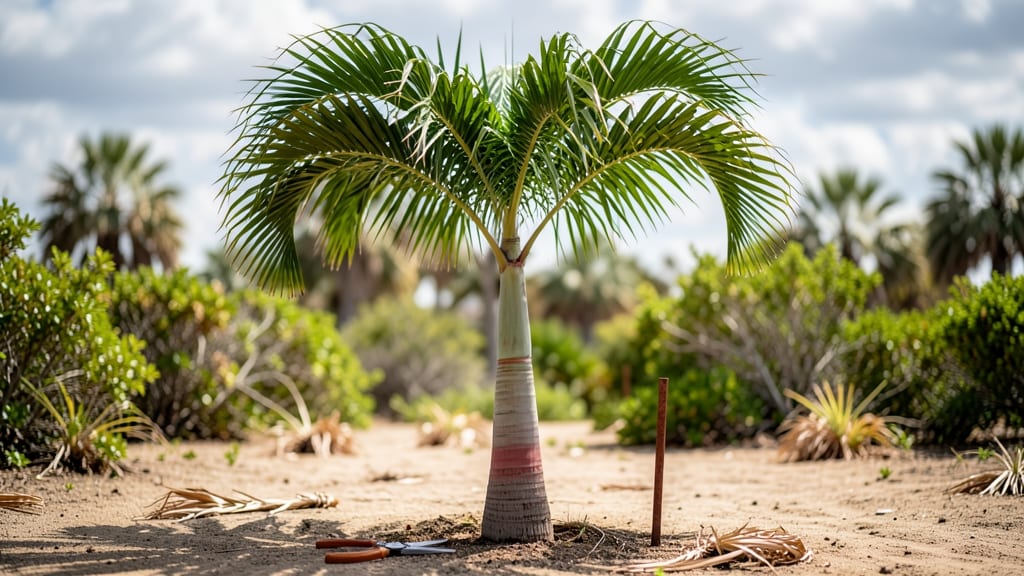
Pruning your red palm tree isn't just about shaping—it's about keeping it alive through Florida's brutal summers and sudden freezes. 🌿 I've watched these majestic trees go from lush and green to skeletal in just one cold snap, and the difference between thriving and struggling comes down to smart seasonal trimming.
The key is timing: prune dead fronds in early spring before new growth starts, remove yellowing leaves in summer, and protect the crown from frost damage in winter. You'll need sharp pruners, gloves, and a ladder—plus patience, because these trees grow fast and recover well when done right.
My first attempt left a messy stump, but now I know exactly where to cut to encourage fresh, vibrant fronds.
What you end up with is a palm that stays taller, healthier, and more resistant to pests—plus, it looks like it belongs in a tropical resort rather than your front yard. The fronds stay green longer, the trunk thickens, and you avoid that sad, half-dead look that screams "neglect."
Works for both young palms and mature giants, whether you're dealing with a single specimen or a whole landscape. Let's get those fronds trimmed the right way—before next season's heat hits.
📚 In This Guide
- What you need
- Instructions
- Tips and common mistakes
- Wrapping up and next steps
What you need
- ● Pruning shears or loppers: Sharp, bypass-style (for clean cuts), 16–24-inch blades (for thicker fronds). Sterilize with rubbing alcohol between cuts!
- ● Pole saw or extendable pruner: 6–12 feet long to reach tall fronds safely. Look for ergonomic grips for comfort.
- ● Heavy-duty gloves: Cut-resistant (e.g., mechanics’ gloves) to protect from sharp frond edges and sap.
- ● Safety glasses/goggles: ANSI-rated to shield eyes from debris.
- ● Ladder or lift: Sturdy, non-slip (e.g., extension ladder, 16+ feet) or a cherry picker for tall trees.
- ○ Disposable pruning bags: 2–3 large bags (20+ gallon capacity) for debris removal. Optional: Use a tarp under the tree to catch fallen fronds.
- ○ Pruning sealant (optional): Wound dressing (e.g., Tanglefoot Tree Wound Pruning Seal) for large cuts only if needed.
- ● Weather check: Prune on a dry, overcast day (avoid wind or rain).
- ● First aid kit: Include antiseptic wipes, bandages, and tweezers for sap-related irritations.
- ● Water & snacks: Hydration breaks are a must—this job’s physically demanding!
- ○ Helper (optional but helpful): A second pair of hands for holding the ladder or passing tools.
Step-by-Step guide to pruning your red palm tree
Here's the method I've used for years to keep palms vibrant and healthy.
🌿 Step 1: Assess the Tree for Pruning Needs
Start by examining your palm from all sides. Look for dead fronds—those that are completely brown and dry to the touch. These are your first targets. Healthy fronds have green undersides and feel slightly flexible when you run your hand along the stem. I always prune in the late winter or early spring, just before new growth begins.
Check the crown for yellowing or blackened fronds, which often signal disease or pest issues. If you spot these, note the location—you may need to address the root cause after pruning. Never prune more than one-third of the fronds at a time, as this can stress the tree.
✂️ Step 2: Gather Tools and Prepare for Pruning
You'll need a sharp pruning saw or loppers for thicker fronds and clean, sterilized pruning shears for finer cuts. I always disinfect my tools with rubbing alcohol between cuts to prevent spreading disease. Wear gloves and long sleeves—palm fronds can be razor-sharp, and the sap can irritate skin.
Lay down a drop cloth or tarp beneath the tree to catch falling debris. This makes cleanup easier and protects your lawn or patio. If your palm has hanging seed pods or fruit, remove these first—they can attract pests and weigh down the fronds.
🌱 Step 3: Remove Dead and Damaged Fronds
Begin by cutting dead fronds at the base, where the frond meets the trunk. Make a clean cut just above the brown, dry section—don't leave stubs, as these can rot. For larger fronds, use your pruning saw to avoid tearing the tissue. I always work from the bottom up to prevent damaging healthy fronds above.
If a frond is only partially dead (green on top, brown on bottom), leave it for now. Removing too much foliage at once can expose the trunk to sunburn, which is especially harmful to red palms. After cutting, inspect the trunk for any signs of rotting or pests—this is your chance to address hidden issues before they spread.
☀️ Step 4: Thin Out Overcrowded Fronds for Better Airflow
Even healthy fronds can block sunlight and airflow if they're too dense. Look for fronds growing too close together or those that are rubbing against each other. These are candidates for thinning. I aim to leave 3-4 inches of space between fronds to improve circulation and reduce humidity buildup in the crown.
When thinning, make your cuts just above a leaf joint or bud to encourage new growth. Avoid cutting into the trunk itself—palms don't heal like other trees, and open wounds can invite disease. If you accidentally nick the trunk, seal the wound with pruning sealant to protect it.
🪴 Step 5: Clean Up and Monitor Post-Pruning
After pruning, rake up all debris and dispose of it in the trash—never compost palm fronds, as they can harbor pests and diseases. Water the base of the tree deeply but gently to help it recover. Avoid overwatering, as soggy soil can lead to root rot, especially after pruning.
Keep an eye on your palm over the next 4-6 weeks. New fronds should emerge from the top of the trunk, and the remaining healthy fronds should look vibrant and upright. If you notice yellowing leaves or wilting, it could signal stress or an underlying issue—adjust your watering or check for pests.
Tips & tricks for perfect red palm tree pruning
A few key tricks will help you transform pruning from a chore into a maintenance routine that keeps your red palm looking stunning year-round.
Seasonal Timing Matters: The instructions mention pruning in late winter or early spring, just before new growth begins—and that's perfect timing. This gives your palm the full growing season to recover. I've learned the hard way that pruning during summer heat stress or winter dormancy can actually harm the tree. If you missed the ideal window, wait until the next seasonal transition rather than forcing it.
Tool Prep is Non-Negotiable: Sterilizing your tools between cuts (as mentioned in Step 2) prevents disease spread, but here's what nobody tells you—heat your pruning shears or saw blades over a flame for 10 seconds between cuts on infected fronds. The high heat kills pathogens instantly. For stubborn sap buildup, keep a small bottle of dish soap nearby to wipe blades clean during the process.
Visual Cues for Healthy Cuts: When making those clean cuts in Step 3, look for the telltale "V" shape where the frond meets the trunk. Cut just above this junction—this is where the frond naturally separates. If you see a smooth, white ring instead of a "V," that's a sign of old growth that's ready to come off. The key is to make cuts that look clean and precise, not jagged or torn.
Post-Pruning Recovery Hack: After cleaning up, mix a handful of compost (not palm debris) into the soil around the base. This provides gentle nutrients to help recovery. I also recommend applying a thin layer of mulch to retain moisture without suffocating the trunk. The 4-6 week monitoring period is crucial—this is when you'll spot any stress signals before they become major problems.
Pro Tips for Red Palm Tree
- A few key tricks will help you transform pruning from a chore into a maintenance routine that keeps your red palm looking stunning year-round.
- Seasonal Timing Matters: The instructions mention pruning in late winter or early spring, just before new growth begins—and that's perfect timing.
- The high heat kills pathogens instantly.
Frequently asked questions
Got questions about keeping your red palm tree lush and thriving? Here are some of the most common concerns—plus expert answers to keep your tree in top shape year-round!
When is the best time to prune a red palm tree?
The ideal window is late winter to early spring (just before new growth begins). Avoid heavy pruning in summer or fall, as this can stress the tree. Pro tip: If you spot dead fronds or pests, light trimming can happen anytime—but stick to the seasonal rule for major pruning!
How do I tell if my red palm tree needs pruning?
Watch for brown, dry fronds (dead leaves), yellowing fronds (nutrient deficiency), or overcrowded fronds blocking sunlight. Also, check for pests or fungal growth (like sooty mold). Prune only what’s necessary—over-trimming can harm the tree’s health!
Can I prune a red palm tree myself, or should I hire a pro?
Small tasks (removing dead fronds) are DIY-friendly with the right tools. But for large trees, high branches, or structural pruning, hire an arborist. Safety first! Red palms can grow 60+ feet tall—falling fronds or branches pose serious risks.
What should I do with the pruned fronds?
Dispose of diseased or pest-infested fronds in sealed bags (don’t compost!). Healthy fronds can be mulched (chopped into small pieces) or used as natural mulch around other plants. Bonus: Dry fronds make great crafting materials or fire starters!
How often should I fertilize after pruning?
Apply a balanced palm fertilizer (like 8-2-12) 2–3 months after pruning to support new growth. In hot climates, fertilize every 3–4 months; in cooler areas, twice a year suffices. Over-fertilizing can burn roots—always follow package instructions!
Wrapping up and next steps
Pruning your red palm tree isn’t just about aesthetics—it’s a year-round commitment to its health, resilience, and beauty! 🌿 By mastering seasonal trimming, you’ll ensure your tree thrives for decades, whether it’s removing dead fronds in winter or shaping it in spring. Remember: consistency is key—small, regular efforts yield the best results.
Ready to take the next step? Mark your calendar for your first trim this season—grab your tools, follow the guidelines, and watch your red palm tree flourish!
For extra confidence, join a local gardening group or consult a certified arborist to refine your technique. Your tree (and future garden guests!) will thank you. 🌟