
Trees
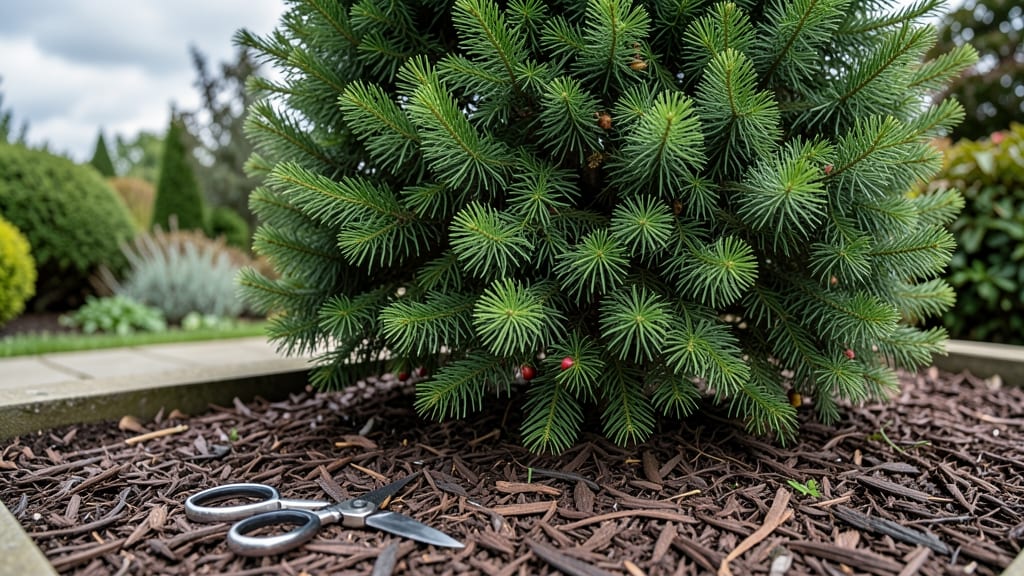
Shaping evergreen trees isn’t just about aesthetics—it’s about keeping them healthy and strong for decades. 🌲 I’ve learned that the right cuts make all the difference, whether you’re trimming a wind-swept pine or sculpting a formal topiary. The key is working with the tree’s natural growth patterns, not against them.
You’ll need sharp bypass pruners, a sturdy ladder, and a clear plan for where to cut. Evergreens like arborvitae, junipers, and pines respond best to pruning in late winter or early spring, before new growth starts.
Avoid heavy cuts in summer—they stress the tree and invite pests. With the right timing and technique, you’ll preserve that lush, full look without sacrificing health.
What you’ll end up with is a tree that looks intentional, not hacked. The branches will fill in evenly, the foliage will stay dense, and the tree will grow stronger over time.
The best part? You’ll skip the common mistakes—like over-pruning or cutting into old wood—that leave trees looking ragged or even dead.
This method works for both formal topiary and natural shaping, whether you’re trimming a small shrub or a towering pine. Let’s get started with the tools and techniques that make the difference between a good trim and a great one.
📚 In This Guide
- What you need
- Instructions
- Tips and common mistakes
- Wrapping up and next steps
What you need
- ● Pruning shears: Bypass pruners (for clean cuts on small branches, 5–7 inches long, with sharp, stainless steel blades).
- ● Loppers: Bypass or anvil style (for medium branches, 8–12 inches long, with a comfortable grip).
- ● Pruning saw: Curved-tooth or folding saw (for thick branches, 10–14 inches long, with a sharp, durable blade).
- ● Hand pruners: Anvil-style (for quick cuts on small twigs, 4–6 inches long).
- ● Rubbing alcohol or disinfectant wipes: 70% isopropyl alcohol (to sterilize tools between cuts and prevent disease spread).
- ● Gloves: Heavy-duty, cut-resistant (to protect hands from thorns, sap, or sharp tools).
- ● Ladder or step stool: Sturdy, non-slip (for reaching higher branches safely—ensure it’s rated for your weight).
- ● Tarp or drop cloth: Waterproof, 6x8 feet (to collect debris and protect the ground below).
- ● Pruning sealant: Tree wound dressing (for large cuts to reduce sap loss—use sparingly or skip for most evergreens).
- ● Pole saw: Extendable, 4–6 feet (for high branches without a ladder).
- ● Magnifying glass: 10x magnification (to inspect small buds or pests up close).
- ● Notebook & pencil: (to sketch your tree’s shape or track pruning progress).
- ● Safety glasses: (to shield eyes from debris or sap splashes).
Step-by-step guide to pruning evergreens for natural beauty
Here’s how to shape evergreens while keeping them healthy and thriving.
✂️ Step 1: Plan Your Cuts for Seasonal Timing
Evergreens respond best to pruning in late winter or early spring, just as new growth begins. This timing lets you shape the tree without stressing it during dormancy or summer heat. Avoid pruning in fall—it encourages tender new growth that won’t survive winter frosts.
Take a step back and study the tree’s natural shape. Look for areas where branches cross, rub together, or grow inward—these are prime candidates for removal. Use a sharp pair of pruning shears to make clean cuts just outside the branch collar (the swollen area where the branch meets the trunk). This ensures faster healing and prevents disease.
🌿 Step 2: Thin Out Overcrowded Branches
Start by removing 10-20% of the tree’s total volume at most—never take more than a third in one season. Focus on thinning branches from the inside out, letting light and air reach the center. This prevents dense, shaded growth that weakens the tree over time.
Use the branch collar method: Identify the branch you’re removing, then make your cut just outside the collar at a 45-degree angle if the branch is thicker than ½ inch. For thinner branches, a straight cut works fine. Avoid leaving stubs—this invites rot and pests. Step back after each cut to check the balance of the tree.
☀️ Step 3: Shape the Outer Canopy Gently
For a more refined look, lightly trim the outer edges of the tree to encourage fuller growth. Use hand pruners for branches under ¼ inch thick and loppers for thicker branches. Never cut more than ¼ of the branch’s length at once—this stresses the tree and can lead to dieback.
Here’s the thing—evergreens like pine, spruce, or fir grow best when you prune gradually. Avoid heavy shearing (the "buzz cut" look), which weakens the tree and encourages unsightly regrowth. Instead, focus on selective pruning to maintain the tree’s natural silhouette. If you’re unsure, leave it—better to prune too little than too much.
💧 Step 4: Clean Up and Monitor for Health
After pruning, sterilize your tools with rubbing alcohol to prevent spreading disease. Remove all clippings from the area—never leave them beneath the tree, as they can harbor pests and fungi. Water the tree deeply if the weather has been dry, helping it recover faster.
Watch for signs of stress in the weeks after pruning: yellowing needles, wilting, or excessive sap flow. These can signal over-pruning or disease. If you see new growth emerging from the base of the tree, that’s a good sign—it means the tree is healing well. For the next few years, give the tree a light touch with minimal pruning to let it recover fully.
Tips & tricks for perfect evergreen tree shaping
Confession: I skipped the seasonal timing step for years and wondered why my evergreens never looked healthy after pruning. Here's what nobody tells you—
Seasonal Timing Secret: Late winter or early spring is non-negotiable for evergreens like pine, spruce, or fir. This is when the tree is just waking up from dormancy, making it far more resilient to pruning. I've learned the hard way that fall pruning creates tender new growth that freezes in winter—don't make my mistake! If you must prune in summer, do it early in the season before extreme heat sets in.
The Branch Collar Method: In Step 2, when you're making those critical cuts just outside the branch collar, here's the thing: the angle matters. For branches thicker than ½ inch, that 45-degree cut isn't just aesthetic—it helps water run off properly and prevents disease entry points. I always test my angle by imagining rain running down the trunk. For thinner branches, straight cuts work fine, but always cut cleanly without leaving stubs. That little detail makes all the difference in healing.
Canopy Shaping Strategy: When shaping the outer edges in Step 3, think of your tree like a haircut—you want layers, not a flat top. Never remove more than ¼ of any branch's length at once. I've seen people take aggressive cuts and end up with sad, leggy trees that never recover. Instead, focus on selective pruning that maintains the natural silhouette. If you're unsure about a cut, step back and ask: "Does this maintain the tree's natural beauty?" If not, leave it.
Post-Pruning Care: After you've finished, don't just walk away. Sterilizing your tools with rubbing alcohol takes 30 seconds but prevents spreading disease between trees. I've seen entire gardens ruined by contaminated pruners. Also, water deeply if your area has been dry—this helps the tree recover faster. Think of it as giving your tree a drink after a workout.
Pro Tips for Shaping Evergreen Trees
- Confession: I skipped the seasonal timing step for years and wondered why my evergreens never looked healthy after pruning.
- Seasonal Timing Secret: Late winter or early spring is non-negotiable for evergreens like pine, spruce, or fir.
- The Branch Collar Method: In Step 2, when you're making those critical cuts just outside the branch collar, here's the thing: the angle matters.
Frequently asked questions
Got questions about shaping evergreen trees while keeping them healthy and beautiful? Here are some common ones—and their answers—to help you prune with confidence!
What’s the best time of year to prune evergreen trees?
The ideal window is late winter to early spring (just before new growth starts). Avoid heavy pruning in fall—it can stress trees before winter. For mild climates, light shaping in summer is okay, but avoid extreme heat. Pro tip: Prune when the tree is dormant for cleaner cuts and faster healing!
Can I shape evergreens like topiary, or will it harm them?
Yes, but go slow! Evergreens like yews, junipers, and arborvitae handle shaping well, but avoid cutting more than 25% of the foliage in one season. Use sharp tools and never remove the leader (top growth)—it’s crucial for the tree’s health. Start with gentle curves to mimic natural growth patterns.
Why are my evergreen branches turning brown after pruning?
Brown tips or branches can mean over-pruning, disease, or drought stress. If it’s new cuts, trim just above a healthy bud or branch collar. For widespread browning, check for pests (like spider mites) or adjust watering. Fix it: Apply a light mulch and water deeply. Most evergreens recover in a season if the roots stay healthy!
Are there chemical-free alternatives to shaping evergreens?
Try natural shaping techniques like:
- Thinning cuts: Remove entire branches at the base for airflow.
- Heading back: Trim just above a bud to encourage bushier growth.
- Weighted branches: Use soft ties (not wire) to guide growth temporarily.
How do I know if I’ve pruned too much?
Watch for these red flags:
- Excessive sap oozing from cuts (seal with pruning sealant if needed).
- Yellowing needles or defoliation (sign of stress).
- Stunted new growth in spring.
Wrapping up and next steps
Shaping evergreen trees isn’t just about aesthetics—it’s about nurturing their health and longevity while keeping their natural beauty intact. By mastering the right pruning techniques, timing, and tools, you can transform your trees into stunning, sustainable landscapes that thrive for years.
Whether you’re trimming for shape, removing dead branches, or encouraging new growth, every cut is a step toward a stronger, more vibrant tree.
Ready to take the next step? Start small—pick one tree and practice your skills. Over time, you’ll gain confidence and see the transformative power of thoughtful pruning. Happy shaping! 🌿✂️