
Pruning
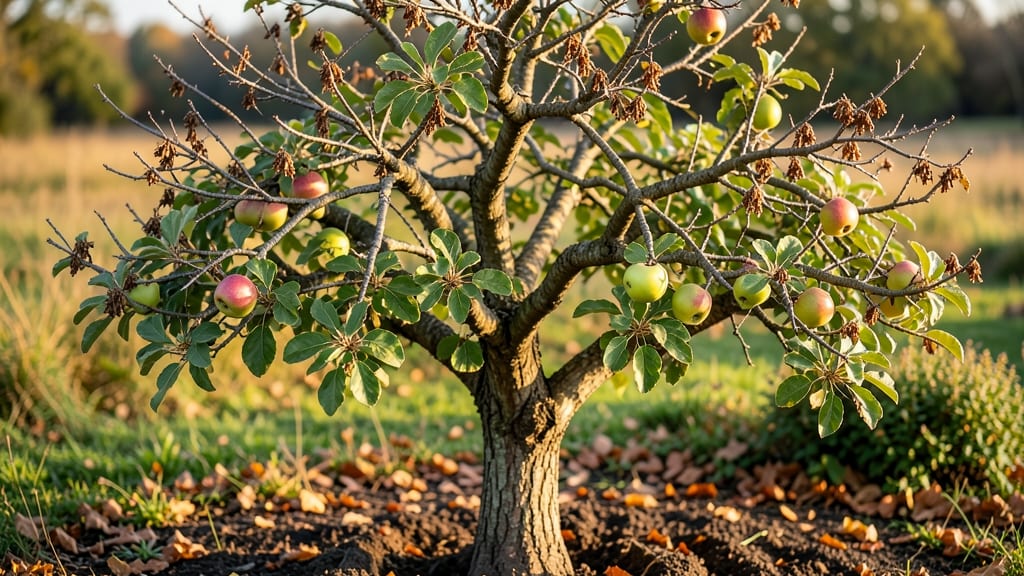
The apple tree growth stages begin the moment you plant that tiny seed or sapling—each phase shapes the future of your harvest. 🌱 I remember my first tree, a stubborn little thing that took three years just to reach waist height, but knowing what to expect made all the difference.
The journey from seedling to fruit-bearing giant isn’t just about time; it’s about understanding when to prune, how much water to give, and why some branches should never see a knife.
First comes the seedling stage, where roots establish deep and the trunk strengthens. This can take 1-3 years, depending on soil and care—think of it as your tree’s foundation. Then comes juvenile growth, where branches spread but no fruit appears yet.
Pruning here is gentle: remove only dead wood and compete branches. Skimp on water now, and you’ll stunt growth forever. The real magic happens in maturity (years 4-6), when buds form, then blossoms, then—finally—fruit. That’s when your trimming blueprint becomes critical.
By year 5, you’ll see heavy harvests if you’ve pruned correctly: open centers for airflow, angled cuts to heal properly, and winter cuts to shape the tree. The payoff? Juicy apples that ripen in late summer, not bitter crabapples.
Every cut you make now determines how many bushels you’ll pick in five years. The best part? Once established, apple trees need less care—just annual pruning and occasional thinning of fruit to avoid overburdening branches.
This works for standard-sized trees in zones 4-8, but dwarf varieties speed up the process by half. Whether you’re growing from seed or buying a grafted sapling, the stages stay the same—just the timeline shifts.
Let’s break down each phase so you know exactly what to watch for, when to intervene, and how to avoid common pitfalls that waste years of growth.
📚 In This Guide
- What you need
- Instructions
- Tips and common mistakes
- Wrapping up and next steps
What you need
- ● Apple tree sapling or bare-root tree (choose disease-resistant varieties like Honeycrisp or Fuji for optimal growth).
- ● Pruning shears (bypass pruners, sharp and sterilized with rubbing alcohol).
- ● Loppers (for thicker branches, 8-10 inch cutting capacity).
- ● Hand saw (pruning saw with fine teeth for clean cuts on larger branches).
- ● Grafting tools (if propagating, include a grafting knife and sealing wax).
- ● Gloves (heavy-duty, cut-resistant for protection).
- ○ Pruning sealant (optional but helpful for large wounds to prevent disease).
- ● Well-draining soil (mix topsoil, compost, and sand in equal parts for young trees).
- ● Organic mulch (3-4 inches of wood chips or straw to retain moisture).
- ● Fertilizer (balanced 10-10-10 NPK for planting; switch to low-nitrogen like 5-10-10 after establishment).
- ● Staking materials (if needed: 2-3 wooden stakes and soft tree ties).
- ● Tree sprayer (for neem oil or copper fungicide to prevent pests/diseases).
- ● Drip irrigation system (automates watering for consistent moisture).
- ● Soil pH test kit (aim for 6.0-7.0; amend with lime or sulfur if needed).
- ● Bird netting (to protect blossoms/fruit from wildlife during harvest season).
Step-by-step seasonal trimming guide for apple trees
Here's how to shape your tree through each season for stronger growth and bigger harvests.
🌱 Step 1: Late Winter Dormant Pruning (Before Bud Break)
Wait until late winter when the tree is still dormant but just before buds swell—this is your 3-4 week window before spring growth begins. I always prune in dry, calm weather to prevent disease spread. Start by removing dead, diseased, or crossing branches first; these are the easiest to spot against bare wood.
Next, cut back last year's growth by about one-third on all branches. Make clean cuts at a 45-degree angle just above an outward-facing bud. This encourages new growth to spread outward rather than inward. You'll see the buds clearly now—they look like tiny, plump knobs along the branches.
For young trees under 5 years old, focus on establishing a strong central leader and scaffold branches. Older trees need structural pruning to open the canopy for sunlight penetration. Real talk: if you see water sprouts (those fast-growing vertical shoots), cut them out completely—they drain energy from fruit production.
☀️ Step 2: Summer Light Pruning (After Flowering)
About 6-8 weeks after flowering, when fruit is pea-sized, do a second light pruning to improve air circulation. Remove any suckers (shoots growing from the base) and water sprouts you missed earlier. These compete with fruit production and weaken the tree's structure.
Look for branches that are rubbing against each other—these create wounds where disease can enter. Thin out some of the fruit clusters too if they're too dense; aim for 6-8 inches between clusters on mature trees. This ensures each apple gets proper nutrients and sunlight.
Here's the thing—summer pruning is gentler. You're not shaping the tree's structure anymore, just maintaining it. Use sterilized pruners to make small cuts, and avoid removing more than 10% of the foliage at once. You'll know you're doing it right when you see more sunlight reaching the center of the canopy.
✂️ Step 3: Post-Harvest Cleanup (Fall)
After harvest, when leaves start turning but before they fall, do a final cleanup. Remove all fallen fruit from the ground within a 10-foot radius—this prevents pests and diseases from overwintering. Rake up leaves too, especially if your tree had any signs of fungal issues like apple scab.
Now's the time to thin out any weak, diseased, or overcrowded branches. Make your cuts just outside the branch collar (that swollen area where the branch meets the trunk). Avoid cutting into the collar itself—this is where the tree heals from. You'll notice some branches look thinner or have fewer leaves; these are the ones to remove.
I always do a final check for any remaining fruit that might have missed the harvest. Even one forgotten apple can harbor codling moth eggs over winter. This is the moment that matters: a clean workspace means fewer pests next spring and healthier growth.
⏰ Step 4: Winter Preparation (Late Fall)
When temperatures drop below 32°F, protect young trees with tree wrap or burlap if your climate gets particularly harsh. Older trees usually handle winter well, but wrapping prevents sunscald on the south side of the trunk. Apply the wrap loosely—too tight and you'll damage the bark.
Now's also the time to plan your spring pruning. Walk around your tree and visualize where you'll make cuts. Sketch a quick diagram if needed. Pay special attention to branches that grew too vigorously last season—they'll need the most attention in late winter. You'll see which branches need thinning by how they're angled; ideal branches grow at a 45-60 degree angle from the trunk.
Don't skip this step. I learned the hard way that skipping winter prep leads to more aggressive summer regrowth, which makes next year's pruning much harder. A little planning now saves hours of work later—and keeps your tree healthier for decades.
Tips & tricks for perfect apple tree growth stages
These practical insights will help you master seasonal pruning like a seasoned orchardist.
Timing is Everything: That 3-4 week window before bud break in late winter is your golden opportunity. I've missed it twice—once too early when buds were still tight, and once too late when they'd already swollen. The key is watching the weather: if you see buds starting to plump up, you're running out of time. A quick check with your thumb—if buds feel firm but haven't swollen yet, you're good to go.
Branch Angle Matters: When making cuts at a 45-degree angle above outward-facing buds, visualize the tree's future shape. The 45-60 degree angle for ideal branches isn't just arbitrary—it creates the perfect balance between sunlight exposure and structural stability. I always sketch a quick diagram before cutting to visualize how each branch will contribute to the tree's architecture. This prevents that "windblown" look where branches all grow in one direction.
Equipment Essentials: Sterilized pruners aren't optional—they're your best defense against spreading disease. I keep a bottle of rubbing alcohol handy to wipe down blades between cuts, especially when moving from diseased to healthy branches. For larger branches, invest in a quality pruning saw with a curved blade—it makes clean cuts without tearing the bark. And always carry a small bag to collect your prunings; they make great mulch or compost.
Seasonal Checklist: Create a simple seasonal checklist to track your pruning schedule. Mark the 6-8 weeks after flowering for summer pruning, the 10-foot radius cleanup after harvest, and the 32°F temperature trigger for winter protection. I keep mine on my fridge door with a red marker to highlight completed tasks. This visual reminder prevents me from skipping crucial steps, especially when I'm busy during harvest season.
Pro Tips for Apple Tree Growth Stages
- These practical insights will help you master seasonal pruning like a seasoned orchardist.
- Timing is Everything: That 3-4 week window before bud break in late winter is your golden opportunity.
- Branch Angle Matters: When making cuts at a 45-degree angle above outward-facing buds, visualize the tree's future shape.
Frequently asked questions
about apple tree growth stages—because even expert gardeners have questions! Here’s what you need to know to keep your tree thriving.How long does it take for an apple tree to bear fruit after planting?
Most apple trees take 3 to 5 years to produce fruit after planting, depending on the variety and growing conditions. Dwarf varieties may fruit sooner (2–3 years), while standard trees can take up to 7 years. Patience is key—focus on proper care during the early growth stages to speed up fruiting.
Can I prune an apple tree in winter? If so, when is the best time?
Yes! Winter pruning (late November to early March) is ideal because the tree is dormant, making it easier to see the structure and reduce disease risk. Avoid pruning during extreme cold or when snow is forecasted. Pro tip: Use clean, sharp tools and disinfect them between cuts to prevent bacterial spread.
Why are my apple tree’s leaves yellowing, but there are no apples?
Yellowing leaves without fruit could signal nutrient deficiencies (like nitrogen or iron), overwatering, or pests/diseases (e.g., apple scab or aphids). Check the soil pH (ideal: 6.0–6.5) and fertilize if needed. If pests are the issue, apply organic sprays like neem oil early in the season to protect blossoms and leaves.
Should I remove all the suckers growing from the base of my apple tree?
Not necessarily! Suckers (shoots from the roots) can be removed, but some may be beneficial if they’re healthy and vigorous. Thin them out to redirect the tree’s energy toward fruit production. Pro tip: Leave 1–2 suckers if your tree is young or struggling—just prune them back to encourage stronger growth higher up.
What’s the difference between summer and winter pruning for apple trees?
| Winter Pruning | Summer Pruning |
|---|---|
| Done in dormant season (Dec–Feb). Focuses on structure and removing dead/diseased wood. | Done after harvest (June–August). Targets water sprouts and shapes the tree for airflow. |
| Reduces disease risk (fewer open wounds). | Encourages fruiting spurs and controls growth. |
Key rule:
Never prune in late fall (risk of frost damage) or during active blooming (hurts fruit set).
Wrapping up and next steps
Understanding the apple tree growth stages and the art of seasonal pruning is your golden ticket to a bountiful harvest! 🍏 From dormant winter cuts to summer thinning, each step ensures your tree thrives—strong, healthy, and ready to reward you with delicious fruit.
Now that you’re armed with the knowledge, it’s time to grab those pruners and get growing!
Ready to take the next step? Start with a single branch this season, observe how your tree responds, and gradually refine your technique. Happy pruning—your future apple pies are waiting! 🍂✨