
Pruning
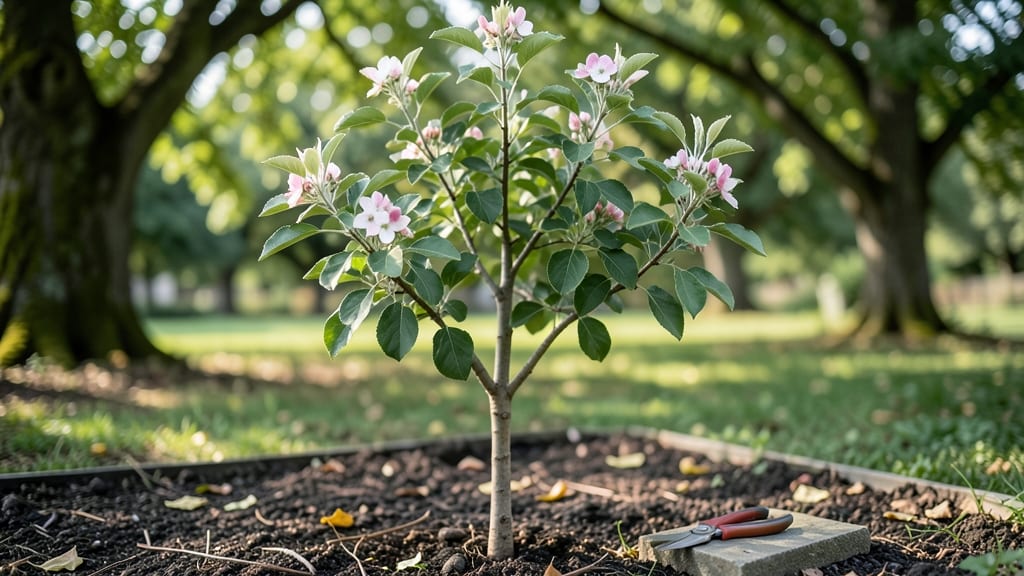
Planting a baby apple tree means betting on decades of harvests—if you get the early years right. 🌱 The first three seasons set the foundation for strong branches, disease resistance, and the ability to handle heavy fruit loads later.
I learned this the hard way when my first tree developed weak crotches and split under winter snow.
Start with the right location: full sun, well-draining soil, and protection from strong winds. A 5-gallon container tree needs a hole twice as wide as its root ball, while bare-root varieties should go in during dormancy.
Water deeply right after planting, then keep the soil moist but never soggy for the first 60 days. This prevents root rot while encouraging deep root growth.
Pruning in the first year isn’t about shaping—it’s about removing suckers and crossing branches that could weaken the tree. By year three, you’ll start thinning to improve airflow, which cuts down on fungal diseases.
The payoff? A sturdy framework that supports 50+ pounds of fruit per tree by maturity, without snapping under the weight.
Seasonal care shifts with the tree’s needs: winter mulching protects roots, spring fertilizing kickstarts growth, and summer watering keeps fruit from shrinking. Even in small spaces, a dwarf variety can thrive with these basics. Let’s build that strong foundation together.
📚 In This Guide
- What you need
- Instructions
- Tips and common mistakes
- Wrapping up and next steps
What you need
- ● Baby apple tree: Choose a dwarf, semi-dwarf, or standard variety (e.g., ‘Honeycrisp,’ ‘Fuji,’ or ‘Granny Smith’). Ensure it’s disease-resistant and suited to your USDA hardiness zone.
- ● Planting site: Full sun (6–8+ hours/day).
- ● Well-draining soil (pH 6.0–7.0).
- ● Space: 10–15 ft apart for standard trees; 6–8 ft for dwarfs.
- ● Soil amendments: Compost (5–10 gallons) or aged manure to improve fertility.
- ● Fertilizer: Slow-release 10-10-10 or organic options like fish emulsion or cottonseed meal (follow package rates).
- ● Mulch: 2–3 inches of wood chips or straw (keep 6 inches away from the trunk).
- ● Watering tools: Hose with soaker nozzle or drip irrigation.
- ● Watering can (for young seedlings).
- ● Pruning tools: Bypass pruners (for 1/4-inch stems).
- ● Loppers (for 1/2-inch branches).
- ● Saw (for thicker branches, if needed).
- ○ Pruning sealant: Optional tree wound paint (controversial but useful for large cuts).
- ● Support: Stake (1-inch diameter) + tree tie (for young trees in windy areas).
- ● Tree guards: Plastic or metal tree collars to protect from critters.
- ● Pest control: Neem oil spray or horticultural oil for early pest prevention.
- ● Soil tester kit: To check pH and nutrient levels annually.
- ● Grafting tools: If you plan to graft your tree later (knife, grafting tape).
Step-by-step guide to cultivating a healthy baby apple tree
Here's how to nurture a sturdy young apple tree through its first critical years.
🌱 Step 1: Plant in the Right Spot with Proper Soil Preparation
Choose a location with full sun exposure (at least 6-8 hours daily) and well-draining soil. Apple trees thrive in slightly acidic soil (pH 6.0-6.5). If your soil is heavy clay, amend it with 2-3 inches of compost mixed into the top 12 inches of soil before planting.
Dig a hole twice as wide as the root ball but only as deep as the container. This prevents burying the graft union (visible as a swollen area near the base) too deeply, which can cause disease. Gently loosen the roots if they're circling the root ball—this encourages outward growth.
Place the tree in the hole, backfill with native soil, and water deeply to eliminate air pockets. The soil should settle 1-2 inches—add more if needed. Mulch with 3-4 inches of organic mulch (like wood chips) in a 3-foot diameter circle, keeping it 6 inches away from the trunk to prevent rot.
☀️ Step 2: Establish a Watering and Fertilizing Routine
Water your baby apple tree deeply once a week during the first growing season, providing 1-2 gallons depending on soil dryness. Check moisture by pushing your finger 2 inches into the soil—if it feels dry, it's time to water. Overwatering suffocates roots, so avoid soggy conditions.
Fertilize in early spring with a balanced 10-10-10 fertilizer (about ½ cup per year of tree age). Spread it evenly in the root zone and water it in. Avoid high-nitrogen fertilizers—they promote leafy growth at the expense of fruit development. In late summer, switch to a low-nitrogen, high-phosphorus fertilizer (like 5-10-10) to support root and flower bud formation.
Real talk: If leaves yellow between veins, it’s likely iron chlorosis—a common issue in alkaline soils. Apply chelated iron in early spring to correct this.
✂️ Step 3: Prune for Structure and Airflow
Prune your baby apple tree in late winter or early spring before buds swell. Remove any dead, diseased, or crossing branches first—these compete with healthy growth. Cut back to the bud or branch collar (the swollen area where the branch meets the trunk) to prevent stubs that invite rot.
Open the center of the tree by removing suckers (vigorous shoots from the base or trunk) and water sprouts (fast-growing vertical shoots). Aim for an open vase shape with well-spaced branches—this ensures sunlight and air circulate evenly, reducing disease risk. Never remove more than 25% of the tree’s foliage in one season.
Here’s the thing—if you see rubbery buds in spring, they’re likely silver leaf disease. Prune infected branches 6 inches below the lesion and sterilize tools with 70% rubbing alcohol to prevent spread.
🌿 Step 4: Protect and Monitor Through the Seasons
In early spring, apply tree wrap around the trunk if rabbits or deer are a threat. Wrap it 2-3 inches wide and remove it in late spring to avoid girdling the tree. For young trees, use a cage or fence to shield them from browsing animals.
Watch for aphids or mites on new leaves—these pests suck sap and weaken growth. Spray with neem oil (mixed per label) if you spot sticky residue (honeydew) on leaves. Avoid chemical sprays, as they can harm beneficial insects and residue may contaminate fruit later.
By fall, reduce watering as temperatures drop. Apply a 3-inch layer of mulch around the base (renewing annually) to insulate roots. If your region experiences freezing temperatures below 10°F, wrap the trunk with burlap or tree guard to prevent sunscald and cracking.
Tips & tricks for cultivating a healthy baby apple tree
Between us, these small adjustments can make all the difference in setting your young apple tree up for a lifetime of strong growth and abundant fruit.
Soil Testing is Non-Negotiable: While the instructions mention slightly acidic soil (pH 6.0-6.5), I can't stress enough how important it is to test your soil before planting. Many gardeners overlook this step—especially in regions with naturally alkaline soils. If your test shows pH above 7.0, amend with sulfur or peat moss to lower it gradually. The 2-3 inches of compost mentioned is a great start, but for heavy clay soils, consider adding sand or perlite to improve drainage. Poor soil conditions in the first year can stunt growth for years to come.
Watering Strategy Beyond the Basics: The once-weekly watering guideline works for average conditions, but your tree's actual needs depend on rainfall and soil type. I've seen many young trees suffer from both underwatering and overwatering. Here's my trick: After your initial deep watering, check soil moisture every 3-4 days by pushing your finger 2 inches deep. If it's dry, water again—consistent moisture is more important than strict timing. For clay soils, you might need to water every 2-3 days, while sandy soils may require daily checks in hot weather. The key is keeping the root zone consistently moist but never soggy.
Fertilizer Timing and Placement: The instructions specify ½ cup of 10-10-10 fertilizer per year of tree age in early spring, which is perfect. But here's what nobody tells you—how you apply it matters just as much. Scatter the fertilizer in a ring pattern 6-12 inches away from the trunk (not directly against it) to encourage outward root growth. After applying, water thoroughly to help the nutrients penetrate the soil. I also recommend using a slow-release fertilizer in the second year to prevent nutrient spikes that can burn young roots. And remember: the late summer switch to 5-10-10 is crucial for preparing the tree for winter dormancy.
Pruning for Future Fruit Production: When pruning in late winter/early spring, focus on creating a framework that will support heavy fruit loads. The instructions mention removing dead branches and crossing branches—take this a step further by selecting 3-5 main scaffold branches spaced evenly around the trunk. These will become your tree's primary fruit-bearing limbs. Aim to have them emerge at 45-60 degree angles from the trunk for maximum strength. This structural approach prevents the common problem of weak crotches that can split under fruit weight later on. And always sterilize your pruning tools with 70% rubbing alcohol between cuts to prevent disease spread.
Pro Tips for Baby Apple Tree
- Between us, these small adjustments can make all the difference in setting your young apple tree up for a lifetime of strong growth and abundant fruit.
- Soil Testing is Non-Negotiable: While the instructions mention slightly acidic soil (pH 6.0-6.5), I can't stress enough how important it is to test your soil before planting.
- Watering Strategy Beyond the Basics: The once-weekly watering guideline works for average conditions, but your tree's actual needs depend on rainfall and soil type.
Frequently asked questions
Got questions about nurturing your baby apple tree? You’re not alone! Here are answers to the most common concerns—from pruning to pests and everything in between.
When should I prune a baby apple tree for the first time?
Prune your baby apple tree in late winter or early spring before buds swell—this encourages strong growth. Focus on removing dead, crossing, or crowded branches (about 25% of the tree’s total). Avoid heavy pruning in fall, as it can stress young trees and invite disease. Check our step-by-step guide for visual cues!
How do I know if my baby apple tree is getting enough sunlight?
Apple trees thrive in 6–8 hours of full sun daily. If leaves yellow (chlorosis) or growth stalls, it’s likely underlit. Move potted trees to sunnier spots or thin nearby shade trees. Pro tip: Morning sun + afternoon shade works for hot climates, but prioritize sun exposure for fruit production!
What are the most common pests for baby apple trees, and how do I treat them?
Watch for aphids, codling moths, and apple maggots—they’re sneaky! Start with neem oil or insecticidal soap for soft-bodied pests. For moths, wrap tree trunks with sticky bands in spring. Prevention: Keep grass short around the base and remove fallen fruit promptly to deter pests.
Can I grow a baby apple tree in a pot, and how long does it stay potted?
Yes! Use a 5-gallon container with drainage holes and well-draining soil. Most dwarf varieties (like ‘Columnar’ or ‘Semi-Dwarf’) stay potted for 2–3 years before transplanting. Key rule: Repot when roots circle the bottom—spring is the best time. Learn more about container pruning to avoid root-bound stress.
Why aren’t there any apples on my baby apple tree yet?
Patience is key! Most apple trees take 3–5 years to bear fruit, especially if grafted. Ensure it’s pollinated (plant two compatible varieties nearby) and fertilized with balanced 10-10-10 in early spring. Red flag: If it’s past 5 years with no fruit, check for poor pruning, disease, or incorrect variety.
What’s the best alternative if I can’t grow a traditional apple tree?
Try columnar apple trees (like ‘Greenstem Golden’)—they’re narrow, fruit early, and fit small spaces! Dwarf espalier varieties also work well for balconies or trellises. For instant gratification, consider apple bushes (e.g., ‘Columnar Honeycrisp’), which produce fruit in 1–2 years.
Wrapping up and next steps
Growing a baby apple tree into a thriving, fruit-bearing giant is a rewarding journey that combines patience, care, and a little know-how! 🌱 By mastering pruning techniques, understanding seasonal needs, and addressing common challenges, you’ll set your tree up for strong branches and bountiful harvests.
Remember, every trim and tip you follow today builds a healthier, happier tree tomorrow.
Ready to take the next step? Start small—pick one pruning task this week, whether it’s thinning crowded branches or shaping young growth. Over time, your efforts will pay off with juicy apples and a stunning backyard centerpiece. Happy growing! 🍏✨