
Pruning
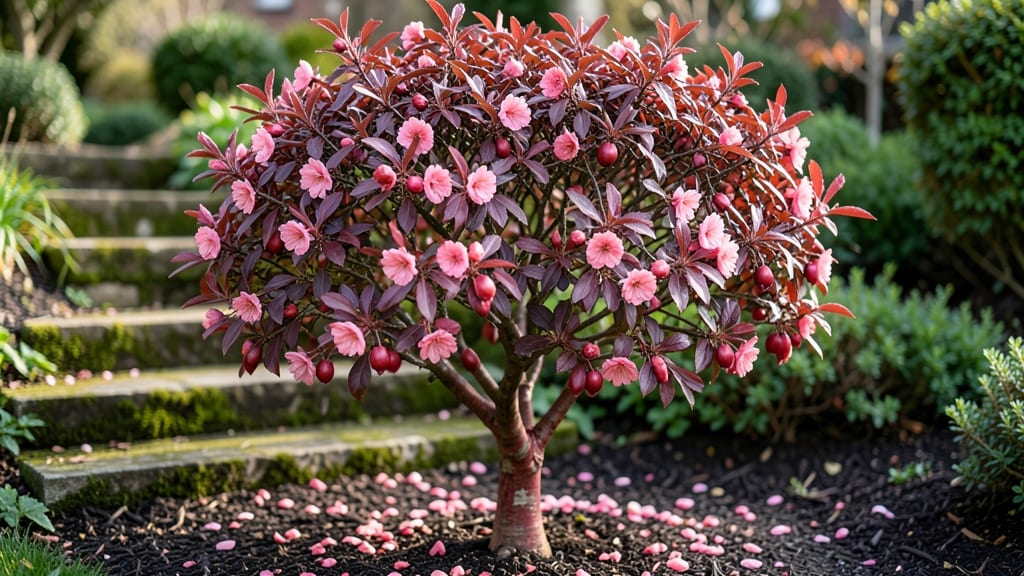
Your flowering red plum tree’s heavy blooms start with a single pair of pruners in winter. ✂️ I’ve trimmed mine every dormant season for five years, and the difference in spring flowers—pink, white, and blush—is nothing short of dramatic.
The key isn’t just cutting branches; it’s shaping the tree to focus its energy where it counts.
You’ll need sharp pruning shears, a ladder for higher branches, and a clear day to see the tree’s structure. The goal is to open the center for sunlight and air, remove dead wood, and encourage next year’s blossoms by cutting back last season’s growth.
Think of it like giving your tree a spa day before the growing rush begins.
By late winter, you’ll see fresh green shoots pushing from the pruned branches—proof the tree is waking up strong. Those buds will burst into hundreds of flowers by spring, and the tree’s dark purple foliage will keep the show going all summer.
The best part? This method works for young trees and mature ones alike.
For zones 5-9, time your trim right after the worst winter cold passes but before buds swell. If you’re in a warmer zone, wait until early spring. Either way, the payoff is a tree that looks like a cloud of blossoms every spring—no mystery fertilizers or fancy tricks required.
📚 In This Guide
- What you need
- Instructions
- Tips and common mistakes
- Wrapping up and next steps
What you need
- ● Pruning shears: Sharp, bypass-style shears (for clean cuts on small branches). Size: 6–8 inches.
- ● Loppers: For thicker branches (½–1½ inches). Look for: Long handles (20+ inches) and a ratchet mechanism for leverage.
- ● Pruning saw: Bow saw or pruning saw for branches thicker than 1½ inches. Blade type: Fine-toothed for clean cuts.
- ● Disinfectant: 70% isopropyl alcohol or rubbing alcohol (1 bottle) to sterilize tools between cuts.
- ● Gloves: Heavy-duty gardening gloves (cut-resistant, like mechanics’ gloves) to protect from thorns and debris.
- ● Ladder: Extension ladder (16–24 ft, depending on tree height) with non-slip feet and a sturdy platform.
- ● Safety gear: Safety glasses (ANSI-rated)
- ● Ear protection (if using a chainsaw for large branches)
- ● Long sleeves/pants (to avoid scratches from thorns)
- ○ Sealant: Pruning sealant (like Tanglefoot Tree Wound Pruning Seal) to coat large cuts (optional, but reduces disease risk).
- ● Marking twine: Colored twine to temporarily mark branches for removal (great for complex pruning plans!).
- ● Tree bag: A large canvas bag (50+ gallons) to collect pruned branches for composting or disposal.
- ● Work vest: With pockets to hold tools and supplies while you climb.
- ● Timing: Prune during dormant season (late winter/early spring, before buds swell). Check your USDA Hardiness Zone for exact timing!
- ● Weather: Choose a dry, calm day (no rain or wind for 24–48 hours before/after pruning).
- ● Tree health check: Inspect the tree for diseases (like silver leaf fungus) or pests before pruning. Treat if needed!
- ● Local regulations: Check if your area requires a permit for large-scale pruning (common in urban areas).
Step-by-Step guide to pruning a flowering red plum tree in dormancy
Winter's the perfect time to shape your plum tree for next year's stunning blooms.
✂️ Step 1: Gather Your Tools and Safety Gear
Start by grabbing your sharp pruning shears (for smaller branches) and pruning saw (for thicker stems over ½ inch in diameter). I always wear gloves—thorns on plum trees are no joke—and safety glasses to protect against flying debris. Disinfect your tools with rubbing alcohol to prevent spreading disease between cuts.
Here's the thing—you don't need fancy tools. A basic pair of bypass pruners works fine for most jobs, but make sure they're clean and sharp. Dull blades tear wood, inviting infections. I like to test my shears on a small branch first—if it doesn't cut cleanly, sharpen them before starting.
✂️ Step 2: Remove Dead, Diseased, or Crossing Branches First
Scan the tree for branches that are dead (no green bark when scratched), diseased (black spots, oozing sap), or rubbing against others. These take priority—remove them entirely at the branch collar (the swollen area where the branch meets the trunk). Cut just outside the collar at a 45-degree angle to prevent water from pooling.
I always work from the bottom up. Start with the lowest branches first—they're easier to see and reach. If you spot a branch growing straight up from the trunk, it's likely competing with the main leader and should come out. These vertical "water sprouts" steal energy from flowering wood.
✂️ Step 3: Thin the Canopy for Better Airflow
Next, focus on thinning the tree's interior. Remove about 20-25% of the branches, targeting those that crowd the center or grow inward. Aim for an open vase shape that lets light penetrate to the inner branches—this encourages more blooms. Cut branches back to their origin point (where they fork from another branch or trunk).
Watch for branches that form a "V" shape with another—these often rub together during wind, creating wounds. Remove one of the branches entirely at the collar. You'll know you're doing it right when you can see light filtering through the center of the tree. This isn't about drastic cuts; think "open up the tree like a breath of fresh air."
✂️ Step 4: Shape the Outer Form Lightly
Now it's time for subtle shaping. Lightly trim the outer branches to maintain the tree's natural form, but avoid heavy cutting—plum trees bloom on old wood, so aggressive pruning reduces next year's flowers. Shorten branches by no more than ⅓ their length, and always cut just above a bud or lateral branch.
Look for branches that grow at sharp angles (less than 45 degrees) from the trunk—these are more likely to break in storms. If you must remove one, cut it back to a stronger lateral branch. Real talk: don't overthink the shape. A slightly uneven tree with good airflow will bloom better than a perfectly symmetrical one that's been over-pruned.
✂️ Step 5: Clean Up and Protect the Tree
After pruning, rake up all debris and dispose of it in the trash (never compost diseased branches). Apply a thin layer of mulch (2-3 inches) around the base, keeping it 6 inches away from the trunk to prevent rot. This protects roots from freezing and retains moisture. Water the tree deeply if the ground isn't frozen.
Here's where it gets fun—watch the tree's response over the next few weeks. You'll see fresh green growth at the cut ends by early spring, signaling the tree is healing. If you notice oozing sap or dark streaks at any cuts, disinfect your tools again and re-examine your technique. A little prevention now means fewer problems later.
Tips & tricks for perfect flowering red plum tree pruning
These simple tricks will help you prune your plum tree like a pro while keeping it healthy and blooming beautifully.
Tool Prep Matters: Before you start, test your pruning shears on a small branch to ensure they're sharp. Dull blades tear wood instead of making clean cuts, which invites disease. I like to use a small piece of scrap wood to sharpen my shears if they feel resistant—this prevents unnecessary damage to your tree. Remember, clean tools are happy tools!
Visual Cues for Better Cuts: In Step 2, when removing dead or diseased branches, look for the branch collar—the swollen area where the branch meets the trunk. This is your target spot for cutting. The 45-degree angle isn't just a rule; it prevents water from pooling at the cut, which can lead to rot. Think of it as creating a tiny roof that sheds water away from the wound.
Canopy Thinning Strategy: When thinning the canopy in Step 3, aim to remove branches that are growing inward or crossing others. You're not just making space—you're creating an environment where light can reach all parts of the tree. This encourages more blooms and healthier growth. If you're unsure about a branch, ask yourself: "Does this branch let light through to the center?" If not, it's likely a candidate for removal.
Mulch Placement Tip: In Step 5, when applying mulch, keep it 6 inches away from the trunk. This might seem like a small detail, but it's crucial for preventing rot. Too much mulch piled against the trunk can trap moisture, leading to fungal issues. Think of it as creating a protective donut around your tree, not a mound that smothers it.
Pro Tips for Flowering Red Plum Tree
- These simple tricks will help you prune your plum tree like a pro while keeping it healthy and blooming beautifully.
- Tool Prep Matters: Before you start, test your pruning shears on a small branch to ensure they're sharp.
- Visual Cues for Better Cuts: In Step 2, when removing dead or diseased branches, look for the branch collar—the swollen area where the branch meets the trunk.
Frequently asked questions
Got questions about your flowering red plum tree? You’re not alone! Here are some of the most common concerns—plus quick, expert-backed answers to keep your tree thriving and blooming beautifully.
When is the best time to prune a flowering red plum tree for maximum blooms?
The ideal window is late winter to early spring, just before buds swell (typically February–March in most U.S. zones). This timing ensures you remove dead wood without cutting off next year’s flower buds. Avoid pruning after blooms fade—new growth will prioritize leaves over flowers!
How much can I trim off without harming the tree?
For healthy flowering red plums, limit pruning to no more than 25% of the canopy per year. Focus on:
- Dead or crossing branches
- Suckers at the base
- Overcrowded growth
My red plum tree isn’t blooming as much as last year—what went wrong?
Heavy blooms depend on balanced pruning and dormancy care. Common culprits:
- Pruning after flowering (cuts off next year’s buds)
- Over-fertilizing with high-nitrogen (promotes leaves, not flowers)
- Pests/disease (like silver leaf fungus) stressing the tree
Can I shape a flowering red plum tree like an ornamental tree?
Yes! These trees respond well to light shaping, but avoid aggressive topiary. For a clean silhouette:
- Remove 1–2 main branches to open the center
- Thin out sparse areas to encourage dense blooms
- Use hand pruners for small branches; loppers for thicker stems
What’s a good alternative if my red plum tree struggles in my climate?
If your zone is too hot/cold or humid (red plums thrive in zones 5–9), consider:
- Japanese plum (Prunus salicina)
- Cherry blossom (Prunus serrulata)
- Apricot tree (Prunus armeniaca)
Wrapping up and next steps
Your flowering red plum tree is ready to reward you with a stunning spring spectacle—thanks to your careful dormant-season pruning! By removing dead wood, thinning crowded branches, and shaping for airflow, you’ve set the stage for healthier growth and breathtaking blooms. 🌸✨
Now’s the perfect time to step back and admire your progress. Next, keep an eye on your tree’s recovery in early spring, and don’t forget to schedule regular maintenance to keep those vibrant flowers coming year after year. Happy gardening!