
Propagation
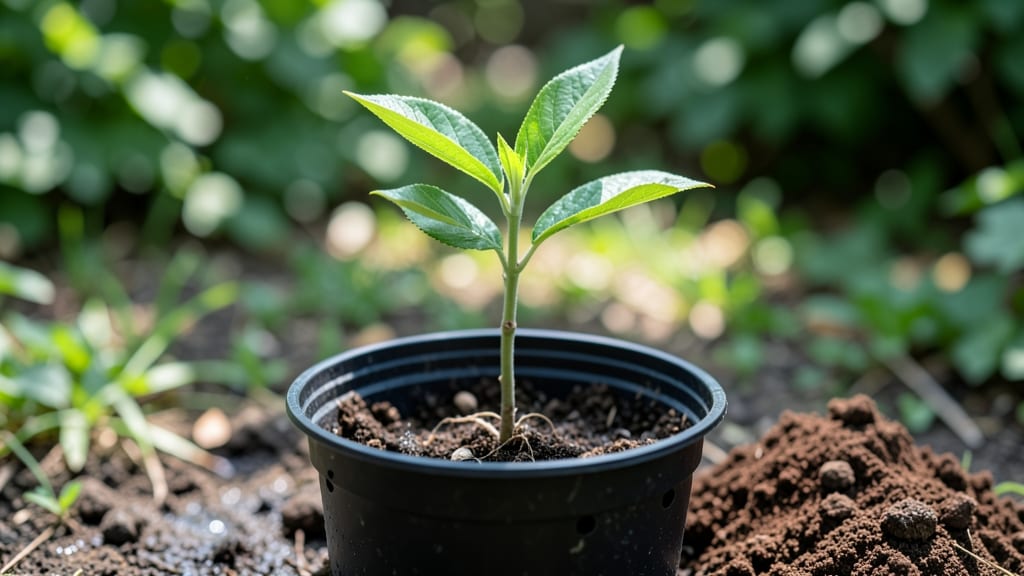
Growing a cherry tree from a pit is the kind of project that turns a simple snack into a decades-long lesson in patience—and the sweetest rewards you’ll ever taste. 🌱 I’ve tried it three times, and each attempt taught me something new about how nature works when you give it time.
The key isn’t just planting the pit; it’s understanding the hidden steps that turn a store-bought seed into a towering tree.
Here’s the thing—most store-bought pits won’t sprout, but when you pick the right variety and follow the cold stratification trick, your odds jump from near-zero to surprising. You’ll need a warm spot, a little soil, and the willingness to wait months before anything happens.
The first green shoot feels like magic after weeks of nothing.
By the time you see real leaves, you’ll have a tiny sapling that needs sunlight, space, and careful watering to survive its first winter. With the right care, that little tree could grow into a fruit-bearing giant in 10-15 years—though the first blossoms might not even produce edible cherries.
The journey is the point.
This method works best for sweet cherries, not tart ones, and your climate matters—cold winters help the tree develop properly. But the real payoff? A tree you grew from a single pit, standing tall in your yard, bearing fruit that tastes like childhood summers.
Let’s get those pits ready to grow.
📚 In This Guide
- What you need
- Instructions
- Tips and common mistakes
- Wrapping up and next steps
What you need
- ● Fresh cherry pit – From a sweet (not tart) cherry (e.g., Bing, Rainier, or Stella).
- ● Small pots or containers – 4–6 inches in diameter (2–3 required). Use well-draining soil mix.
- ● Well-draining potting soil – A mix of peat, perlite, and sand (or a cactus/succulent blend).
- ● Plastic wrap or humidity dome – To retain moisture during germination.
- ● Spray bottle – For gentle watering.
- ○ Refrigerator (optional but helpful) – For cold stratification (if skipping natural winter exposure).
- ● Grow lights or sunny windowsill – For early growth (6+ hours of light/day).
- ● Pruning shears – For shaping the seedling later.
- ● Seed-starting kit – Includes trays, labels, and clear domes for easier germination.
- ● Soil moisture meter – To avoid over- or under-watering.
- ● Fertilizer (balanced, 10-10-10) – Once the seedling sprouts true leaves.
- ● Mulch (straw or wood chips) – For outdoor planting later.
Step-by-Step instructions for growing a cherry tree from a pit
Here's how to nurture a seedling into a thriving tree—just give it time.
🌱 Step 1: Prepare and Plant the Cherry Pit
Start by selecting a fresh, plump pit from a sweet cherry—avoid dried or shriveled ones. Scrub off any remaining fruit flesh, then let it dry completely for 24 hours to prevent mold. I like to place the pit between two paper towels, dampen them slightly, and fold it into a small packet. Store this in a sealed plastic bag in the refrigerator for 4-6 weeks to simulate winter dormancy—this breaks dormancy and mimics natural conditions.
After cold stratification, plant the pit 1 inch deep in a small pot filled with well-draining potting mix. I use a 4-inch diameter pot for this, as it gives the seedling enough room to establish roots without drying out. Water lightly until the soil feels evenly moist but not soggy. Place the pot in a warm spot (65-75°F) with indirect light—like a sunny windowsill away from direct midday sun.
💧 Step 2: Wait for Germination and Early Growth
Germination can take 4-12 weeks, so patience is key. Keep the soil consistently moist—water when the top inch feels dry—but avoid soggy conditions, which can rot the seed. You'll know it's working when you see a tiny sprout break through the soil, usually within 6-8 weeks if conditions are ideal. Once the first true leaves (not the initial seed leaves) appear, move the pot to a sunnier spot with 4-6 hours of indirect light daily.
Here's the thing—cherry trees grown from pits are unpredictable. The resulting tree may not produce fruit identical to the parent, and it could take 5-10 years before it bears fruit if it does at all. But the journey is rewarding. Watch for signs of stress like yellowing leaves, which often means the pot is too dry or the light is insufficient. Adjust as needed, and keep the soil moist but well-drained.
☀️ Step 3: Transplant and Provide Long-Term Care
Once the seedling reaches 6-12 inches tall and has 4-6 true leaves, it’s ready for its first transplant. Choose a larger pot (8-10 inches wide) or a garden bed in a sunny location with full sun (6+ hours daily). If planting outdoors, wait until spring after the last frost—cherry trees are frost-sensitive when young. Dig a hole twice as wide as the root ball but only as deep as the container, then gently remove the seedling and place it in the hole. Fill around the roots with soil, firm it lightly, and water deeply.
Fertilize lightly with a balanced, slow-release fertilizer in early spring to encourage healthy growth. Cherry trees need well-draining soil and regular watering—about 1 inch per week during dry spells. Avoid overwatering, though; soggy soil leads to root rot. Prune any dead or crossing branches in late winter to shape the tree and encourage strong growth. Mulch around the base with 2-3 inches of organic mulch to retain moisture and regulate soil temperature.
⏰ Step 4: Protect and Monitor for Fruit Production
If your cherry tree survives its first few years, it’ll need extra care to reach fruiting age. Cross-pollination is often required for fruit production, so plant a second cherry tree nearby if possible—even if it’s a different variety. Watch for pests like aphids or borers, and treat them early with neem oil or insecticidal soap. Young trees are vulnerable, so protect them from late frosts in spring by covering them with frost cloth if temperatures dip below 28°F.
Real talk: Many homegrown cherry trees never produce fruit, or the fruit is small and tart. But if yours does, you’ll have the sweetest reward—knowing you grew it from a single pit. Keep an eye out for blooms in early spring, which signal the tree is maturing. With consistent care, your cherry tree could live for decades, providing shade and potential fruit for generations.
Tips & tricks for growing a cherry tree from a pit
Growing a cherry tree from a pit is all about patience—and these little tricks will help you avoid common pitfalls along the way.
Cold Stratification Secret: The 4-6 week cold stratification in Step 1 is non-negotiable for breaking dormancy. I've tried skipping it, and the pit just sat there—no sprouts. Place your pit in a sealed bag with a damp paper towel to maintain consistent moisture during this period. If you forget to refrigerate it, don't panic—just move it to a cool basement or garage (around 40°F) if your fridge isn't cold enough.
Germination Timeline: Those 4-12 weeks of waiting can feel endless, but the 6-8 week average gives you a realistic expectation. I track germination by marking the planting date on my calendar and checking daily for the first sign of green. If nothing appears after 12 weeks, your pit might not have been viable—don't give up, try another one!
Light Transition: The shift from indirect light in Step 1 to 4-6 hours of indirect light in Step 2 is crucial. I use a grow light on a timer for this phase since natural sunlight can be too intense. Watch for leaves that look pale or stretched—they're telling you it's time for more light, but gradually increase exposure to avoid shocking the young plant.
Transplant Readiness: Waiting until your seedling reaches 6-12 inches with 4-6 true leaves ensures it's strong enough for transplanting. I check root health by gently removing the seedling from its pot—if roots are circling tightly, it's definitely ready. When repotting, use a pot just 2-3 inches larger than the current one to prevent soil from staying too wet around the roots.
Pro Tips for Grow A Cherry Tree From A Pit
- Growing a cherry tree from a pit is all about patience—and these little tricks will help you avoid common pitfalls along the way.
- Cold Stratification Secret: The 4-6 week cold stratification in Step 1 is non-negotiable for breaking dormancy.
- Germination Timeline: Those 4-12 weeks of waiting can feel endless, but the 6-8 week average gives you a realistic expectation.
Frequently asked questions
How long does it take for a cherry pit to sprout?
A cherry pit can take anywhere from 2 weeks to 6 months to sprout, depending on temperature and moisture. Some pits even need a cold stratification period (like winter) to break dormancy. Don’t rush it—patience is key! If nothing happens after 6 months, the pit may not have viable seeds.
Do I need to refrigerate the pit before planting?
Yes! Cherry pits have a hard outer shell that requires cold stratification to soften. Place the pit in a damp paper towel, seal it in a plastic bag, and refrigerate for 4–8 weeks before planting. This mimics winter and helps trigger germination.
Can I grow a cherry tree from any cherry pit?
Not all cherry pits will grow true to the parent tree. Sweet cherries (like Bing or Rainier) are more likely to produce fruit, but sour cherries (like Montmorency) may not. If you want a guaranteed fruit-bearing tree, buy a grafted nursery sapling instead.
What if my sapling gets pests or diseases?
Young cherry trees are vulnerable to aphids, spider mites, and fungal issues like powdery mildew. Prevent problems by keeping the soil moist (not soggy), pruning for airflow, and using neem oil if pests appear. Avoid over-fertilizing, which weakens defenses.
Will my homegrown cherry tree produce fruit?
It’s possible—but not guaranteed! Many homegrown cherry trees from pits take 5–10 years to fruit (if they do at all). For faster results, choose a self-pollinating variety (like ‘Stella’ or ‘Lapins’) or plant two trees nearby. Cross-pollination boosts your chances of sweet, juicy cherries!
Still curious?
Drop your question in the comments—we’re happy to help!
Wrapping up and next steps
Growing a cherry tree from a pit is a rewarding journey that blends patience with the joy of nurturing life.
While it may take years to bear fruit, every step—from scarification to transplanting—teaches you the magic of nature’s cycle. Celebrate your progress! Once your sapling thrives, consider protecting it from pests or pruning for shape as your next steps toward a lush, fruit-bearing tree. 🌱✨