
Pruning
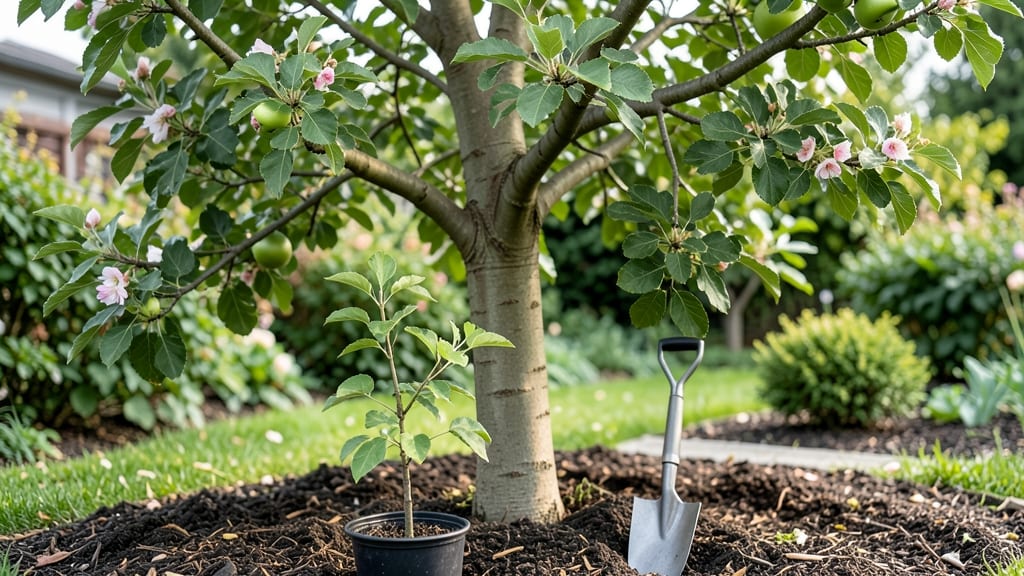
Growing an apple tree from scratch means you’ll soon be harvesting crisp, homegrown fruit straight from your yard—and it starts with the right seasonal trims.
I planted my first tree five years ago, and the difference between a neglected bush and a productive orchard comes down to pruning at the right times. The first cut shapes the tree’s future; every trim after that determines how heavy the harvest will be.
You’ll need a few basics: a dwarf or semi-dwarf variety (like Honeycrisp or Fuji) for smaller spaces, sharp pruning shears, and a clear plan for winter and summer cuts.
Most beginners skip the early pruning, thinking the tree will “figure it out”—but that’s how you end up with weak branches and sparse fruit. My tree now produces dozens of apples annually because I learned to thin out crowded limbs and open the center for sunlight.
By summer’s end, you’ll see the payoff: a sturdy tree with strong limbs bearing juicy, sun-ripened fruit instead of a tangled mess. The key is timing—prune in late winter to encourage new growth, then do light maintenance in summer to prevent overcrowding.
Even in small yards, this method works if you start with the right variety and tools.
This approach scales from urban backyards to rural orchards. Whether you’re growing from seed or buying a sapling, the principles stay the same: prune for sunlight, shape for strength, and thin for fruit. Let’s get your tree on the right path from day one.
📚 In This Guide
- What you need
- Instructions
- Tips and common mistakes
- Wrapping up and next steps
What you need
- ● Apple tree sapling or bare-root tree: Choose a variety suited to your climate (e.g., Honeycrisp, Fuji, or Granny Smith). For best results, opt for a 1- to 2-year-old tree from a reputable nursery.
- ● High-quality potting soil or compost: 3–5 gallons (for container growing) or enough to fill a planting hole (for in-ground planting).
- ● Organic fertilizer: A balanced 10-10-10 or fruit-tree-specific blend (follow package instructions for application rates).
- ● Mulch: Wood chips or straw (2–3 inches thick) to retain moisture and suppress weeds.
- ● Drip irrigation system or hose with a gentle spray nozzle: For consistent watering.
- ● Shovel or trowel: For digging planting holes (12–18 inches wide and deep).
- ● Pruning shears or lopping shears: Sharp, clean tools for trimming (sterilize with rubbing alcohol between cuts).
- ○ Grafting tape (optional): For securing grafts if propagating from cuttings.
- ● Garden gloves: To protect hands from thorns and soil.
- ○ Stake and ties (optional): For young trees in windy areas.
- ● Sunlight: A location with at least 6–8 hours of direct sunlight daily.
- ● Well-draining soil: Test soil pH (ideal range: 6.0–7.0). Amend with compost if needed.
- ● Space: Mature apple trees need 15–20 feet of spacing (or 6–8 feet for dwarf varieties).
- ● Patience: Apple trees take 3–5 years to bear fruit!
Step-by-Step guide to planting and pruning an apple tree for heavy fruit production
Here's how to establish a thriving apple tree that bears abundant, high-quality fruit year after year.
🌱 Step 1: Choose and Plant Your Apple Tree
Start with a dwarf or semi-dwarf variety suited to your climate zone—these produce fruit faster and are easier to manage than standard-sized trees. Plant in early spring or fall, when temperatures are mild but not extreme. Dig a hole twice as wide as the root ball but no deeper—this encourages roots to spread horizontally rather than stay compacted.
Place the tree so the graft union (the bump where the scion meets the rootstock) sits 2-3 inches above soil level. This prevents it from being buried too deep, which can cause rot. Backfill with native soil mixed with 2 inches of compost to improve drainage and fertility. Water deeply immediately after planting to settle the soil and eliminate air pockets around the roots.
Mulch the base with 3 inches of organic mulch (like wood chips or straw), keeping it 6 inches away from the trunk to prevent moisture buildup that could cause rot. This mulch layer helps retain soil moisture and regulates temperature—critical for young trees still establishing their root systems.
☀️ Step 2: Provide Optimal Growing Conditions
Apple trees need full sun—at least 6-8 hours daily—to set fruit properly. Choose a location with shelter from strong winds, which can damage branches and reduce fruit quality. If your tree is in a container, ensure the pot is at least 18 inches deep and has drainage holes to prevent root suffocation.
Water deeply once a week during the first growing season, aiming for 1-1.5 inches of water per week. You’ll know it’s enough when the soil feels moist 6 inches below the surface. Overwatering is just as harmful as underwatering—yellowing leaves or wilting can signal either problem. In hot climates, increase watering to twice weekly and monitor soil moisture daily.
Fertilize in early spring with a balanced, slow-release fertilizer (10-10-10 ratio) to support new growth. Spread ½ cup of fertilizer around the drip line (the edge of the tree’s canopy) and water it in. Avoid fertilizing in late summer or fall—this encourages tender new growth that won’t harden off before winter, making the tree vulnerable to cold damage.
✂️ Step 3: Prune for Structure and Fruit Production
Prune your apple tree twice a year: late winter/early spring (just before buds swell) and summer (after fruit has set but before harvest). Start by removing dead, diseased, or crossing branches—these compete for energy and can harbor pests. Use clean, sharp pruners to make cuts at a 45-degree angle just above a bud or lateral branch, which encourages healing and new growth.
In late winter, focus on structural pruning: open the center of the tree to allow sunlight and air circulation. Aim for an open vase shape with a strong central leader (main upright stem) and well-spaced branches. Remove suckers (shoots growing from the base or roots) and water sprouts (vertical shoots from the trunk or branches)—these drain energy from fruit production.
In summer, do light pruning to shape the tree and encourage fruiting spurs (short, stubby branches where fruit forms). Thin out excessive fruit clusters to 6-8 inches apart—this prevents overloading branches, which can lead to breakage. You’ll see small, green apples forming in early summer; leave only the healthiest ones to ensure quality harvests.
⏰ Step 4: Maintain Through the Seasons
In early spring, apply dormant oil spray to control overwintering pests like aphids and mites. This non-toxic treatment smothers eggs and larvae before they hatch. Follow up with neem oil if you spot signs of disease (like black spots on leaves) or pests (like tent caterpillars). Always apply sprays early in the morning or late afternoon to avoid burning leaves in direct sunlight.
During fruit development, monitor for apple scab and codling moths—common issues that can ruin harvests. Use organic copper fungicide for scab and pheromone traps for codling moths. Harvest apples when they easily detach from the tree and have reached full color. Leave a short stem attached to prolong shelf life and prevent bruising.
In fall, rake up and compost fallen leaves—they can harbor diseases and pests. Apply a 2-inch layer of mulch to insulate roots and retain moisture for next year’s growth. If your tree is young, consider wrapping the trunk with tree guard (a flexible plastic sleeve) to protect it from voles, rabbits, and sunscald during winter.
Tips & tricks for growing a fruitful apple tree
Here's what I've learned after years of growing apple trees—these small details make all the difference between a struggling tree and one loaded with fruit.
Root Ball Placement: When planting, don't just bury the root ball—position it so the graft union sits exactly 2-3 inches above soil level. I made the mistake of burying it deeper once, and the tree struggled for years with rot at the base. This simple adjustment ensures your tree develops properly from the start.
Pruning Timing Secret: The twice-yearly pruning schedule in Step 3 is crucial, but here's what nobody tells you: In late winter, focus on removing branches that grow inward to create that open vase shape. In summer, when you're thinning fruit clusters to 6-8 inches apart, also look for small, stubby fruiting spurs—they're where next year's apples will form. Preserve these, even if they're not bearing fruit yet.
Watering Wisdom: That 1-1.5 inches of water per week guideline works for most climates, but here's the trick: Water deeply and infrequently rather than light daily watering. I learned this the hard way when my tree's roots stayed near the surface, making it vulnerable to drought. Use a moisture meter to check 6 inches down—this is the real test of proper watering.
Fertilizer Placement: When you spread that ½ cup of fertilizer in early spring, don't just pile it at the base. Work it into the soil around the drip line—the outer edge of your tree's canopy. This is where new roots are actively growing, and they'll benefit most from the nutrients. I've seen trees with fertilizer piled at the trunk develop weak, shallow root systems.
Pro Tips for Make Apple Tree
- Here's what I've learned after years of growing apple trees—these small details make all the difference between a struggling tree and one loaded with fruit.
- Root Ball Placement: When planting, don't just bury the root ball—position it so the graft union sits exactly 2-3 inches above soil level.
- Pruning Timing Secret: The twice-yearly pruning schedule in Step 3 is crucial, but here's what nobody tells you: In late winter, focus on removing branches that grow inward to create that open vase shape.
Frequently asked questions
Got questions about growing and maintaining your apple tree? Here are some of the most common ones—plus straightforward answers to keep your tree thriving and productive!
How long does it take for an apple tree to bear fruit?
Most apple trees take 3 to 5 years to produce their first fruit after planting, depending on the variety and growing conditions. Dwarf varieties may fruit sooner (2–3 years), while standard trees can take up to 7 years. Patience pays off—healthy trees reward you with bountiful harvests over decades!
When’s the best time to prune an apple tree for heavy fruit loads?
Prune during late winter or early spring (just before buds swell) to shape the tree and encourage strong growth. A second light trim in summer (after harvest) helps manage fruit load by thinning branches. Avoid heavy pruning in fall—it stresses the tree before winter dormancy.
Can I grow an apple tree from a store-bought apple?
While you can plant apple seeds (from a fresh, organic apple), the tree won’t produce fruit true to the parent variety—it’ll likely grow a wild, unpredictable apple (or none at all!). For reliable fruit, buy a grafted tree from a nursery or propagate via cuttings from a known variety.
What should I do if my apple tree leaves are yellowing or falling off?
Yellow leaves often signal nutrient deficiency (like iron or nitrogen), overwatering, or pests/disease (e.g., apple scab or aphids). Check soil moisture, test pH, and inspect leaves for spots or pests. Apply balanced fertilizer in spring and treat fungal issues with copper spray if needed.
Do apple trees need a pollinator to produce fruit?
Most apple trees are self-pollinating but produce more fruit with a pollinator nearby (like another apple tree or a crabapple). For guaranteed harvests, plant two compatible varieties (check labels for "pollination partners"). Honeybees and other insects help too—just avoid pesticides during bloom!
Wrapping up and next steps
Growing a thriving apple tree with a bountiful harvest is entirely within your reach—just remember that patience and precision are your best friends! 🌳 By mastering seasonal pruning, selecting the right tools, and understanding your tree’s needs, you’ll turn a simple sapling into a fruit-bearing powerhouse.
Start small, stay consistent, and don’t forget to celebrate those first sweet, homegrown apples!
Ready to take the next step? Mark your calendar for this year’s first pruning session and watch your tree flourish. Happy growing! 🍏✨