
Propagation
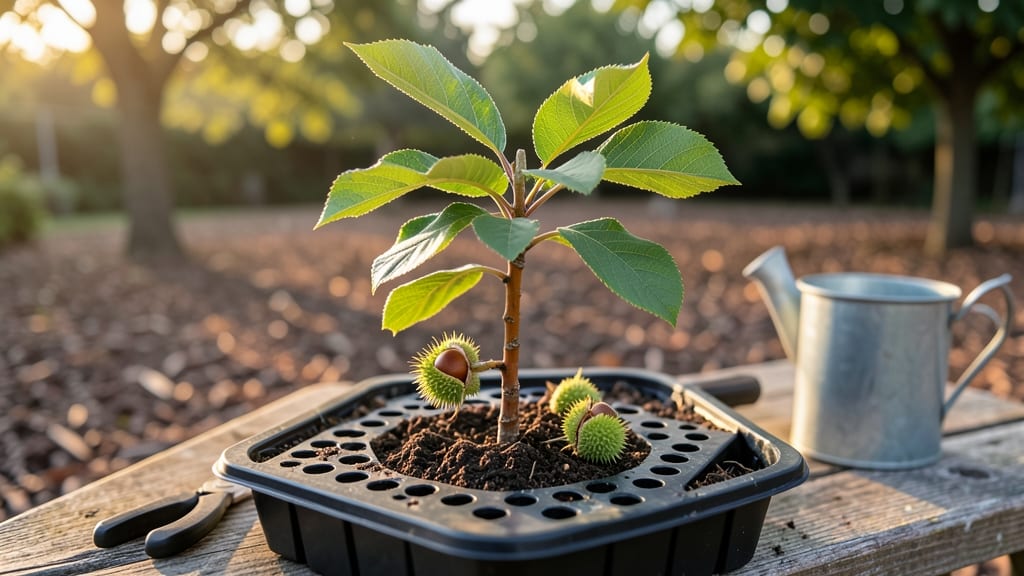
Starting a chestnut tree from seed is one of those gardening adventures that rewards patience with a century-lasting legacy—if you crack the cold stratification secret. I’ve tried the shortcuts, and they always fail. The real trick is mimicking nature’s winter chill, which breaks dormancy and triggers those first stubborn sprouts.
You’ll need fresh, plump chestnuts (not store-bought), a damp paper towel or peat moss, and a refrigerator for 90 days of cold treatment. Skip this step, and you’ll be waiting years—or never see germination.
The payoff? A sturdy sapling that grows 3-5 feet per year once established, with edible nuts in 10-15 years.
Picture this: after months of waiting, a pale green shoot pushes through the soil in early spring. That’s your cue to transplant into a sunny spot with rich, well-draining soil. By year 3, you’ll have a 6-foot-tall tree that outgrows most gardeners’ impatience.
Works best in zones 4-8, but the stratification method adapts to other climates. Here’s how to do it right the first time—no guesswork, just reliable results.
📚 In This Guide
- What you need
- Instructions
- Tips and common mistakes
- Wrapping up and next steps
What you need
- ● Fresh chestnut seeds: 5–10 viable, plump seeds (harvested from healthy trees, ideally in fall). Pro tip: 💡 Avoid seeds with holes or mold!
- ● Cold stratification setup: 1 container of moist sphagnum peat moss or sand (sterilized, 2–3 cups).
- ● 1 ziplock bag or airtight container (with breathable mesh or a small vent).
- ● Planting supplies: 1 seed-starting tray or small pots (3–4 inches deep, with drainage holes).
- ● Potting mix: 1 part peat moss + 1 part perlite or sand (sterile and well-draining).
- ● 1 spray bottle (for gentle watering).
- ● Growth support: 1 humidity dome or plastic wrap (to retain moisture).
- ● 1 grow light or sunny windowsill (south-facing, 6+ hours of light/day).
- ● Seed viability test: 1 bowl of water (to check for floating seeds—sinkers = good!).
- ● Fungicide: 1 bottle of hydrogen peroxide (3%) or mycorrhizal inoculant (to prevent rot).
- ● Temperature monitor: A small thermometer (to track cold stratification temps: 35–45°F).
- ● Transplant supplies: 1 5-gallon pot or garden bed (for seedlings after 1–2 years).
- ● Mulch (straw or wood chips, 2–3 inches thick).
Step-by-step instructions for growing chestnut trees from seed
Here's the method I've used to successfully germinate chestnut seeds—it's all about patience and understanding the tree's natural dormancy cycle.
Harvest and Extract the Seed Properly
Chestnut seeds need to be fresh for best results. If you're using store-bought seeds, skip ahead. For freshly harvested nuts, crack open the spiny husk carefully—wear gloves, as the spines are sharp—and remove the glossy brown nut inside. The seed inside must be fully formed, with no cracks or soft spots. I like to soak the nuts in lukewarm water for 24 hours to soften the outer shell slightly, making it easier to handle without damaging the seed.
Once soaked, gently tap the nut against a hard surface to crack it open. The actual seed is the large, flat, brown kernel inside. Remove it carefully, as the seed coat is delicate. Place the extracted seed on a paper towel to dry slightly for 12 hours before proceeding. This prevents mold during stratification. Real talk: If the seed feels mushy or smells off, toss it—it won't sprout.
Perform Cold Stratification for Dormancy Break
This is the critical step chestnut seeds refuse to skip. Place the dried seed in a resealable plastic bag with a moistened paper towel—just damp enough that it doesn't drip when squeezed. Seal the bag and store it in your refrigerator's crispier drawer (typically 34-40°F) for 90-120 days. The goal is to simulate winter conditions, breaking the seed's dormancy.
Check the seed every 30 days. If the paper towel dries out, mist it lightly with water and reseal. You'll know stratification is working when the seed develops a small white root (radicle) about ½ inch long—this usually happens around 60-80 days in. Don't rush this; forcing it won't help. If your fridge runs cooler, stratification may take longer, but consistency matters more than speed.
Plant the Stratified Seed in a Controlled Environment
Once the radicle appears, it's time to plant. Fill a 4-inch diameter pot with well-draining potting mix (avoid garden soil—it's too dense). Make a 1-inch deep hole in the center and place the seed vertically, with the radicle pointing downward. Cover it lightly with soil, pressing down gently to ensure contact but not compacting.
Water the pot thoroughly until moisture runs from the drainage hole, then place it in a warm, bright location (around 65-75°F). A grow light set 4-6 inches above the pot ensures strong, even growth. Chestnut seedlings are slow starters, so don't expect much for the first 4-6 weeks. Patience is key—wait until the first true leaves (not the seed leaves) appear before moving the seedling.
Transition to Outdoor Conditions Gradually
After the seedling shows 3-4 sets of true leaves, it's ready for outdoor hardening. Place the pot in a sheltered, partially shaded spot for 2-3 hours the first day, gradually increasing exposure over 10-14 days. Chestnut seedlings are sensitive to sudden temperature changes, so avoid direct sun or wind during this period.
Once the seedling tolerates a full day outside without wilting, transplant it into the ground in early spring, after the last frost date. Choose a location with full sun and well-draining soil, digging a hole twice as wide as the root ball but no deeper. Water deeply after planting to settle the soil, and mulch around the base to retain moisture. Here's the thing—chestnut trees grow slowly, so give it space to establish before expecting nuts.
Tips & tricks for perfect chestnut tree germination
Here's what I learned after years of nurturing these stubborn seeds—small details make all the difference between success and frustration.
Seed Selection Tip: Always choose plump, glossy chestnut seeds without cracks or soft spots. I've found that seeds harvested in late fall (October-November) germinate most reliably. If you're working with store-bought seeds, look for those labeled as "fresh" or "harvested this season"—older seeds often fail to sprout. The 24-hour soak in lukewarm water isn't just for convenience; it helps identify good seeds that sink while bad ones float.
Stratification Success: The 90-120 day cold stratification period in your refrigerator's crispier drawer (34-40°F) is non-negotiable for chestnuts. I've tried shorter periods, and the seeds simply won't break dormancy. Use a small plastic bag with a moistened paper towel—just damp enough to feel like a wrung-out sponge. Place the bag in a sealed container to prevent drying. The key is consistency: check every 30 days, but don't disturb the seed more than necessary. If you notice mold developing, discard the seed immediately and start fresh.
Planting Precision: When planting the stratified seed in your 4-inch pot, precision matters. The 1-inch depth is critical—too shallow and the seed may dry out, too deep and it won't get enough light. I always make a small indentation with my finger before placing the seed vertically with the radicle pointing down. After covering it, press the soil gently around the seed to ensure good contact without compacting. This creates the perfect balance of stability and aeration the seedling needs to establish roots.
Growth Patience: Chestnut seedlings move at their own pace, and that's okay. The 4-6 weeks before you see true leaves can feel like an eternity, but this slow start builds a strong root system. I recommend using a grow light set 4-6 inches above the pot to provide consistent light without overheating. Place the pot on a heat mat set to 65-75°F to maintain optimal germination temperatures. During this time, water only when the top inch of soil feels dry—overwatering is the most common mistake that kills young seedlings.
Pro Tips for Start A Chestnut Tree From Seed
- Here's what I learned after years of nurturing these stubborn seeds—small details make all the difference between success and frustration.
- Seed Selection Tip: Always choose plump, glossy chestnut seeds without cracks or soft spots.
- Stratification Success: The 90-120 day cold stratification period in your refrigerator's crispier drawer (34-40°F) is non-negotiable for chestnuts.
Frequently asked questions
Got questions about growing chestnuts from seed? You’re not alone—this process has a few quirks! Below, we’ve rounded up the most common queries to help you avoid pitfalls and boost your success rate.
How long does cold stratification need to last for chestnut seeds?
Chestnut seeds typically require 90–120 days of cold stratification (33–41°F) to break dormancy. Place them in a moist medium like peat moss or sand, then refrigerate. Pro tip: Check seeds every 2–3 weeks—if they sprout, plant them immediately!
When is the best time to plant stratified chestnut seeds outdoors?
Wait until late spring or early summer (after the last frost) to transplant seedlings outdoors. Chestnuts are slow to mature—grown from seed, they may take 10–20 years to produce nuts! Choose a sunny, well-drained spot with deep soil for the best growth.
Can I grow a chestnut tree from a store-bought chestnut?
Yes, but only if it’s fresh (harvested that fall). Store-bought chestnuts are often treated to prevent sprouting. Soak them in water for 24 hours to test viability—if they sink and feel firm, they’re ready for stratification! Avoid roasted or canned chestnuts.
What should I do if my chestnut seed sprouts mold or rots during stratification?
Mold or rot usually means too much moisture or poor airflow. Discard affected seeds and try again with drier, sterile medium (like perlite or coconut coir). Keep containers slightly open or use a breathable lid. If using a bag, poke holes for ventilation!
Are there faster alternatives to growing chestnut trees?
If patience isn’t your strength, consider grafting (attaching a scion from a mature tree to a rootstock) or buying a 1–2-year-old sapling from a nursery. Grafted trees produce nuts in 3–5 years, but they’re pricier. Seed-grown trees offer genetic diversity but take longer!
Wrapping up and next steps
Growing a chestnut tree from seed is a rewarding journey that combines patience, care, and a touch of nature’s magic! 🌱 By following the cold stratification method, you’ve set the stage for strong, healthy sprouts—and soon, you could be nurturing a tree that provides shade, wildlife benefits, and delicious nuts for decades. Don’t let the wait discourage you: consistency is key, and your efforts will pay off in time.
Now that you’re equipped with the know-how, take the next step! Plant your stratified seeds in a sunny spot, monitor their progress, and enjoy the process.
Whether you’re a gardening novice or a seasoned green thumb, every little effort brings you closer to a thriving chestnut tree. Happy growing! 🌳✨