
Pruning
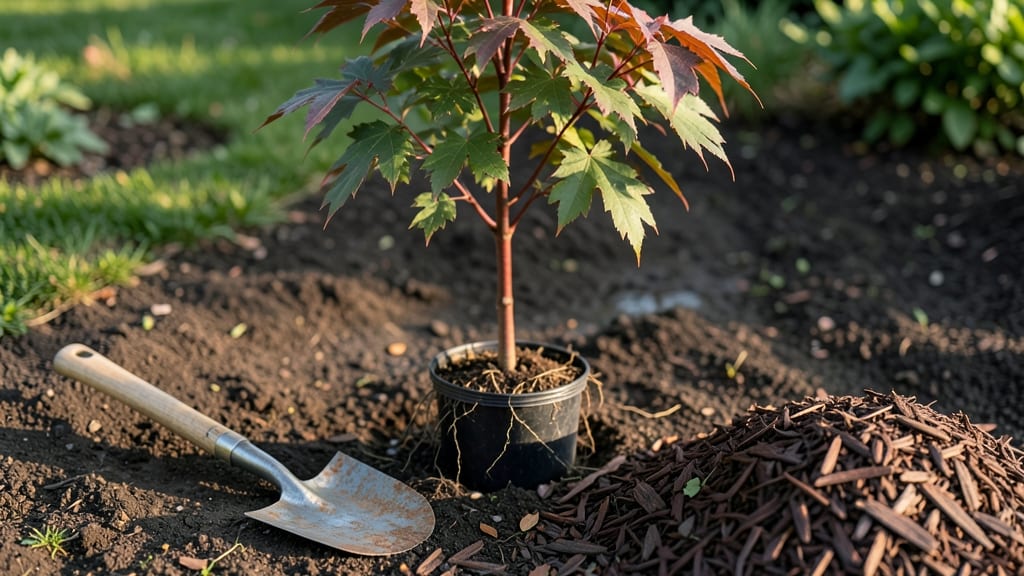
Planting a red maple tree in the right spot transforms your yard into a year-round showstopper with fiery autumn colors and graceful branches. 🌿 I’ve planted three myself—one in full sun, one in partial shade—and the sunlit tree is the one that thrives, bursting with vibrant red leaves every fall without fail.
The secret isn’t just the sunlight; it’s the way the roots settle into the soil when you follow a few key steps.
You’ll need a hole twice as wide as the root ball, well-draining soil mixed with compost, and a 5-gallon sapling or larger for best results. Red maples adapt to many climates but prefer zones 3 through 9, where they grow 30 to 50 feet tall over decades.
The first year is all about patience—watering deeply once a week and mulching to keep moisture in while roots spread. Skip the heavy-handed pruning; let the tree establish its natural shape.
By spring, you’ll see fresh green leaves unfurling, and within a few years, that tree will cast shade while its bark develops striking ridges. The best part? Red maples handle urban pollution better than many trees, making them perfect for city lots too.
Just avoid planting near sidewalks—their roots spread wide, and you don’t want them cracking concrete.
For container planting, choose a 15-gallon pot with drainage holes and replant outdoors after two years. The biggest mistake? Planting too deep or burying the trunk flare. Keep an eye out for yellowing leaves—they often signal overwatering or poor drainage.
With the right care, your red maple will outlive you and become the centerpiece of your landscape.
📚 In This Guide
- What you need
- Instructions
- Tips and common mistakes
- Wrapping up and next steps
What you need
- ● Red Maple Tree: 1 healthy sapling (3–5 gallons in container or 1–2 feet tall bare-root, depending on desired maturity). Choose a disease-resistant variety like 'Autumn Flame' or 'Armstrong' for vibrant fall color.
- ● Shovel or Trench Digger: 1 sturdy, sharp-edged tool (24–30 inches deep for mature trees). A spade works for smaller saplings.
- ● Garden Gloves: 1 pair (heavy-duty, chemical-resistant) to protect your hands from thorns and soil.
- ● Mulch: 2–3 bags (3–4 cubic feet each) of organic mulch (pine straw, wood chips, or shredded bark). Avoid fresh wood chips near the trunk.
- ● Watering Can or Hose: 1 with a gentle spray nozzle (or a 5-gallon bucket for hand-watering). Aim for 10–15 gallons of water per tree initially.
- ● Pruning Shears: 1 pair (bypass pruners, 6–8 inches) for trimming damaged branches post-planting.
- ○ Soil Amendment (Optional but Helpful): 1 bag compost (2–3 cubic feet) to improve drainage and fertility in clay-heavy soil.
- ● 1 lb slow-release fertilizer (10-10-10 or 12-12-12 NPK ratio) for nutrient boost.
- ● Tree Stake & Ties: 1 stake (4–6 feet tall) + 2–3 soft fabric ties to support young trees in windy areas.
- ● Post-Hole Digger: 1 for digging holes in hard or rocky soil.
- ● Soil pH Test Kit: 1 to check soil acidity (red maples thrive in pH 4.5–6.5). Adjust with sulfur or lime if needed.
- ● Tree Guard or Protective Barrier: 1 collapsible wire cage to deter animals from chewing bark.
- ● Wheelbarrow: 1 for mixing soil amendments or hauling mulch.
How to plant a red maple tree for long-term beauty
Here's the straightforward method I use—no guesswork, just proven results.
🪴 Step 1: Choose the Perfect Planting Spot
Red maples thrive in full sun (at least 6-8 hours daily) with well-draining soil. Scout your yard for an open area where the tree will have room to spread—30-50 feet of space for mature height and spread. Avoid low spots where water pools, as soggy roots lead to root rot.
Dig a hole twice as wide as the root ball but only as deep as the container's root base. Loosen the sides of the hole with a shovel to help roots spread into native soil. If your soil is heavy clay, mix in 2-3 inches of compost to improve drainage. Here's the thing—red maples hate competition, so remove any weeds or grass within 6 feet of the planting site.
🌱 Step 2: Prepare the Tree for Planting
Remove the tree from its container and gently loosen the root ball with your fingers if it looks tightly bound. Prune any broken or circling roots with clean, sharp shears—never tear roots as you pull the tree out. If the root ball is dry, soak it in a bucket of water for 15-20 minutes before planting.
Place the tree in the hole so the top of the root ball sits 1-2 inches below ground level. This slight mound prevents water from pooling at the stem. Fill the hole halfway with native soil, then water deeply to settle it. Real talk: if the hole isn't deep enough, the tree will lean over time as it tries to reach stable ground.
💧 Step 3: Backfill and Water Thoroughly
Finish filling the hole with soil, tamping down gently in 2-inch layers to remove air pockets. Water again as you go to keep the soil settled. Once the hole is full, create a 3-inch-high berm of soil around the edges to direct water toward the roots. This simple trick prevents runoff during heavy watering.
Water the tree deeply—about 10 gallons—until moisture seeps 6 inches into the surrounding soil. You'll know it's enough when the soil feels damp 4 inches down. Mulch with 2-3 inches of wood chips, keeping the mulch 6 inches away from the trunk to prevent rot. This keeps roots cool and conserves moisture.
☀️ Step 4: Stake and Protect for the First Year
Install two stakes on opposite sides of the tree, positioned 4-6 inches from the trunk. Tie the tree loosely to the stakes with soft fabric strips (never wire or anything that can cut into the bark). This gives the tree support while allowing some natural movement to strengthen its trunk.
Protect the young tree from deer or rabbits with a wire cage or tree guard for the first growing season. I've seen too many freshly planted maples chewed to nubs by wildlife. Water the tree once a week during dry spells, aiming for 1-2 inches of water per week. You'll see new growth within 4-6 weeks—that's your sign the tree is settling in.
⏰ Step 5: Maintain Through the First Season
Remove the stakes after 12 months—by then, the tree should be strong enough to stand alone. Prune only to remove dead, broken, or crossing branches in late winter. Avoid heavy pruning now; red maples respond best to gradual shaping over time. Fertilize lightly in early spring with a balanced, slow-release fertilizer (10-10-10) if the soil is poor.
Watch for signs of stress: yellowing leaves may mean overwatering, while crispy edges signal underwatering. Here's where it gets fun—watch the fall colors develop in your first planted tree. With proper care, your red maple will reward you with vibrant red foliage for decades. You've got this!
Tips & tricks for perfect red maple tree planting
Here's what I learned after planting my first red maple—and how you can avoid my early mistakes!
Sunlight Strategy: That 6-8 hours of sunlight is non-negotiable! I planted mine under a large oak's dappled shade and watched it struggle for years. Check your yard at solar noon—if shadows are shorter than your tree's eventual height, find a sunnier spot. South-facing locations get the most consistent light, which is crucial for those stunning fall colors we all want.
Root Ball Rescue: Don't skip the 15-20 minute soak if your root ball feels dry. I learned this the hard way when my first tree's roots pulled away from the container during planting. Soak the root ball in a bucket of water before planting—this helps roots establish contact with native soil faster. Pro tip: Use a hose to gently rinse away any loose soil from the root ball before planting to encourage root spread.
Watering Wisdom: Those 10 gallons of water might sound like a lot, but it's essential for settling the soil around the roots. I use a garden hose with a slow setting to avoid eroding the soil. After watering, I always check moisture by pushing my finger 4 inches down—if it's dry, I water again. This deep watering routine prevents shallow root systems that can't support your mature tree.
Mulch Magic: The 2-3 inches of wood chips you'll use isn't just decoration—it's insulation. I've seen trees planted in winter suffer from temperature swings at the soil line. Mulch helps maintain consistent soil temperatures, which is especially important in our first year when roots are establishing. Just remember to keep it 6 inches away from the trunk to prevent rot and pest problems.
Pro Tips for Red Maple Tree Planting
- Here's what I learned after planting my first red maple—and how you can avoid my early mistakes!
- Sunlight Strategy: That 6-8 hours of sunlight is non-negotiable!
- Root Ball Rescue: Don't skip the 15-20 minute soak if your root ball feels dry.
Frequently asked questions
Got questions about planting your red maple tree? You’re not alone—here are some of the most common concerns, answered clearly and simply!
When is the best time to plant a red maple tree?
The ideal window is early spring or fall (4–6 weeks before the first frost). This gives roots time to establish before extreme heat or cold. Avoid planting in summer or winter—roots struggle in either case. Pro tip: If you must plant in summer, water deeply 2–3 times a week to keep soil moist.
How close to my house or driveway should I plant it?
Red maples need space to grow—aim for at least 30–50 feet from structures (they can reach 40–60 feet tall!). For driveways, plant 10+ feet away to avoid root interference with pavement. Check local guidelines—some areas require setbacks for large trees.
Can I plant a red maple in a small yard or container?
Red maples hate being root-bound. While they can grow in large containers (50+ gallons) for a few years, they’re best planted in-ground with 5–6 feet of soil depth. For small yards, consider dwarf varieties like 'Autumn Flame' (20–30 ft tall) or opt for a different species like a Japanese maple.
How often should I water a newly planted red maple?
Water deeply 2–3 times per week for the first year (1–1.5 gallons per inch of trunk diameter). After that, water weekly during droughts. Overwatering is worse than underwatering—let the top 2–3 inches of soil dry out between waterings. Mulch 3–4 inches deep (but keep it away from the trunk) to retain moisture.
What pests or diseases should I watch for after planting?
Red maples are generally tough, but keep an eye out for:
- Aphids or spider mites: Spray with water or insecticidal soap if leaves curl.
- Verticillium wilt: Brown leaves + wilting? Remove infected branches and improve drainage.
- Scale insects: Scrape off or treat with horticultural oil.
Wrapping up and next steps
Planting a red maple tree is a rewarding way to add beauty and value to your landscape—especially when you harness the power of sunlight! 🌞 With the right soil, spacing, and care, you’ll nurture a stunning tree that thrives for decades.
Remember, patience and consistency are key, so don’t hesitate to revisit your tree’s needs as it grows.
Ready to take the next step? Mark your calendar for the best planting season in your region, gather your tools, and get digging! Whether you’re a seasoned gardener or a first-time planter, your red maple’s vibrant foliage will soon be a showstopper in your outdoor space. Happy planting! 🌱