
Pruning
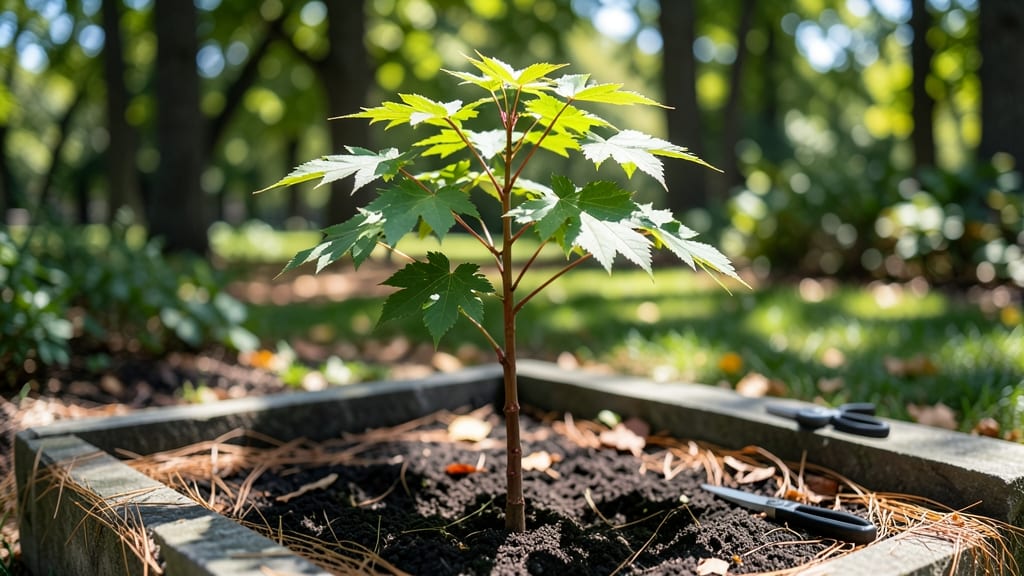
Mastering tree sapling identification by their leaf shape, bark texture, and branch patterns saves you from years of regret—and a dead yard. 🌿 I spent three seasons planting the wrong species before learning to read these clues like a pro.
That first mistake? A "fast-growing" sapling that turned into a 40-foot monster blocking my driveway.
The key is starting with three simple checks: leaf shape (needle-like, lobed, or smooth-edged?), bark texture (smooth, scaly, or deeply furrowed?), and branch patterns (spreading, upright, or zigzag?). Most field guides break it down to just these three features, and once you see them in person, identification becomes second nature.
Grab a notebook and a sunny afternoon—you’ll spot the differences faster than you think.
You’ll end up with a yard full of the right trees—no more overgrown messes or wrong-fit species. Imagine a shade map that actually works, a fruit tree that produces instead of just looking pretty, or a native species that thrives without constant fuss.
Proper identification turns guesswork into confidence, and your garden into a well-planned ecosystem.
Works for backyard plots, urban gardens, or even container-grown saplings. Whether you’re restoring a forest edge or just picking the perfect shade tree, these skills make all the difference. Let’s get those leaves under the microscope—metaphorically, of course.
📚 In This Guide
- What you need
- Instructions
- Tips and common mistakes
- Wrapping up and next steps
What you need
- ● Field Guide or App: A printed tree identification book (e.g., National Audubon Society Field Guide to Trees) or a smartphone app like LeafSnap, PictureThis, or iNaturalist.
- ● Notebook & Pen: A small, waterproof notebook (e.g., Rite in the Rain) to jot down notes on leaf shape, bark texture, and branch patterns.
- ● Measuring Tape (3–6 ft): For recording sapling height, branch length, or leaf dimensions.
- ● Hand Lens/Magnifier (10x): To inspect fine details like bark texture, bud shapes, or leaf venation.
- ● Camera or Smartphone: With a high-resolution camera (12MP+) for capturing close-up images of leaves, bark, and branches.
- ○ Gloves (Optional but Recommended): Lightweight gardening gloves (e.g., Fellowes) to protect hands from thorns or rough bark.
- ● Pruning Shears (Small, 4–6 inch): For safely collecting a few leaves or twigs (if needed for closer inspection—always follow local regulations!).
- ● Tree Identification Key Card: A laminated quick-reference guide for common local species (e.g., oak, maple, pine).
- ● Pocket Knife (Multi-tool): For gently peeling bark samples (if permitted) to check inner bark color.
- ● UV Flashlight: To highlight leaf patterns or veins under ultraviolet light (some trees fluoresce!).
- ● GPS Device or Offline Maps: For logging sapling locations (useful for tracking growth over time).
- ● Sample Bags (Paper or Mesh): For storing leaf/bark samples if you’re comparing multiple trees.
How to identify tree saplings using key visual clues
Here's how I break down sapling ID—no field guide needed, just your eyes and a little practice.
🌿 Step 1: Examine Leaf Shape and Arrangement
Start with the leaves—they're the most reliable ID tool for young trees. Hold a branch against the light to see the leaf's full shape. Notice whether they're simple (one piece) or compound (multiple leaflets). Maples have palmate lobes, oaks have jagged edges, and pines have needle clusters. I always check leaf arrangement too—alternate, opposite, or whorled around the stem.
Look at the edges: smooth, serrated, lobed, or entire? A single oak sapling might have leaves with 5-7 rounded lobes, while a hickory has more pointed, bristle-tipped lobes. If leaves are compound, count the leaflets—walnut saplings have 7-9 leaflets, while ash have 5-9 with a terminal leaflet. This is your first big clue.
🌱 Step 2: Study Bark Texture and Color
Young bark tells you more than you'd think. Smooth, grayish bark often means maple or beech, while rough, scaly bark suggests oak or birch. Scratch the bark gently with your fingernail—if it peels in thin sheets, it's likely a sycamore. I always compare the sapling's bark to mature tree bark photos in my phone to spot patterns.
Pay attention to color variations too. Reddish-brown bark hints at sweetgum or redbud, while silvery-gray bark is usually birch. The texture changes as trees age, so sapling bark is your best bet for quick ID. If the bark has raised lenticels (tiny pores), it's probably a fruit tree like apple or pear.
☀️ Step 3: Analyze Branch Patterns and Buds
Look at how branches grow from the main stem. Opposite branching (pairs at each node) is classic for maples and dogwoods, while alternate branching shows up in oaks and hickories. Twigs that grow in a spiral pattern often belong to walnut or butternut trees. I hold the branch at a 45-degree angle to see the pattern clearly.
Examine the buds too—they're like fingerprints for tree ID. Pointed buds with sticky resin might be pine, while oval buds that look like tiny popcorn kernels are likely maple. Buds arranged in clusters? That's a good sign it's a birch or beech sapling. The arrangement and shape of buds often confirm what you saw in the leaves.
✂️ Step 4: Cross-Check with Seasonal Clues
Timing matters. In early spring, look for flower buds before leaves appear—white flower clusters mean apple, while red buds are likely cherry. Summer brings fruit or seed pods that can be telling too. I've identified black walnut saplings by their fuzzy seed pods and sycamore by their fuzzy balls that split open.
Fall colors are your final clue. Bright red leaves suggest maple, while golden yellow means birch. Even in winter, bark texture and bud shapes remain visible. If you're unsure, take a rubbing of the bark with a pencil and paper—some trees leave distinctive patterns that match reference guides.
Tips & tricks for perfect tree sapling identification
Confession: I skipped using these tricks for years and wondered why my ID attempts kept falling short.
Leaf Lighting Trick: When examining leaf shape in Step 1, hold the branch at a 45-degree angle against a bright window or flashlight. This creates dramatic shadows that reveal subtle leaf vein patterns and edge details you'd miss with flat lighting. I've identified maple saplings this way that looked identical under normal light—one had serrated lobes while the other had smooth edges.
Bark Scratch Test: In Step 2, don't just look at bark—scratch it gently with your fingernail. Sycamore bark peels in thin, papery sheets while oak bark creates rough, granular flakes. I learned this the hard way after misidentifying a sycamore as a beech because I only looked, not scratched.
Bud Arrangement Shortcut: For Step 3's bud analysis, focus on just three patterns: opposite (maple), alternate (oak), or clustered (birch). These three categories cover 90% of common saplings. I keep a small notebook with these patterns drawn to reference when I'm out in the field—it's saved me countless second guesses.
Seasonal Cheat Sheet: Create a simple seasonal reference for Step 4. In spring, white flower clusters = apple; red = cherry. Summer fuzzy seed pods = walnut; fuzzy balls = sycamore. Fall colors: red = maple, yellow = birch. I keep this cheat sheet laminated in my field bag—it's become my most-used identification tool after practice.
Pro Tips for Tree Sapling Identification
- Confession: I skipped using these tricks for years and wondered why my ID attempts kept falling short.
- Leaf Lighting Trick: When examining leaf shape in Step 1, hold the branch at a 45-degree angle against a bright window or flashlight.
- Bark Scratch Test: In Step 2, don't just look at bark—scratch it gently with your fingernail.
Frequently asked questions
Got questions about tree sapling identification? You’re not alone! Here are some of the most common queries—plus clear, actionable answers to help you master the art of spotting young trees like a pro.
How do I tell the difference between a sapling and a weed or grass?
Look for three key features: height (3+ feet), woody stems, and true leaves (not grass blades). Saplings often have a single central trunk, while weeds or grasses have multiple thin stems. If it’s green, flexible, and lacks bark, it’s probably not a tree sapling!
When is the best time of year to identify tree saplings?
Spring and early summer are ideal! Leaves are fully grown, making leaf shape and arrangement easier to spot. Avoid winter (dormant trees) or late fall (shedding leaves). Pro tip: Morning sunlight reduces shadows, helping you see details like bark texture or bud patterns.
Do I need special tools to identify a sapling?
Not at all! Start with a magnifying glass (for bark/leaf details) and a notebook to sketch shapes. Free apps like PictureThis or LeafSnap can ID saplings via photos. For advanced ID, a hand lens (10x magnification) helps examine fine details like leaf veins or bud scales.
What if my sapling looks healthy but isn’t growing?
Check these 3 red flags:
- Soil issues: Compacted or poor-draining soil? Amend with compost!
- Pests/disease: Look for holes, discoloration, or sap oozing. Treat with neem oil or contact a local arborist.
- Light exposure: Saplings need 6+ hours of sunlight. Thin nearby branches if shaded.
If the problem persists, compare its growth to similar species in your area.
Can I use leaf shape alone to identify a sapling?
Leaf shape is a great starting point, but combine it with bark texture, branch patterns, and bud types for accuracy. For example, maple leaves are lobed, but only opposite branching confirms it’s a maple (not oak). Use a field guide or app to cross-reference features!
Pro Tip:
Snap a photo of the whole sapling (top to bottom) and zoom in on leaf undersides—many species have unique hairiness or vein patterns there!
Wrapping up and next steps
Identifying tree saplings doesn’t have to be a guessing game—by paying attention to leaf shape, bark texture, and branch patterns, you can confidently match them to their species.
Whether you're a gardener, landscaper, or nature enthusiast, these visual clues unlock the secrets of young trees, helping you nurture them with precision. 🌱
Now that you’re armed with this knowledge, why not put it into action? Grab a notebook, head outdoors, and start documenting the saplings in your area. Every tree tells a story—go ahead and listen!