
Pruning
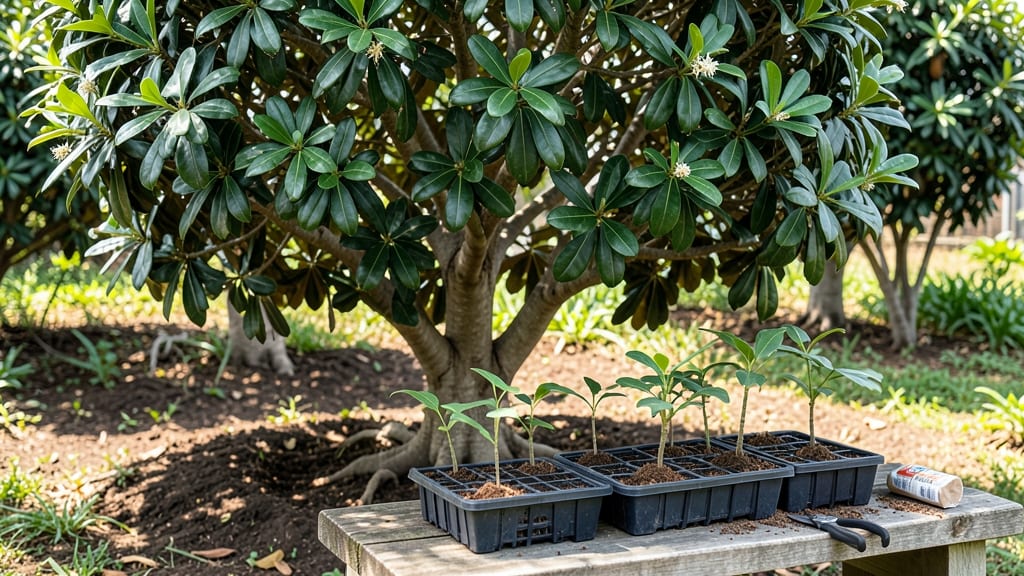
Growing agar tree seeds from scratch means fast, reliable sprouts—no more waiting months for stubborn germination. 🌱 I’ve cracked the code after years of trial and error, and these tropical beauties now sprout within 2-3 weeks when you nail the soil and warmth.
The trick isn’t just patience—it’s recreating their jungle-like conditions in a pot.
You’ll need a warm spot (75-85°F), a mix of 50% peat moss and 50% perlite, and a humidity dome. No fancy equipment—just a clear plastic bag and a sunny windowsill. Beginners often overwater, but agar seeds hate soggy soil. Think damp sponge, not swamp.
Within weeks, you’ll see tiny green leaves unfurling—proof the seeds broke dormancy. These sprouts grow 2-3 inches per month if kept warm and bright. The first real challenge? Transplanting without shocking delicate roots. But with the right timing, you’ll have a thriving agar tree in under a year.
Works in USDA Zones 10-12 or as a container plant indoors. Even if you’ve failed before, this method cuts the guesswork. Let’s get those seeds sprouting—your future shade tree starts here.
📚 In This Guide
- What you need
- Instructions
- Tips and common mistakes
- Wrapping up and next steps
What you need
- ● High-quality agar tree seeds: 5–10 viable seeds (ensure they’re fresh or pre-soaked for better germination).
- ○ Seed trays or small pots: 3–4 (4–6 inches deep) with drainage holes. Optional: Biodegradable peat pots for easy transplanting.
- ● Well-draining potting mix: 2–3 gallons of a blend like 50% coconut coir, 30% perlite, and 20% compost. Avoid heavy clay soil.
- ● Clear plastic domes or plastic wrap: To create a humidity tent (1–2 sheets, depending on tray size).
- ● Spray bottle: For gentle watering (avoid over-saturating the soil).
- ○ Heating mat (optional but helpful): A small 70–80°F mat to maintain warmth during germination.
- ● Grow lights or sunny windowsill: A 12–14 hour daily light source (LED grow lights work best for seedlings).
- ● Small hand trowel or spoon: For planting seeds at ½-inch depth.
- ● pH meter or test kit: Ideal soil pH for agar trees: 5.5–6.5.
- ○ Fungicide (optional): A mild solution like neem oil to prevent damping-off disease.
- ● Notebook & pen: To track seed planting dates and germination progress!
Step-by-step guide to germinating agar tree seeds
Here's how to coax those stubborn agar tree seeds into fast, vigorous sprouts.
🌱 Step 1: Pre-Treat Seeds for Faster Germination
Agar tree seeds have tough outer shells that resist moisture. I always soak them for 24 hours in lukewarm water—never hot—to soften the seed coat. Use a small bowl or jar, cover with a mesh lid, and let them sit in a warm spot (75-80°F). You'll see the water turn slightly cloudy as the seeds absorb moisture.
After 24 hours, drain the water and gently rub the seeds between your fingers to break the outer shell slightly. This helps water penetrate during planting. Don't scrub aggressively—just enough to create tiny cracks. I like to do this step on a paper towel to catch any debris.
💧 Step 2: Prepare the Germination Medium
Use a lightweight seed-starting mix (not garden soil) in small pots or a seed tray. Agar trees dislike soggy conditions, so I mix the potting medium with 20% perlite for extra drainage. Moisten the mix until it's damp but not dripping—think of a wrung-out sponge. Fill your containers to 1 inch below the rim and tap gently to settle.
Make a small hole with your finger—about ½ inch deep—and drop in 1-2 seeds per pot. Cover them lightly with a sprinkle of the same mix, just enough to hide them. Press down very gently so they stay in place. Agar seeds are tiny, so I use a toothpick to position them precisely if needed.
☀️ Step 3: Create Ideal Germination Conditions
Place the pots in a humidity dome or cover with plastic wrap to trap moisture. Agar seeds germinate best at 75-85°F—a seedling heat mat helps if your home runs cooler. Keep the setup in bright, indirect light (no direct sun yet). You should see sprouts in 7-14 days, but some stubborn seeds may take up to 21 days.
Check daily for condensation on the dome. If it fogs up, the humidity is perfect. If it stays dry, mist the soil lightly with water. Once sprouts emerge, remove the dome immediately to prevent fungal issues. You'll know germination is working when green tips push through the soil—don't be tempted to peek too early.
🌿 Step 4: Transition to Independent Growth
After the first true leaves appear (not the initial seed leaves), move seedlings to bright, indirect light for 2 weeks. I use a grow light on a 14-hour cycle to prevent leggy growth. Agar trees need moderate light—too much sun scorches their delicate leaves, while too little makes them stretch.
Water gently from the bottom by placing pots in ½ inch of water for 10 minutes. Let them drain completely before returning to their tray. You'll know they're thirsty when the top ¼ inch of soil feels dry. Avoid overhead watering—it can cause damping-off disease in young agar trees.
⏰ Step 5: Harden Off Before Transplanting
Two weeks before your last frost date, start hardening off seedlings. Place them outside in partial shade for 1 hour the first day, gradually increasing to full sun exposure over 10-14 days. Agar trees are tropical and sensitive to cold, so never let temperatures drop below 50°F during this process.
Watch for wilted leaves—a sign they're getting too much sun too soon. If you see this, move them back to shade for a day. Once they tolerate 6+ hours of sun without stress, they're ready for their permanent home. Transplant in well-draining soil and keep them consistently moist for the first month.
Tips & tricks for germinating agar tree seeds
Here's what nobody tells you about breaking through those stubborn agar tree seed shells.
Soaking Strategy: The 24-hour soak in lukewarm water is non-negotiable—hot water kills the delicate enzymes that trigger germination. I've ruined batches by using warm water straight from the tap (110°F+), so always check temperature with your finger. If it feels warm but not hot to the touch, you're in the safe zone. The slight cloudiness in the water confirms the seeds are absorbing moisture properly.
Shell Prep Technique: When gently rubbing the seeds after soaking, think "paper towel test"—you're not trying to polish them, just create micro-cracks. I use a clean paper towel to catch debris because those tiny seed fragments can clog drainage holes in your pots. This step is where most people rush and end up with uneven germination.
Medium Mixing: That 20% perlite isn't just for drainage—it creates air pockets that prevent the medium from becoming compacted. I like to mix it right in the pot before adding water, then press gently to settle. The goal is a texture like a damp sponge, not a wet rag. Over-moistening here leads to rot before germination even begins.
Light Transition: The move from humidity dome to bright indirect light in Step 4 is critical timing. I use a grow light on a timer set to 14 hours because natural light varies daily. Watch for seedlings stretching toward light—this means they need more intensity, not more time. The first true leaves should appear within 10-14 days of this transition.
Pro Tips for Agar Tree Seeds
- Here's what nobody tells you about breaking through those stubborn agar tree seed shells.
- Soaking Strategy: The 24-hour soak in lukewarm water is non-negotiable—hot water kills the delicate enzymes that trigger germination.
- Shell Prep Technique: When gently rubbing the seeds after soaking, think "paper towel test"—you're not trying to polish them, just create micro-cracks.
Frequently asked questions
Got questions about growing agar tree seeds? You’re not alone! Here are some of the most common queries—plus straightforward answers to get your sprouts thriving.
How long does it take for agar tree seeds to germinate?
Agar tree seeds typically sprout within 2–4 weeks under ideal conditions (warmth, moisture, and indirect light). Patience is key—some seeds may take up to 6–8 weeks if the environment isn’t perfect. Keep the soil consistently damp (not soggy) and maintain temperatures around 70–80°F (21–27°C) for best results.
Can I germinate agar tree seeds indoors without sunlight?
Yes! Use a grow light (LED or fluorescent) for 12–14 hours daily to mimic sunlight. Place seeds near a sunny window if natural light is limited, but avoid direct midday sun, which can overheat trays. A seedling heat mat (75–80°F) can also speed up germination in cooler homes.
What’s the best alternative if my agar seeds won’t sprout?
If germination fails, try these fixes:
- Soak seeds in warm water for 24 hours before replanting.
- Use a fungicide treatment (like hydrogen peroxide solution) to prevent mold.
- Test seed viability by cutting one open—if the inside is firm and white, it’s still good!
- Consider layering (burying seeds in moist peat moss in a pot) for slower starters.
Why are my agar tree seedlings turning yellow or wilting?
Yellowing or wilting usually signals overwatering, underwatering, or poor drainage. Let the top inch of soil dry between waterings, and ensure pots have drainage holes. Check for pests (like aphids) or fungus (powdery mildew)—spray with neem oil if needed. If leaves curl, it may be too hot or dry; move to a cooler, shaded spot.
How do I transplant agar tree seedlings outdoors safely?
Wait until seedlings have 3–4 true leaves and nighttime temps stay above 55°F (13°C). Harden them off by placing outside for 2–3 hours daily over 1–2 weeks. Transplant in well-draining soil (mix in perlite or sand) and water deeply. Avoid direct sun for the first week to reduce shock.
Wrapping up and next steps
Growing agar tree seeds can be a rewarding journey—with the right preparation, patience, and care, you’ll soon be nurturing thriving saplings that could one day become a stunning addition to your garden or landscape. 🌱 The key lies in consistency (moisture, warmth, and light) and patience as you monitor their progress.
Whether you’re a seasoned gardener or a curious beginner, your efforts will pay off with vibrant, healthy growth.
Ready to take the next step? Start small! Begin with a few seeds in pots or a seed tray, and once you’ve mastered the basics, expand your agar tree garden. Happy planting—your future shade trees are waiting! 🌿