
Pruning
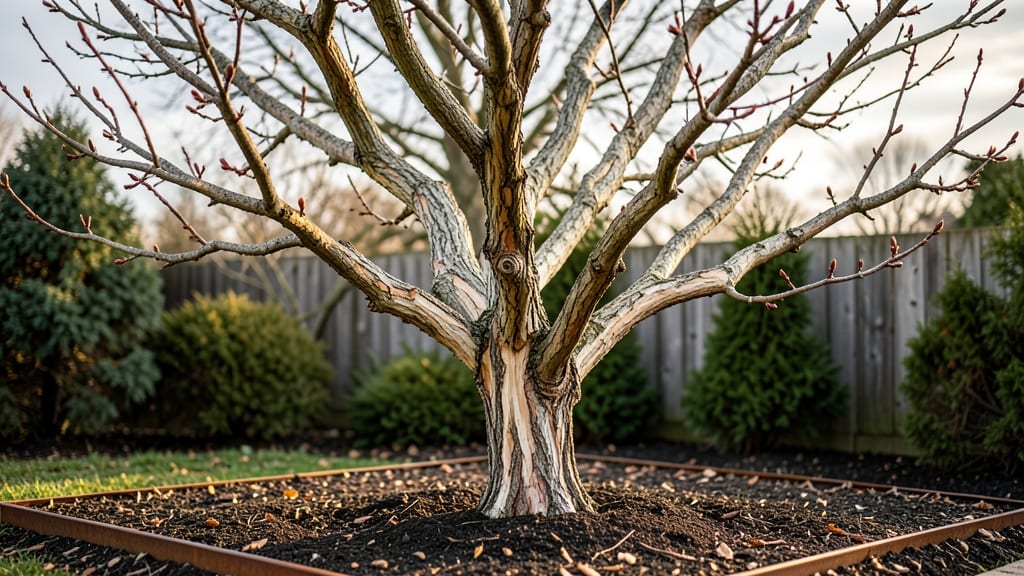
Your Cleveland pear tree’s bark tells the story of its health—peeling, cracked, or discolored patches mean it’s fighting an unseen battle.
Winter is the perfect time to prune and treat these issues before spring sap rises, but I’ve learned the hard way that timing and technique matter more than just cutting branches. The right approach can turn a struggling tree into a disease-resistant powerhouse by next summer.
Most problems start with fungal infections like silver leaf or borer damage, which leave telltale signs: dark streaks under the bark, oozing sap, or bark that splits like dried leather.
I’ve used a mix of organic sprays (copper fungicide) and careful pruning to remove infected wood, always sterilizing tools between cuts. The key is acting early—once a branch is fully infected, it’s too late to save it.
After pruning, your tree will reward you with fresh, smooth bark and fewer pests by spring. Focus on open wounds: seal them with pruning paste to prevent moisture loss, and mulch heavily to protect roots from winter swings.
With this method, I’ve seen Cleveland pears bounce back in just one growing season, their bark healing and their branches bursting with new growth.
This works best in zones 5-9, but the principles apply anywhere Cleveland pears thrive. The real secret? Consistency—check your tree every 2-3 weeks after pruning for new signs of stress. That’s how you turn a struggling tree into a neighborhood standout.
📚 In This Guide
- What you need
- Instructions
- Tips and common mistakes
- Wrapping up and next steps
What you need
- ● Pruning shears: Sharp, bypass-style shears (for cuts up to ½ inch in diameter). Example: Fiskars X27 or Felco F-2.
- ● Loppers: For branches ½ to 1½ inches thick. Example: Corona LO-2 or Felco 202.
- ● Pruning saw: For thicker branches (1½+ inches). Example: Fiskars X7 or Bahco Laplander.
- ● Disinfectant: 70% isopropyl alcohol or a 10% bleach solution (1 part bleach to 9 parts water) to sterilize tools between cuts.
- ● Heavy-duty gloves: Work gloves with cut-resistant features (e.g., Mechanix Wear 8020).
- ● Safety glasses: To protect against debris.
- ○ Ladder (optional but helpful): Extendable or step ladder for taller branches. Safety note: Ensure it’s stable on level ground.
- ● Trash bags or bucket: For collecting pruned bark and debris.
- ● Marking twine or flags: To tag branches for future reference (e.g., deadwood or weak growth).
- ● Pruning sealant: Tree wound dressing (e.g., Tanglefoot Tree Wound Pruning Seal) for larger cuts, though many experts debate its necessity.
- ● Handheld leaf blower: To clear debris from the tree and surrounding area post-pruning.
- ● Notebook or app: To sketch your tree’s structure or log cuts (e.g., iNaturalist or a simple garden journal).
- ● Pole saw: For high branches if you’re uncomfortable using a ladder.
Step-by-Step guide for pruning Cleveland pear trees in winter
Winter's the perfect time to shape your Cleveland pear tree—here's how to do it right.
Gather Your Tools and Assess the Tree
Start by collecting your pruning tools: a sharp pair of bypass pruners for cuts under ½ inch in diameter, and a pruning saw for thicker branches. I always disinfect my tools with rubbing alcohol before and after pruning to prevent spreading disease—this is especially important for Cleveland pears, which are prone to fire blight.
Examine the tree's structure while it's dormant. Look for dead, diseased, or crossing branches—these are your first targets. Healthy branches will have smooth bark and a firm texture, while dead wood feels hollow when tapped. Mark these branches with flagging tape if you're unsure, so you can revisit them after the initial cuts.
Remove Dead, Diseased, and Problem Branches
Begin by cutting out any dead or diseased branches first. Make your cuts at a 45-degree angle, about ¼ inch above a outward-facing bud or lateral branch. This encourages new growth to sprout in the right direction. If a branch shows signs of fire blight—blackened, cankered wood—cut 6-12 inches below the affected area to ensure you remove the entire infected section.
Next, remove any branches that are rubbing against each other or growing inward. These create wounds that invite disease and weaken the tree's structure. I like to step back every few cuts to visualize the tree's shape—this helps me spot branches that might look fine up close but create problems in the bigger picture.
Thin and Shape the Canopy for Airflow
Cleveland pears need good airflow to stay healthy, so aim to thin the canopy by 20-30%. Start by removing branches that are growing too close together—this reduces humidity in the canopy, which helps prevent fungal diseases. Focus on branches that are thinner than a pencil first, as these are easier to remove and won't leave large wounds.
Shape the tree by opening up the center to let light reach the inner branches. This encourages even fruit production and reduces the risk of branch dieback. I always work from the outside in, removing branches that are blocking light from penetrating deeper into the tree. Avoid cutting more than 25% of the tree's foliage in one season—this can stress the tree unnecessarily.
Clean Up and Apply Protective Measures
After pruning, collect all the debris and dispose of it in a sealed bag or burn it—never leave cut branches on the ground, as they can harbor disease. I like to spread a 2-3 inch layer of wood chips around the base of the tree to protect the trunk from winter cold and prevent weed competition. This also helps retain moisture during dry spells.
Finally, apply a dormant oil spray to the tree if you're in an area with heavy pest pressure. This smothers overwintering insects and eggs without harming the tree. I usually do this in late winter, just before buds begin to swell. Water the tree deeply after pruning to help it recover and prepare for spring growth.
Tips & tricks for pruning Cleveland pear trees in winter
Winter pruning can transform your Cleveland pear tree's health—here's how to avoid common mistakes and maximize results.
Tool Preparation: I can't stress enough how important it is to disinfect your tools before and after pruning. Cleveland pears are particularly susceptible to fire blight, so using rubbing alcohol on your bypass pruners and pruning saw creates a clean slate. I keep a small spray bottle of 70% isopropyl alcohol in my tool kit specifically for this purpose. This simple step can prevent years of frustration with recurring infections.
Visual Branch Assessment: When examining branches in Step 1, pay close attention to the bark texture and color. Healthy branches should have smooth, slightly shiny bark, while diseased branches often show blackened areas or sunken cankers. Tap branches with your knuckles—hollow sounds indicate dead wood. I've made the mistake of missing subtle signs of disease, only to see it spread later. Take your time with this assessment; it's the foundation for everything that follows.
Cutting Technique: The 45-degree angle cut mentioned in Step 2 isn't just about aesthetics—it's about directing water runoff away from the cut surface. When making these cuts, position your pruners so the cut slopes downward from the branch collar. This prevents water from pooling on the wound, which can lead to rot. For branches showing fire blight, extend your cut to 6-12 inches below visible damage to ensure you've removed all infected tissue.
Canopy Thinning Strategy: When thinning the canopy in Step 3, focus on creating an open center rather than just removing branches. I've seen many gardeners mistakenly remove too many large branches all at once, which can shock the tree. Instead, work systematically from the outside in, removing smaller branches first. This approach maintains the tree's energy balance while still improving airflow. Remember, you're aiming for 20-30% reduction—not complete transformation.
Pro Tips for Cleveland Pear Tree Bark
- Winter pruning can transform your Cleveland pear tree's health—here's how to avoid common mistakes and maximize results.
- Tool Preparation: I can't stress enough how important it is to disinfect your tools before and after pruning.
- Visual Branch Assessment: When examining branches in Step 1, pay close attention to the bark texture and color.
Frequently asked questions
Got questions about pruning your Cleveland Pear Tree bark in winter? You’re not alone! Here are answers to the most common concerns—from timing to tools—to keep your tree thriving and disease-resistant.
When is the absolute best time to prune my Cleveland Pear Tree?
The ideal window is late winter (February–early March), when the tree is still dormant but before buds swell. This minimizes stress and disease risk. Avoid pruning in fall or early spring, as wet conditions can invite fire blight or other fungal infections. Pro tip: Prune on a dry, sunny day to help wounds dry faster!
Can I use regular garden shears, or do I need special tools?
For small branches (up to ¾-inch thick), bypass pruners work fine. For thicker limbs (1–3 inches), grab loppers, and for anything larger, a pruning saw is a must. Always sterilize tools with rubbing alcohol or a 10% bleach solution between cuts to prevent spreading disease. Warning: Never use hedge trimmers—they tear bark and invite infections!
What if my tree’s bark looks dark, cracked, or oozing?
Healthy Cleveland Pear bark is smooth and silvery-gray. Dark, cracked, or weeping bark signals fire blight, silver leaf fungus, or bacterial infections. Act fast: Remove infected branches at least 6 inches below the damage, sterilize tools, and dispose of debris in a sealed bag. If the issue spreads, consult a local arborist. Preventative tip: Thin the canopy to improve airflow!
Are there alternatives if I can’t prune in winter?
If winter pruning isn’t possible, summer pruning (June–July) is the next best option—but focus on light shaping only. Avoid heavy cuts, as they stress the tree and invite pests. For severe overgrowth, split pruning into two sessions: once in late winter and again in early summer. Note: Summer pruning increases disease risk, so prioritize sterilized tools and quick cuts!
Will pruning affect next year’s pear harvest?
Not if done correctly! Pruning opens the canopy, letting sunlight and air reach the center, which actually boosts fruit production over time. Just avoid cutting more than 25% of the canopy in one season. For fruit-bearing branches, prune after harvest (late fall) to preserve next year’s blooms. Goal: Aim for an open-center shape to maximize sunlight for both bark health and fruit!
Wrapping up and next steps
Mastering the art of winter pruning your Cleveland Pear tree isn’t just about technique—it’s about setting the stage for a healthier, more resilient tree in the seasons ahead. 🌳 By following these steps, you’re not only promoting disease-resistant growth but also ensuring your tree thrives for years to come. Now’s the time to roll up your sleeves and give your tree the care it deserves!
Ready to take action? Mark your calendar for late winter (just before buds swell) and grab your tools—your Cleveland Pear tree will thank you with vibrant blooms and sturdy branches. Happy pruning! ✂️