
Trees
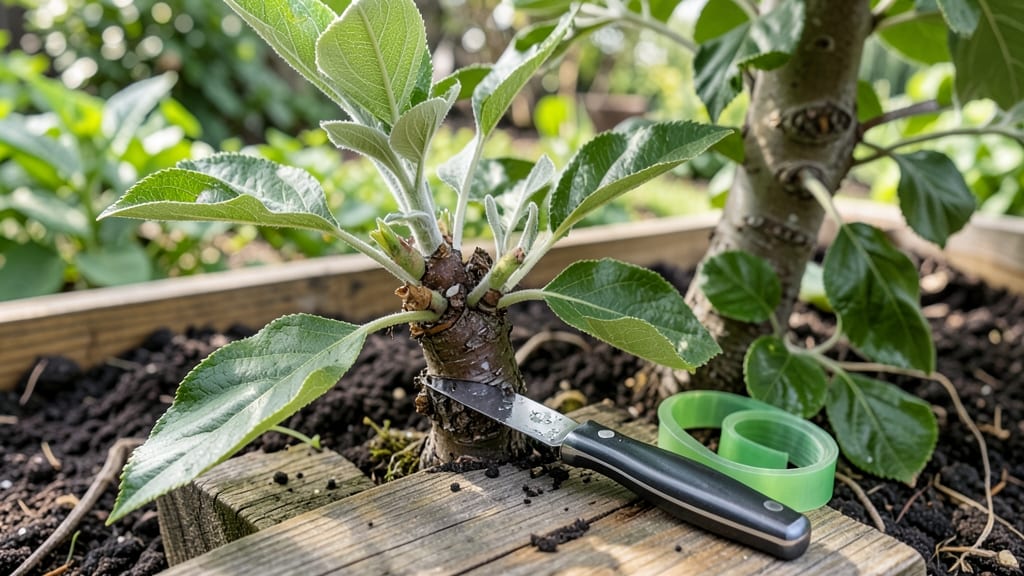
Grafting fruit trees lets you grow rare varieties from your own cuttings—something I learned the hard way after watching a neighbor's apple tree produce heirloom fruit I couldn't find anywhere else.
The process might sound intimidating, but with the right tools and timing, even a beginner can create strong unions that produce fruit for decades. My first attempt with a whip-and-tongue graft on a peach tree resulted in a scion that's now thriving, proving this skill isn't just for experts.
You'll need just a few essentials: sharp grafting knives, grafting tape, rootstock cuttings, and a clean workspace. The key is working during dormant season (late winter) when sap flow is minimal, or in early spring when buds are swelling but leaves haven't emerged.
Compatible pairings—like apple to crabapple rootstock—make all the difference, and sterilizing tools between cuts prevents disease spread that could ruin your work.
Once you make the cut and wrap the graft tightly, you'll see new growth in 4-6 weeks if everything's done right. The first year focuses on protecting the union while the scion establishes roots, but by year two, you'll have a tree producing fruit exactly like the parent plant.
It's a patient but rewarding way to propagate your favorite varieties without buying expensive nursery trees.
This method works for apples, peaches, plums, and cherries—basically any fruit tree with compatible rootstock. Whether you're reviving an old tree or creating a new variety, grafting opens doors to gardening possibilities you won't find in seed packets.
Let's get started with the tools and steps that turn cuttings into fruit-bearing trees.
📚 In This Guide
- What you need
- Instructions
- Tips and common mistakes
- Wrapping up and next steps
What you need
- ● Grafting knife or pruning shears: Sharp, clean, and sterilized (preferably with rubbing alcohol). A budding knife (for T-budding) or a cleft grafting knife (for cleft grafting) works best.
- ● Rootstock: A healthy, disease-free young tree (1–3 years old) with compatible root systems for your desired fruit variety.
- ● Scion wood: Fresh, dormant branches (¼–½ inch thick) from the desired fruit tree, cut just before bud break (late winter/early spring). Store in a damp paper towel in a plastic bag in the fridge until use.
- ● Grafting tape or rubber bands: To secure the graft union snugly (avoid plastic wrap—it can suffocate the graft).
- ○ Pruning sealant (optional but helpful): A wax-based product to protect the graft from drying out and pests.
- ● Grafting wax or clay: For sealing larger grafts (like whip-and-tongue) to prevent moisture loss.
- ● Disinfectant (rubbing alcohol or bleach solution): To sterilize tools and cuts.
- ○ Grafting clips (optional): For extra stability in windy conditions.
- ● Timing: Graft in late winter/early spring (before buds swell) or mid-summer (for T-budding). Avoid extreme temperatures.
- ● Compatibility: Ensure the rootstock and scion are compatible (e.g., apple to apple, not apple to peach). Check local nursery recommendations!
- ● Weather: Cloudy, calm days are ideal—humidity helps the graft heal faster.
- ● Patience: Grafts take 4–8 weeks to heal. Avoid disturbing the tree during this time.
Step-by-step guide to grafting fruit trees for reliable results
Grafting fruit trees is easier than you think—just follow these precise steps.
Select and Prepare Your Scion and Rootstock
Choose a healthy scion (the top part of the graft) from a mature fruit tree you want to propagate. It should be about ¼-inch thick and have at least 3-4 buds. The rootstock (the bottom part) should be a compatible, disease-resistant tree of the same thickness, around ½-inch in diameter and 6-12 inches tall.
Use a sharp grafting knife to make clean cuts on both the scion and rootstock. The cut surfaces should be fresh and moist—work quickly to prevent drying. I like to dip the cut ends in grafting wax immediately to seal in moisture while I prepare the graft. This step is critical: dried-out cambium layers won't heal properly.
Make the Graft Cut and Align the Cambium Layers
For a whip-and-tongue graft (ideal for beginners), make a 1- to 1½-inch-long diagonal cut on both the scion and rootstock. Then, cut a small notch (the "tongue") about ¼-inch deep at the base of each cut. The tongue ensures perfect alignment of the cambium layers—the green, growth-producing layer just under the bark.
Slide the scion into the rootstock so the cambium layers match perfectly. The tongue should interlock like puzzle pieces. Hold them together firmly for 10-15 seconds to ensure contact. If the fit isn't snug, the graft will fail. Wrap the joined area tightly with grafting tape, leaving the top bud exposed. This keeps the graft stable while it heals.
Seal and Protect the Graft
Apply grafting wax or sealant over the wrapped area to prevent moisture loss and infection. The wax should cover the tape completely, forming a smooth, protective barrier. I use a small brush to apply it thinly but evenly—thick layers can suffocate the graft. Leave the top bud exposed so it can grow once the graft takes.
Place the grafted tree in a shaded, humid environment for 4-6 weeks. A plastic bag loosely draped over the top works well to maintain humidity without trapping too much heat. Check daily for signs of drying or mold. If the wax cracks or the tape loosens, reapply immediately. This is where most grafts fail—don’t skip this step.
Monitor and Encourage New Growth
After 3-4 weeks, check for signs of success: the scion should start to swell slightly at the bud union, and new growth will emerge within 2-3 weeks if the graft took. If the scion turns brown or mushy, the graft failed—start over with fresh material. Successful grafts will show firm, green buds pushing through.
Once new growth appears, remove the plastic bag and gradually expose the tree to sunlight over 5-7 days. Water lightly at the base to avoid disturbing the graft. Prune any suckers (shoots growing below the graft) to direct energy into the scion. This ensures your new tree grows strong and true to the variety you grafted.
Tips & tricks for perfect fruit tree grafting
Here's what I wish I knew before attempting my first graft—these details make all the difference between success and frustration.
Scion Selection is Everything: When choosing your scion, look for branches with vibrant green bark and firm buds—these are signs of strong vitality. I've found that scions from the current season's growth (not last year's wood) heal most reliably. Also, make sure the scion has at least 3-4 buds above the cut; this gives your graft multiple chances to sprout if one bud fails to take. The thickness matters too: a scion that's too thin won't survive, while one that's too thick creates unnecessary stress on the rootstock.
The Tongue Technique Matters: That tiny ¼-inch notch you cut in Step 2 isn't just decorative—it's the secret to perfect cambium alignment. When you slide the scion into the rootstock, the tongue should interlock like a zipper. I've ruined several grafts by rushing this step. Take your time to ensure the green cambium layers match completely around the entire cut. A quick trick: hold the graft up to a bright light—you should see perfect alignment through the transparent bark.
Humidity Control is Critical: During those 4-6 weeks in the shaded environment, maintaining humidity is non-negotiable. I learned this the hard way when my first grafts failed from drying out. Use a plastic bag, but don't seal it completely—leave one side open for airflow. You can also place a shallow tray of water near the grafted tree to increase ambient moisture. Check daily for condensation on the bag; if you see water droplets, it's too humid.
Grafting Tape Application: When wrapping your graft in Step 2, pull the tape snugly but not so tight it cuts into the bark. I've seen beginners wrap so tightly they create grooves that prevent proper healing. Start wrapping just below the graft union and overlap each turn by about half its width. Leave the top bud exposed—this is where your new growth will emerge. If you accidentally cover a bud, the graft may still work, but you'll lose that bud's growth potential.
Pro Tips for Graft Fruit Trees
- Here's what I wish I knew before attempting my first graft—these details make all the difference between success and frustration.
- Scion Selection is Everything: When choosing your scion, look for branches with vibrant green bark and firm buds—these are signs of strong vitality.
- The Tongue Technique Matters: That tiny ¼-inch notch you cut in Step 2 isn't just decorative—it's the secret to perfect cambium alignment.
Frequently asked questions
Got questions about grafting fruit trees? You’re not alone—this process can feel tricky at first! Below, we’ve tackled the most common concerns to help you feel confident before diving in.
What’s the best time of year to graft fruit trees?
Late winter to early spring (before buds swell) is ideal—when trees are dormant but sap is flowing. This timing ensures strong root systems and minimal stress. Avoid grafting during extreme cold or heat, as both can hinder success.
Can I graft any two fruit tree varieties together?
No! The rootstock (root system) and scion (grafted branch) must be compatible. For example, apple scions work on crabapple rootstocks, but citrus and apple trees can’t be grafted together. Always check compatibility charts before starting.
Why did my graft fail? What are common mistakes?
Grafts often fail due to poor cuts (uneven surfaces), weak tape binding, or improper sealing with grafting wax. Other culprits include:
- Using scions that are too thick/thin for the rootstock
- Grafting during active growth (not dormant season)
- Not keeping the graft moist and protected
- Incompatible varieties
Do I need a grafting knife, or can I use regular scissors?
Never use scissors—they crush tissue and create jagged edges, which slow healing. A sharp grafting knife (or even a clean, thin-bladed knife) makes clean, precise cuts. If you’re on a budget, a cheap grafting tool works better than scissors.
How long until my grafted tree bears fruit?
Patience is key! Dwarf rootstocks may produce fruit in 2–3 years, while standard trees can take 4–7 years. The graft itself takes 4–8 weeks to heal before new growth appears. Keep the tree healthy, and rewards will come!
Wrapping up and next steps
Grafting fruit trees is a rewarding skill that unlocks endless possibilities for growing your dream orchard—whether you're reviving an old tree or creating a unique variety! With the right tools, patience, and a little practice, you’ll soon be enjoying bountiful harvests from your carefully crafted trees. 🌱✨
Now that you’re armed with knowledge, take the next step: grab your grafting tools and start experimenting! Try grafting a few branches this season, and don’t hesitate to share your progress with fellow gardeners. Happy growing—your future fruit trees are waiting! 🍏🍎