
Planting
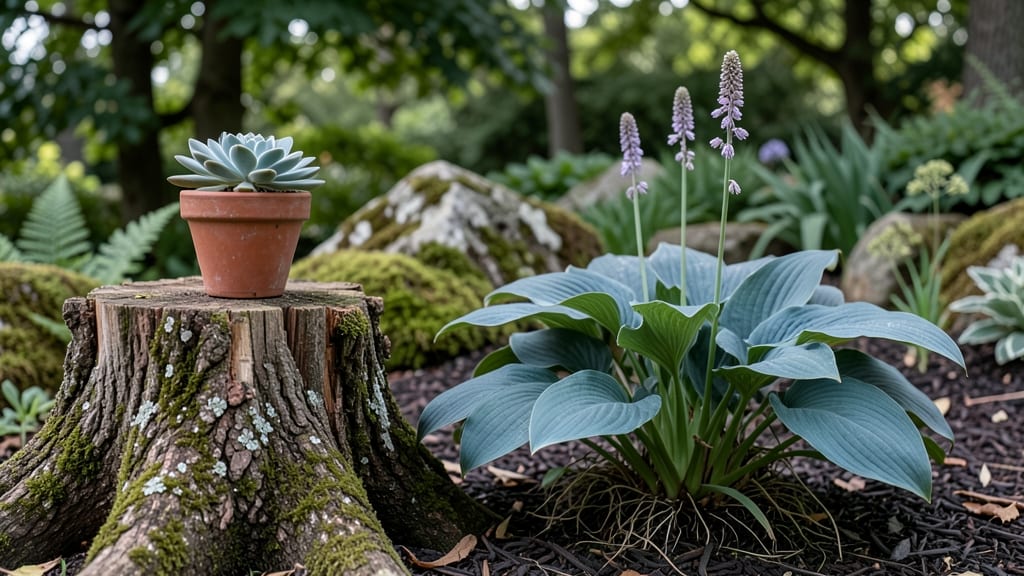
Transforming that old tree stump into a rustic elevated plant stand is one of the most satisfying upcycling projects in gardening—no fancy tools or expensive materials needed.
I still remember the first time I saw one at a local farm: the way it held plants just above the ground, creating this magical dappled-light effect while using something that would’ve otherwise been waste.
It’s not just functional; it’s a conversation piece that makes your garden feel like a curated retreat.
The beauty of this project is how simple it is to start. You’ll need just a few basic tools—a drill, sandpaper, and maybe some outdoor paint or sealant—and the stump itself, which you can often find for free if you know where to look.
Whether you leave it natural for that organic charm or stain it to match your patio furniture, the transformation happens in under an hour. The best part? You’re not just repurposing wood; you’re elevating your plants—literally—to protect them from slugs, improve drainage, and add height to your garden beds.
Imagine your favorite trailing petunias spilling over the edges, or a cluster of herbs within arm’s reach while you cook. The possibilities are endless, and the results are instantly more dynamic than a flat garden bed.
Plus, this stand works just as well in a container garden as it does in a backyard—no digging required. Once you’ve got yours set up, you’ll wonder why you didn’t turn that stump into a planter sooner.
For those worried about durability, a good sealant or two coats of paint will keep it looking fresh for years. And if you’re feeling extra creative, you can even carve simple designs into the stump before sealing it—your plants will thank you for the extra personality.
Ready to give it a try? Let’s get started with what you’ll need.
📚 In This Guide
- What you need
- Instructions
- Tips and common mistakes
- Wrapping up and next steps
What you need
- ● Tree stump: A clean, dry, and stable stump (preferably 4–6 inches tall for a sturdy stand).
- ● Sandpaper or electric sander: 80–120 grit to smooth rough edges and surfaces.
- ● Wood sealant or outdoor paint: Non-toxic, waterproof (e.g., spar urethane or milk paint).
- ● Paintbrush or foam brush: For even coating.
- ● Drill with ¼-inch bit: For creating drainage holes (if needed).
- ○ Screws or lag bolts: 2–4 inches long, to secure a platform (optional but recommended).
- ● Wooden board or plank: 12–18 inches wide, for the plant stand surface.
- ● Potting soil: Lightweight, well-draining mix (e.g., cactus or succulent soil).
- ● Small plants: Herbs, succulents, or trailing plants (e.g., sedum, ivy, or ferns).
- ● Stain or natural wood oil: For a rustic or weathered look.
- ● Decorative trim or molding: To add flair to the edges.
- ● Watering tray or drip tray: To catch excess water and protect surfaces.
- ● LED string lights: For a cozy, magical touch at night.
- ● Non-slip pads: To prevent the stump from sliding on surfaces.
Instructions: build a sturdy tree stump plant stand in minutes
Here's how to transform an old stump into a charming elevated garden display—no power tools required.
Prepare the Stump Surface
Start by cleaning the stump thoroughly with a stiff brush and soapy water to remove dirt, moss, or old paint. Sand the top surface lightly with medium-grit sandpaper—this creates a rough texture that helps glue and paint adhere better. I like to use a hand sander for this step, but elbow grease works too if you're patient.
Once clean and sanded, wipe away any dust with a damp cloth. The goal is a smooth, dry surface ready for the next step. If the stump has deep cracks or holes, fill them with wood filler and let it dry completely. This ensures your paint and plants have a stable foundation.
Apply a Protective Base Coat
Use a high-quality outdoor paint or wood sealant designed for stumps and planters. I recommend a water-based stain or paint with UV protection to prevent fading and cracking over time. Apply the first coat with a wide brush, starting from the edges and working toward the center.
Let the paint dry for 4-6 hours or according to the product instructions. This initial coat seals the wood and prevents moisture from seeping in, which could cause rot. If the stump absorbs the paint unevenly, apply a second thin coat once the first is completely dry. Smooth strokes prevent drips that could create uneven surfaces later.
Create Drainage Holes and Planting Pockets
Using a 1-inch drill bit, create drainage holes around the perimeter of the stump, spacing them about 6 inches apart. These holes allow excess water to escape, preventing root rot. For smaller stumps, 3-4 holes are plenty; larger ones may need 6-8.
Next, mark planting pockets with a pencil. I like to arrange them in a circular pattern around the edges, about 3-4 inches from the outer rim. Use a 1-inch hole saw to cut these pockets to a depth of 2-3 inches. This depth gives roots room to establish while keeping the plant stand lightweight and stable.
Add Soil and Plant Your Selections
Fill each planting pocket with high-quality potting mix, pressing it gently to remove air pockets. Avoid garden soil—it compacts and drains poorly in containers. For a 4-plant stand, you'll need about 1 gallon of potting mix total, divided evenly among the pockets.
Choose plants that thrive in containers, like succulents, herbs, or small perennials. Gently remove each plant from its nursery pot and place it in a pocket, then top off with additional potting mix. Water lightly to settle the soil around the roots. Avoid overwatering at this stage—wait until the top inch of soil feels dry before adding more moisture.
Position and Maintain Your Stump Garden
Place your stump stand in a location with partial to full sun, depending on your plants' needs. Most herbs and succulents prefer 6+ hours of sunlight daily, while ferns or shade-loving plants do better with morning sun and afternoon shade. Keep the stump elevated on a small patch of landscape fabric or gravel to prevent moisture buildup underneath.
Water your plants every 2-3 days during the first week, then adjust based on weather. Check the soil moisture by sticking your finger 1 inch deep—if it feels dry, it's time to water. Mulch the surface with orchid bark or shredded bark to retain moisture and suppress weeds. This simple step keeps your stump stand looking neat and reduces maintenance.
Tips & tricks for perfect tree stump plant stands
Transforming a simple stump into a functional garden feature takes just a few smart moves—and avoiding these common pitfalls makes all the difference.
Prep Like a Pro: In Step 1, when cleaning your stump, don't rush the sanding. Lightly roughing up the surface with medium-grit sandpaper isn't just about aesthetics—it's what makes paint and sealant grip properly. I've seen paint peel after just a few weeks when this step gets skipped. A hand sander makes this go faster, but if you're doing it by hand, focus on the top surface where your paint will go.
Paint Application Secret: The 4-6 hour drying time between coats isn't just arbitrary—it's when the wood absorbs the maximum protection. If you're impatient and add a second coat too soon, you'll end up with drips and uneven coverage. Work in thin, even strokes from edges inward, and let that first coat fully cure before adding more. Trust me, the extra hour waiting prevents headaches later.
Drainage and Pocket Precision: When creating your drainage holes in Step 3, think about water flow. Space those 1-inch holes about 6 inches apart, but arrange them slightly downward if your stump has a natural slope. For planting pockets, the 2-3 inch depth gives roots just enough room without making the stand top-heavy. I've found that using a pencil to mark pocket locations before drilling saves time and keeps your design neat.
Soil and Plant Strategy: That 1 gallon of potting mix for 4 plants might seem like a lot, but remember—container plants dry out faster than in-ground ones. Press the soil gently but firmly to eliminate air pockets, which helps roots establish contact with moisture. For the first watering, go light—just enough to settle the soil around roots without creating soggy conditions that invite rot.
Pro Tips for Tree Stump Plant Stand
- Transforming a simple stump into a functional garden feature takes just a few smart moves—and avoiding these common pitfalls makes all the difference.
- Prep Like a Pro: In Step 1, when cleaning your stump, don't rush the sanding.
- Paint Application Secret: The 4-6 hour drying time between coats isn't just arbitrary—it's when the wood absorbs the maximum protection.
Frequently asked questions
Got questions about turning a tree stump into a stylish plant stand? You’re not alone! Here are some of the most common queries—and their answers—to help you get started with confidence.
What’s the best way to clean and prep a tree stump for a plant stand?
Start by removing loose bark and debris with a wire brush or sandpaper. For a smoother finish, sand down rough edges. If the stump has sap or mold, wipe it down with a mix of vinegar and water (1:1 ratio). Let it dry completely before painting or sealing—this ensures your plants stay put and your stand lasts longer!
How long does it take to turn a stump into a plant stand?
Most DIYers complete the project in 1–3 hours, depending on the stump’s size and condition. Sanding and sealing can add time, but with a power sander and pre-mixed stain/sealer, you could finish in under an hour. Pro tip: Work outside to avoid dust messes and speed up drying!
Do I need to paint or seal the stump? Can’t I just use it as-is?
Sealing or painting isn’t mandatory, but it’s highly recommended! A clear polyurethane sealant protects against moisture, pests, and rot, while paint adds color and character. If you skip it, the stump may crack over time or attract termites. For a natural look, try a matte wood stain—it’s low-maintenance and blends beautifully with outdoor decor.
What types of plants work best on a tree stump planter?
Opt for lightweight, trailing, or small potted plants to avoid tipping. Great choices include:
- Succulents (e.g., sedum, echeveria)
- Herbs (basil, thyme, oregano)
- Ferns (for a lush, airy vibe)
- Small flowering plants (pansies, petunias)
My stump is rotting or hollow—can I still use it?
If the rot is superficial (just surface-level), you can still use it after cleaning and sealing. However, if the stump is soft, crumbly, or hollow, it’s not safe for a plant stand—it may collapse under weight. In this case, consider repurposing it as a garden marker or compost material instead. For a sturdy stand, look for a firm, solid stump with minimal decay.
Wrapping up and next steps
Transforming a simple tree stump into a charming tree stump plant stand is easier—and more rewarding—than you think! With just a few tools and a little creativity, you’ve got a rustic, elevated garden display that adds personality to any space.
Whether you’re a seasoned gardener or a beginner, this project is a fantastic way to repurpose nature’s leftovers into something beautiful.
Now that you’re inspired, grab that stump and get crafting! 🌿✨ Share your creation with fellow plant lovers or take it a step further by customizing multiple stands for a cohesive garden vibe. Happy planting!